EYEBROW LAMINATION | tint | shaping e-book with video tutorials available!

Reasons Of Eyelash Extension Allergy and Dealing with it safely

Reason Of Eyelash Extension Allergy and Dealing with it safely

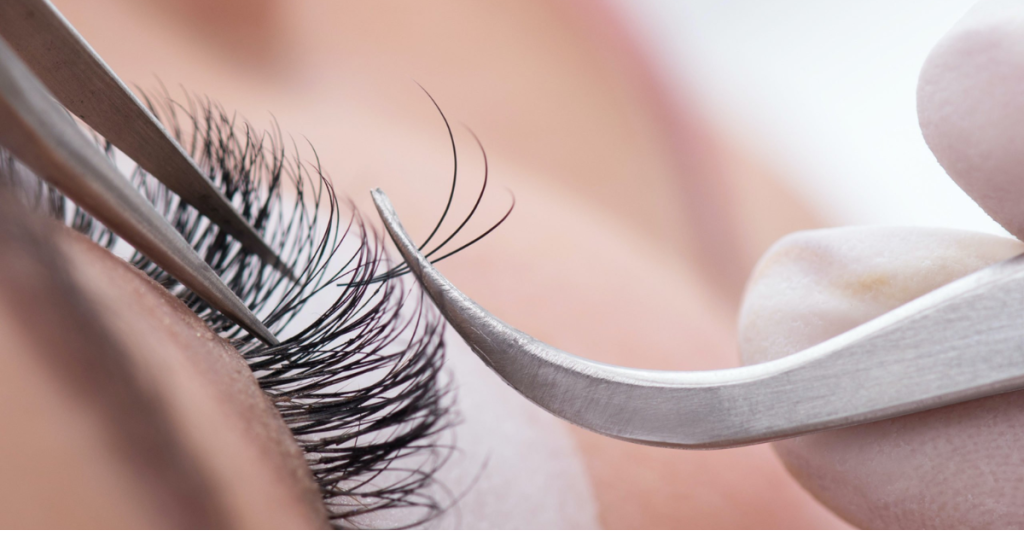
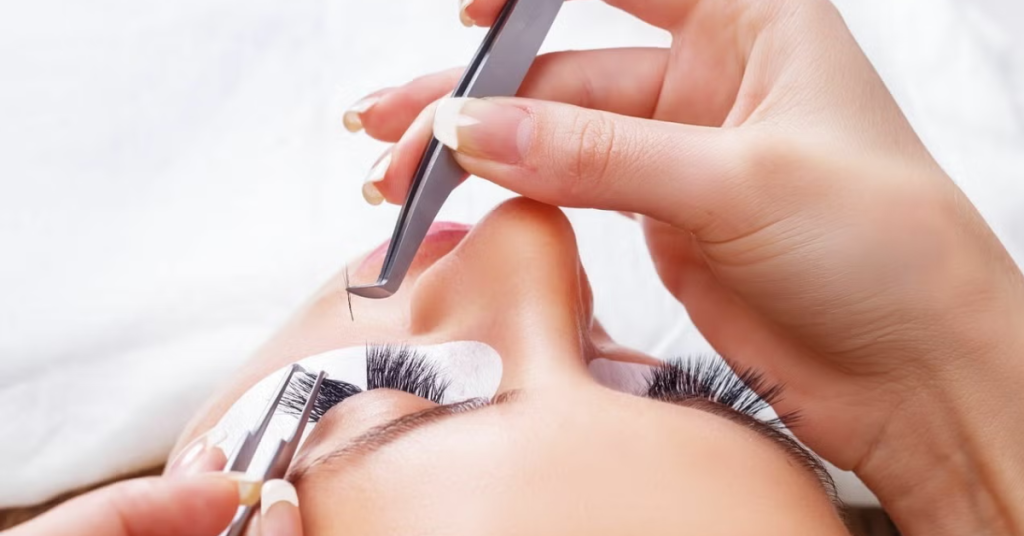
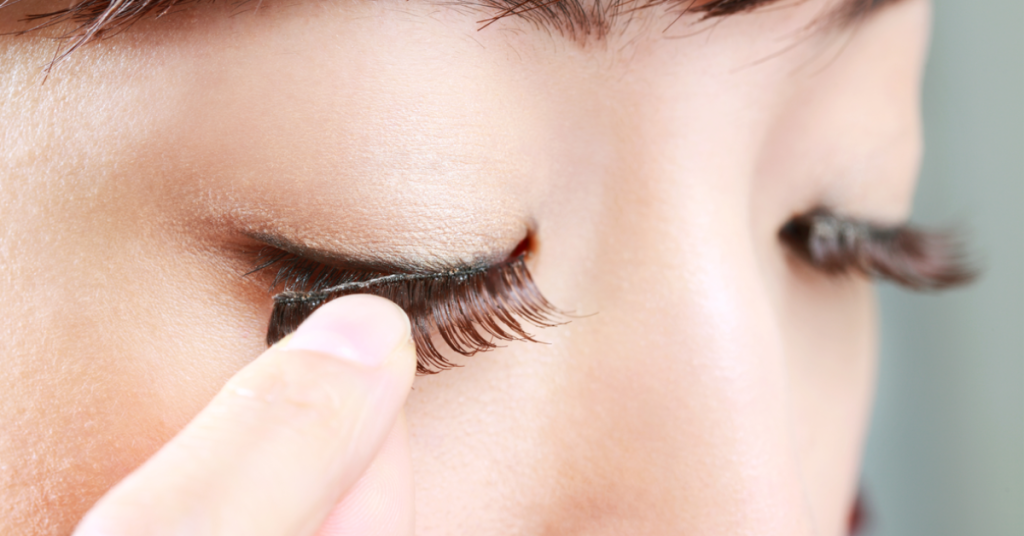
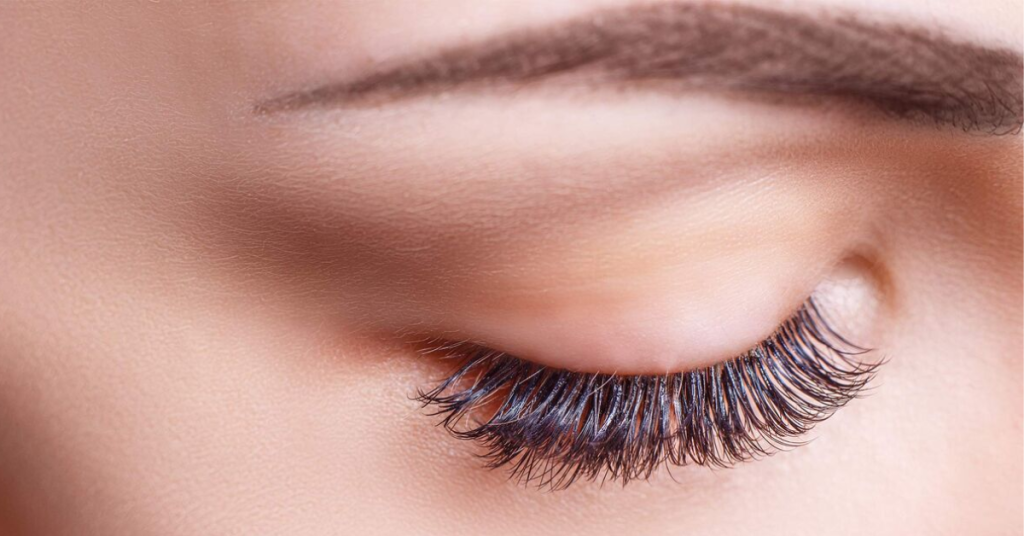
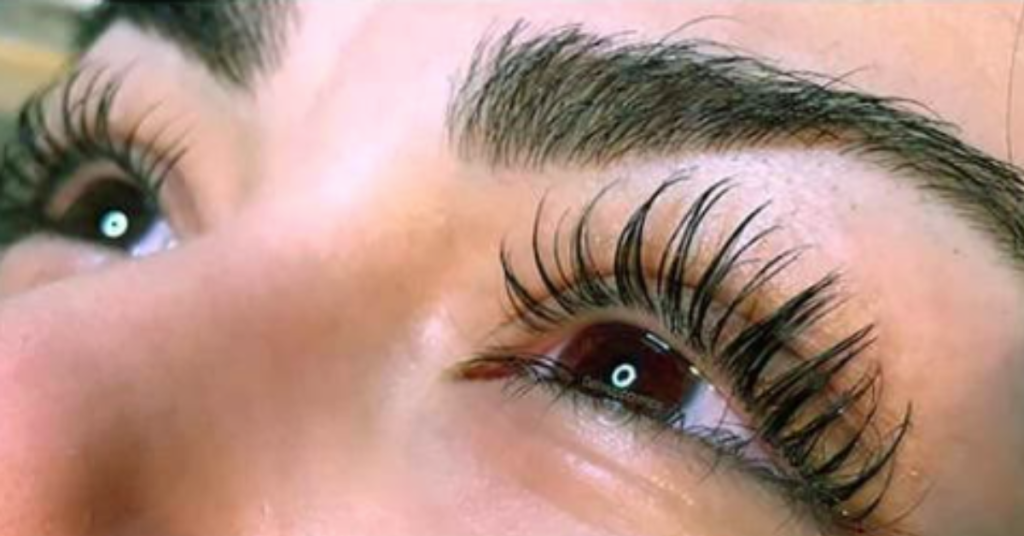
Experiencing an Eyelash Extension Allergy can be frustrating and worrisome. If your eyes are swollen, itchy, or red after a lash appointment, you might be allergic to the adhesive or the lashes itself. This is more common than you think and typically occurs when the body’s immune system identifies certain allergens in the lash glue-like cyanoacrylate, carbon black, and latex. Once your body develops sensitivity, even minimal exposure can trigger a reaction.

Symptoms range from mild irritation, such as watery eyes or nasal congestion, to severe swelling and pain. While the good news is that these reactions are manageable, the best course of action is to remove the extensions and consult a professional for further guidance. Prevention, such as patch tests and sensitive adhesives, can significantly impact.

Beauty Box prioritizes clients’ safety and comfort, offering high-quality lash services and adhesives for sensitive eyes. Our trained technicians ensure every lash journey is as safe as glamorous. 

Let’s learn everything about eyelash extension allergies or reactions and how to handle them like a pro!

What Is an Eyelash Extension Allergy?

Definition and Causes of Eyelash Extension Allergy

Eyelash extension allergy occurs when your body’s immune system overreacts to substances in lash adhesives, such as cyanoacrylate. Allergies are essentially your body mistaking a harmless substance as a threat, triggering symptoms like redness, swelling, and itching. For lash adhesives, the most common culprit is cyanoacrylate, a bonding agent that reacts with moisture to harden glue. Moreover, some mink lashes

Some people may develop allergies over time, while others might react immediately upon exposure. The severity varies depending on individual immune responses. Think of it as your body becoming a bit too dramatic about defending itself against an imagined invader.

Difference Between Sensitivity and Allergy to Eyelash Glue

It’s easy to confuse sensitivity with an allergy, but the two are very different. A sensitive client may experience watery eyes, mild itching, or nasal congestion during or shortly after their lash appointment. These symptoms typically subside within 24 hours and are usually triggered by the fumes of the adhesive, not a full-blown immune response.

On the other hand, an allergic client might have swollen eyelids, persistent redness, and even pain. Unlike sensitivity, allergies are your immune system’s way of saying, “Nope, I’m not dealing with this!” Once a true allergy develops, the body remembers it and reacts more aggressively each time it encounters it.

Next, let’s dive into the signs that help you recognize if you or your client are dealing with an allergy.

Symptoms of Eyelash Extension Allergy

Common Signs of an Allergic Reaction to Eyelash Extensions

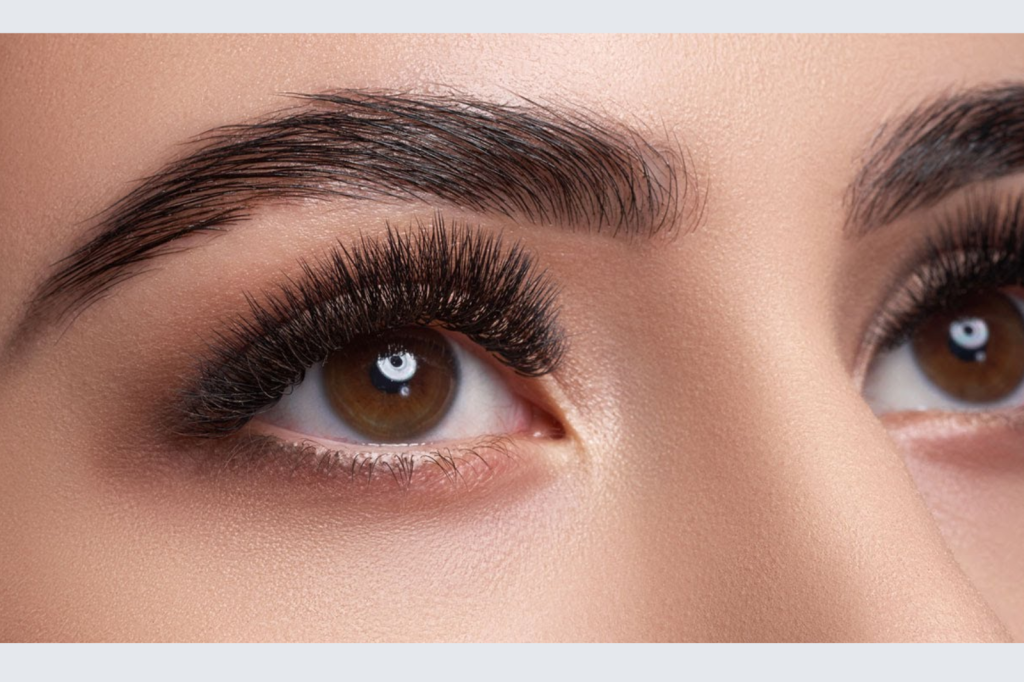
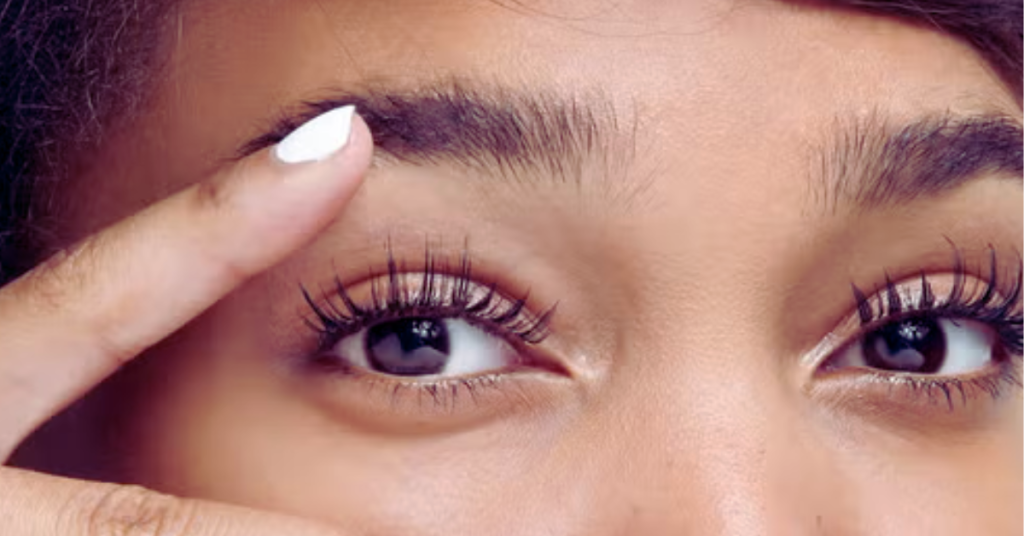
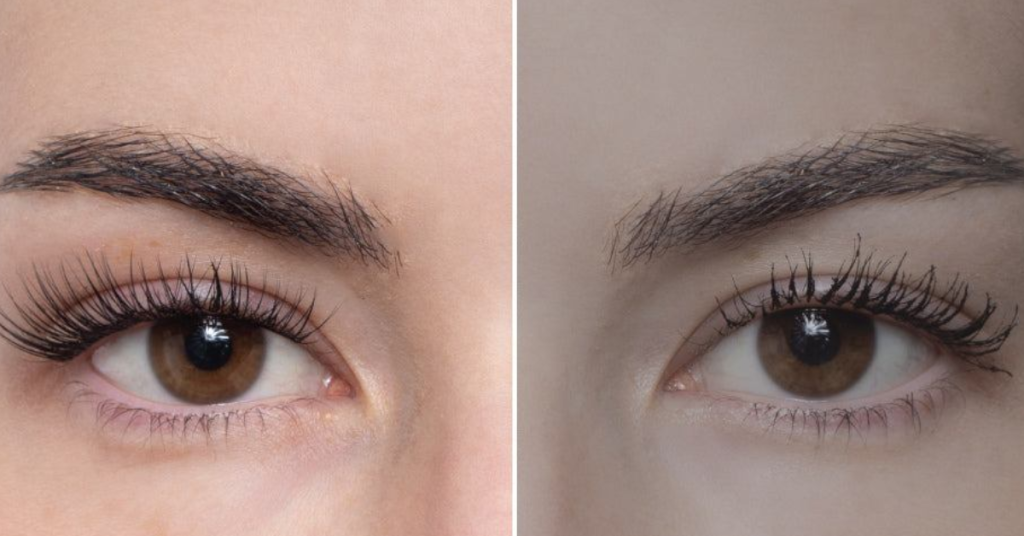
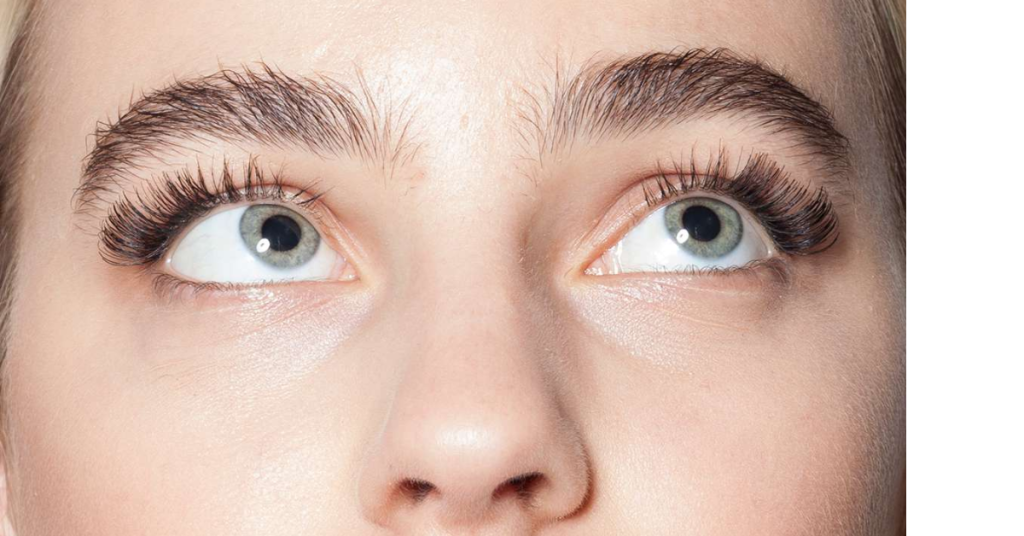
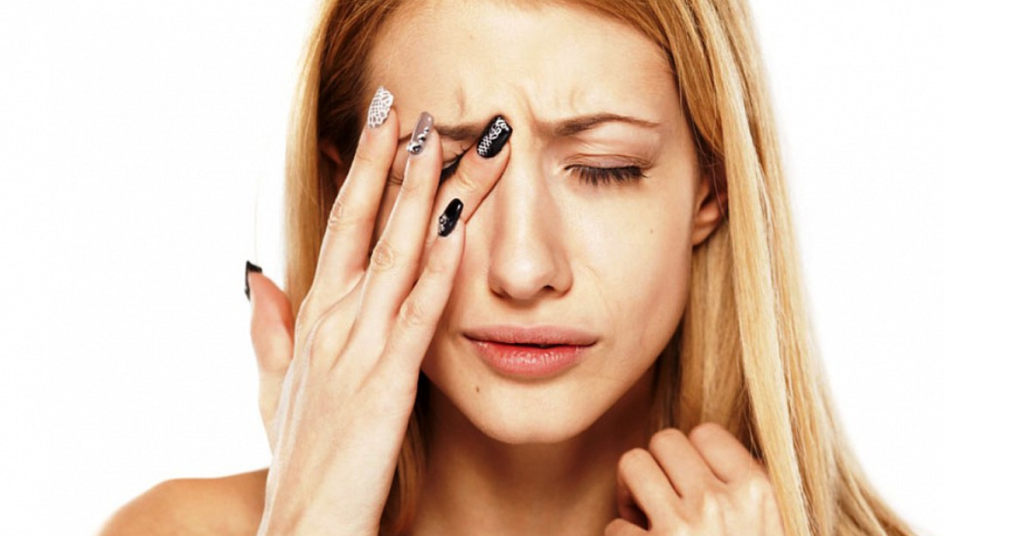
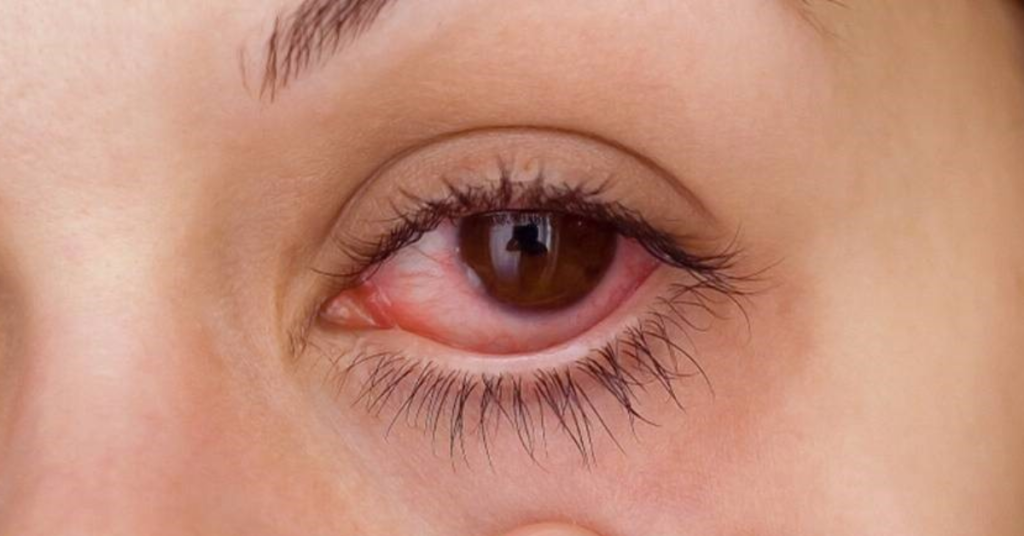
The symptoms of an eyelash extension allergy can show up quickly, often within hours of application. These include red, swollen, or itchy eyelids, watery eyes, and even discomfort that feels like a stinging sensation. Some clients may notice a runny nose or nasal congestion, especially if the fumes irritate their sinuses.

For severe reactions, swelling can extend beyond the eyes, making it uncomfortable to even blink. If you spot these symptoms, it’s important to act fast and recommend the immediate removal of the lash extensions.

Why Do Eyelash Extensions Suddenly Cause Allergies?

Surprisingly, allergies to lash adhesives can develop out of nowhere. Factors like fatigue, stress, or a weakened immune system can make someone more vulnerable to allergic reactions if they’ve worn lash extensions for years without issue. It’s as if the body decides, “I’ve had enough!” and starts overreacting to the adhesive. Sometimes, synthetic mink lashes also cause allergies.

Seasonal allergies can also play a role. For example, if someone’s body is already battling pollen or dust, it may mistakenly add lash adhesive to the list of allergens. Next, let’s explore the root causes of these allergies in detail.

Causes of Eyelash Extension Glue Allergy

Cyanoacrylate: The Main Culprit in Lash Adhesives

Cyanoacrylate is the superstar of lash adhesives responsible for the quick-drying and long-lasting bonds we love. However, it’s also the main cause of allergic reactions. When exposed to humidity (like the moisture around our eyes), cyanoacrylate releases fumes that can irritate sensitive skin and mucous membranes. If your body decides it doesn’t like cyanoacrylate, it may start treating it like an enemy every time it encounters it.

Other Potential Irritants in Lash Adhesives

While cyanoacrylate takes the spotlight, other ingredients like carbon black (used to make adhesive black), latex, and formaldehyde (a by-product of glue curing) can also cause issues. Additionally, improper taping of lower lashes or using expired glue can irritate the eyes, leading to redness and discomfort. 

Now that we’ve covered the causes let’s look at how to handle eyelash allergic reactions effectively.

How to Treat Eyelash Extension Allergy Safely

Steps to Alleviate Mild Symptoms of Lash Glue Allergy

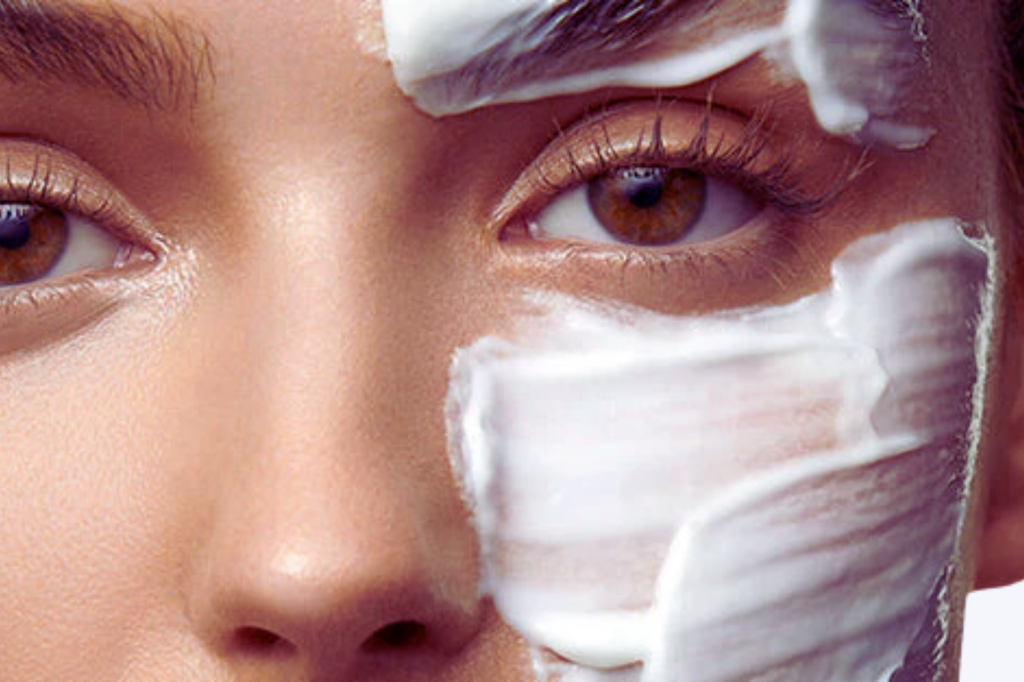
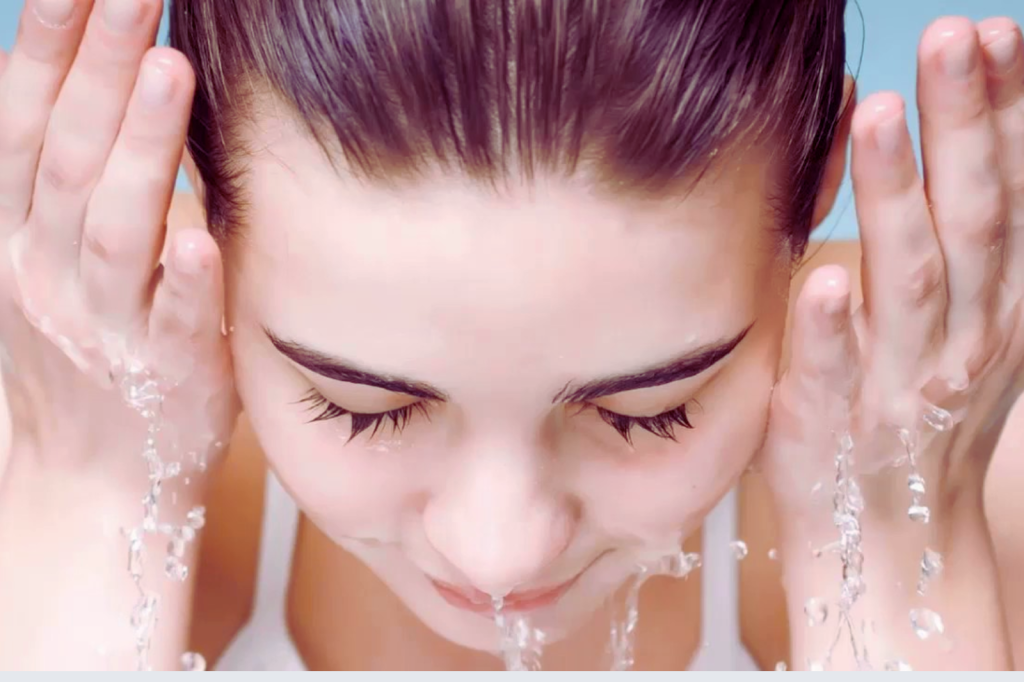
For mild reactions, start with a cold compress to reduce swelling and soothe the itchiness. Antihistamines like Benadryl can also help by calming the body’s allergic response. However, it’s important to avoid rubbing or touching the affected area, as this can worsen symptoms.

When to Seek Professional Help for Lash Allergies

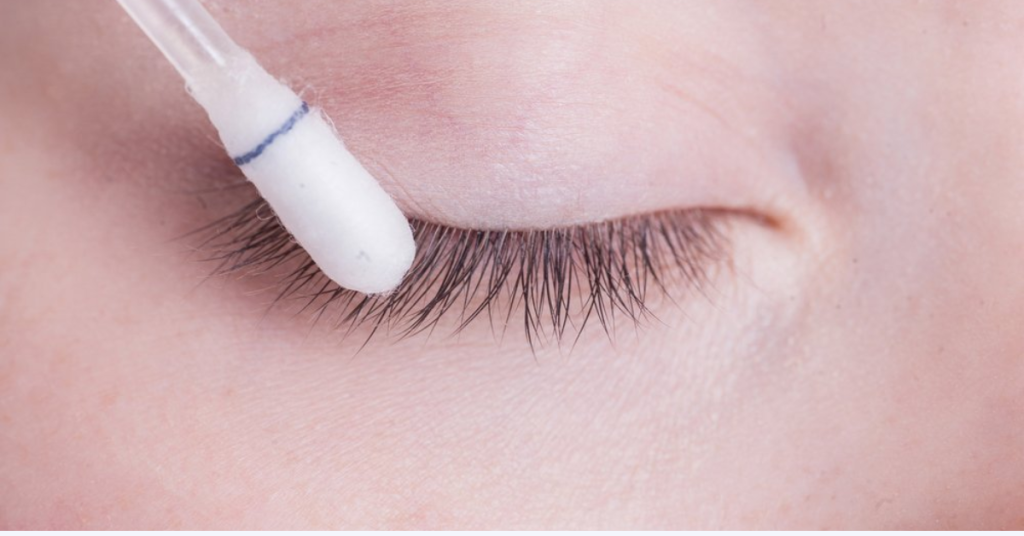
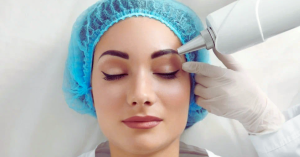
If the symptoms persist beyond 24 hours or include severe swelling or pain, it’s time to seek professional help. Encourage your client to visit a doctor or dermatologist for a proper diagnosis. If you want to remove your extensions, Beauty Box is there to safely remove it with a specially formulated adhesive remover. Do not try to remove your eyelash extensions at home. It should always be done through a professional.

Next, let’s talk about how to prevent these allergic reactions from happening in the first place.

Preventing Eyelash Extension Allergies

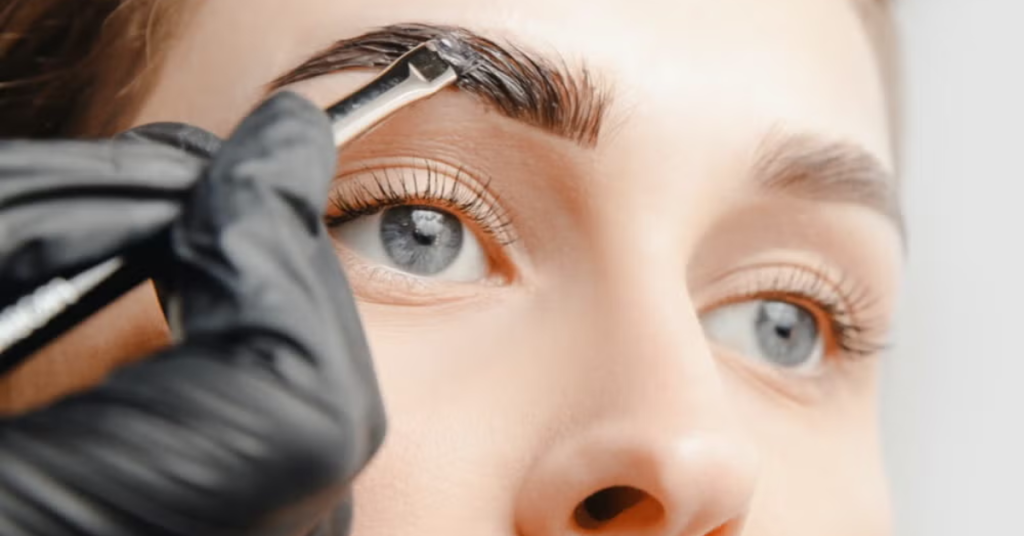
Patch Testing: A Must for New Clients

Patch tests are the easiest way to predict potential allergic reactions. Apply a small amount of adhesive to the client’s arm or behind their ear at least 24 hours before the appointment. If there’s no reaction, it’s safe to proceed. Skipping this step may save time initially, but it could cost you in the long run if a reaction occurs.

Using Sensitive Adhesives for Safe Lash Extensions

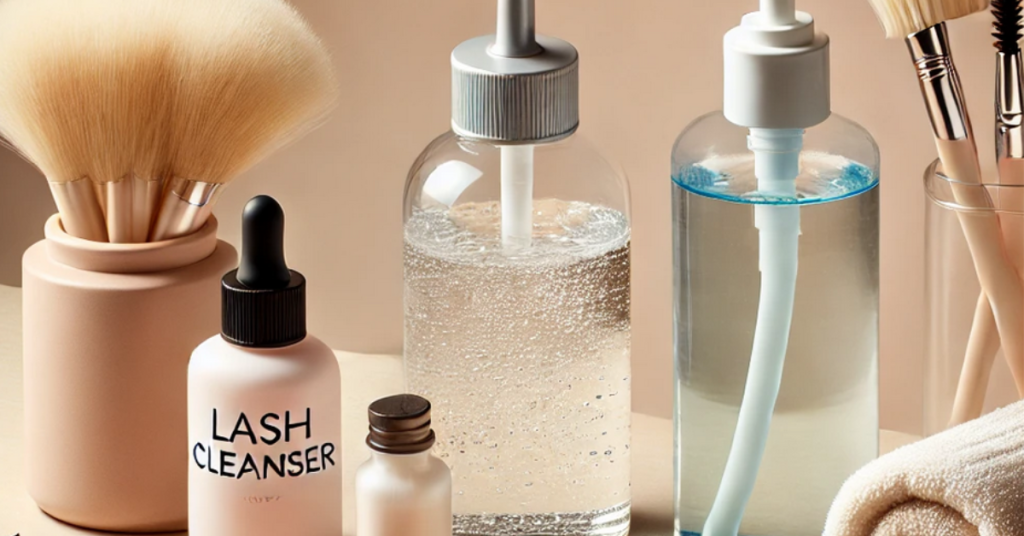
Sensitive adhesives contain lower levels of cyanoacrylate and are less likely to cause allergies. While they may not have the same quick-drying or long-lasting properties as regular adhesives, they’re a safer choice for clients with a history of sensitivity.

Creating a Safe Lash Environment

Good ventilation is key to reducing exposure to adhesive fumes. Anti-allergy gels can also help by absorbing harmful fumes before they reach the client’s eyes or nose. And don’t forget—always use fresh glue and sanitized tools to minimize risks.

Alternatives to Eyelash Extensions for Sensitive Clients

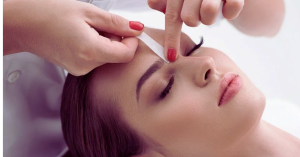
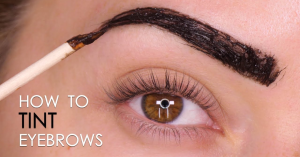
Exploring Lash Lifts and Tints

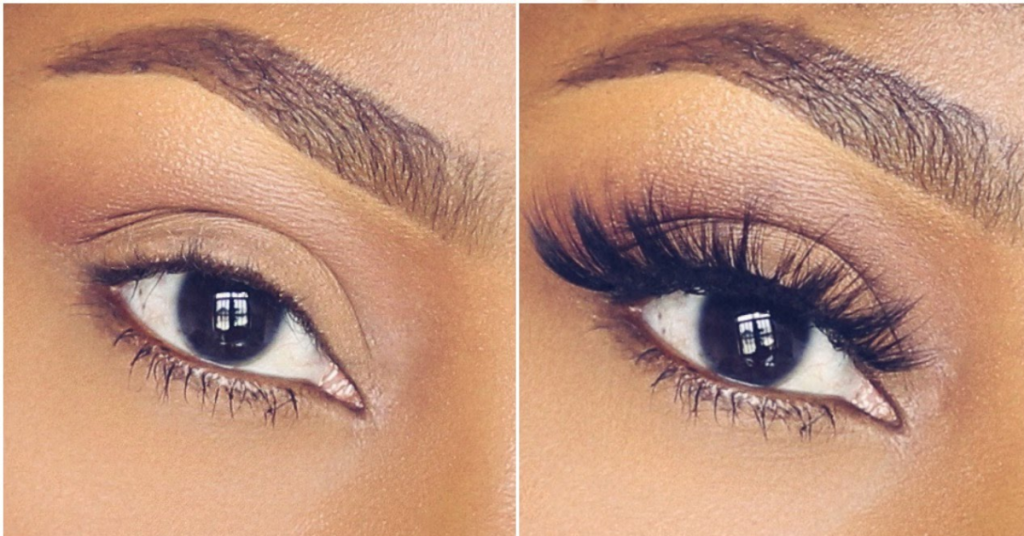
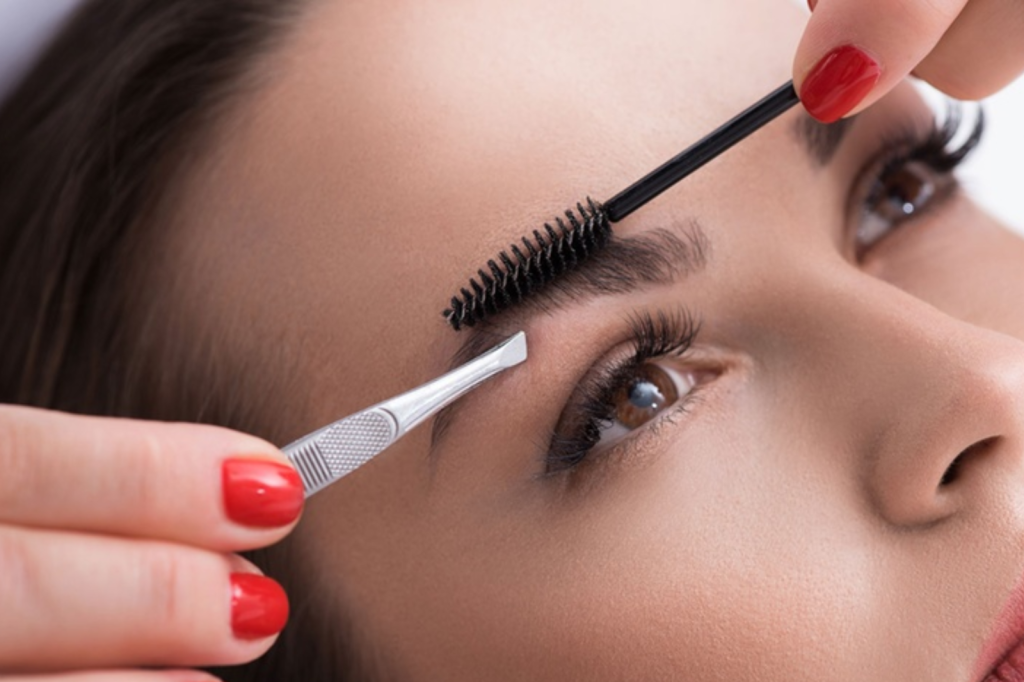
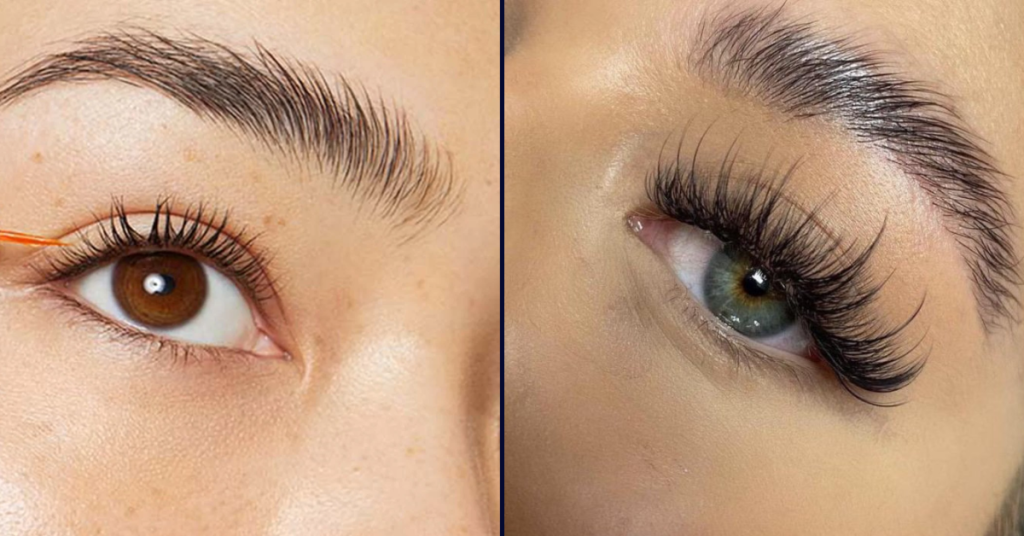
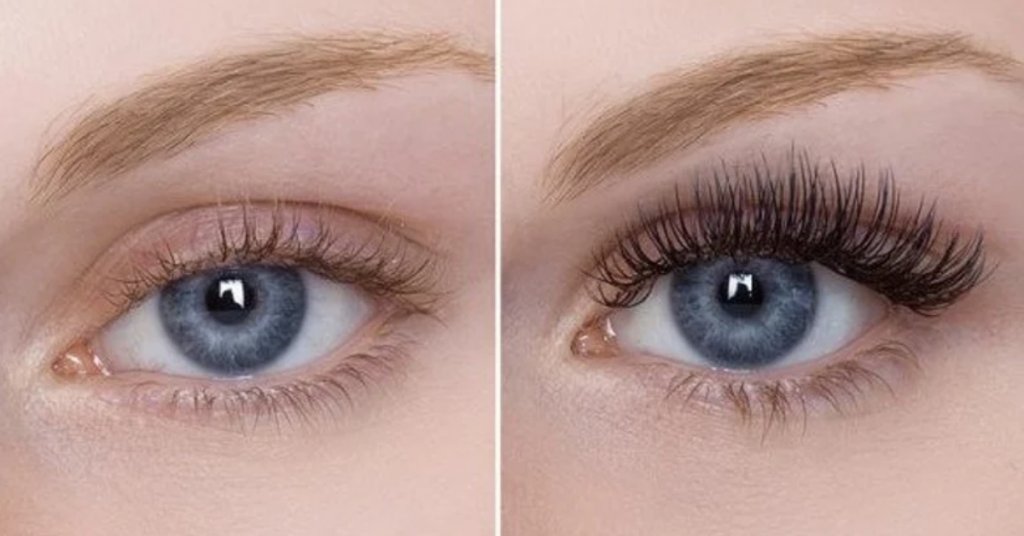
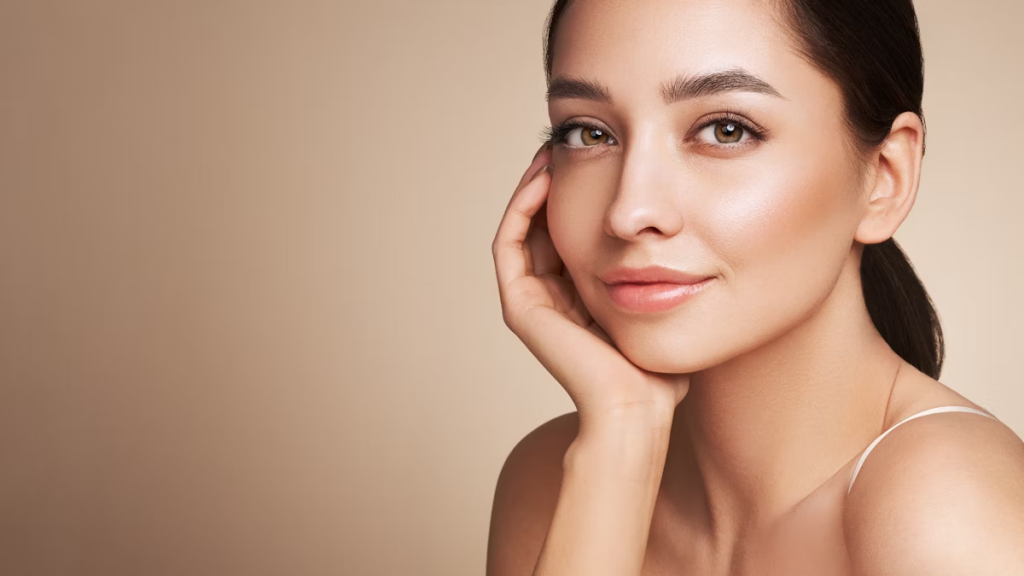
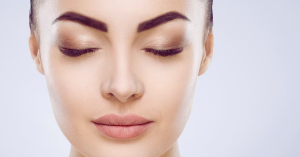
For clients who experience an eyelash extension allergy or other sensitivities, lash lifts and tints provide a fantastic alternative. A lash lift works by curling your natural lashes, giving them a fuller, more defined appearance without the use of adhesives or extensions. Adding a tint further enhances the lashes by darkening them, making mascara unnecessary for most clients.

The best part? Lash lifts and tints are low-maintenance and long-lasting, typically lasting six to eight weeks. This option is ideal for those looking for a natural, elegant look without the risks of glue-based products. While they won’t provide the dramatic length of extensions, they offer a healthier and safer enhancement for sensitive clients.

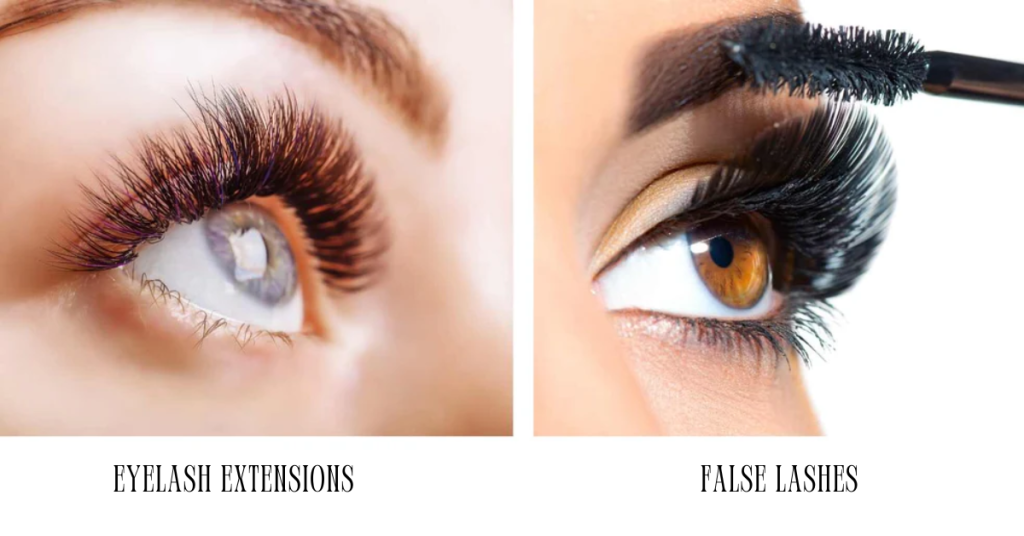
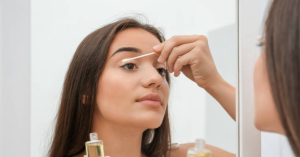
Using Magnetic Lashes as a No-Glue Alternative

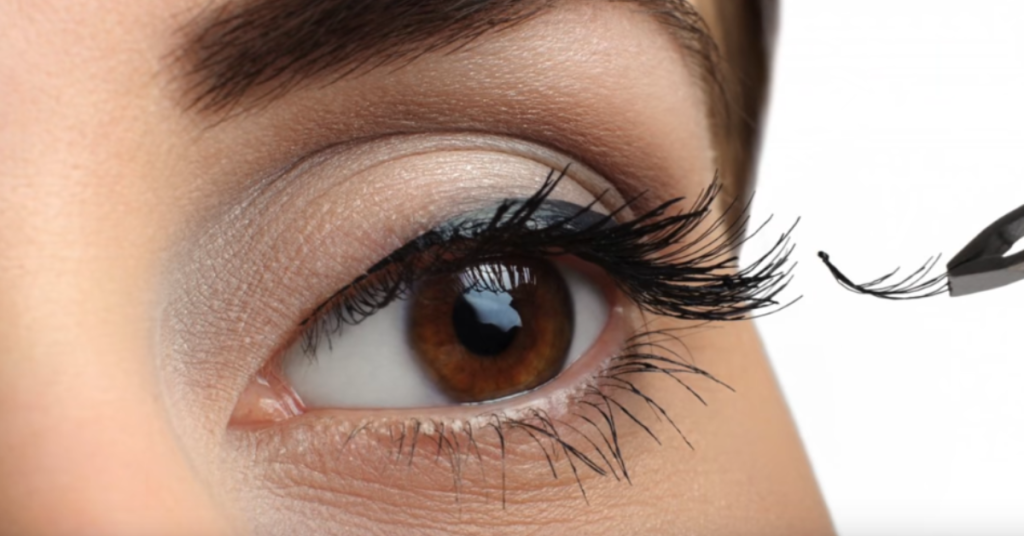
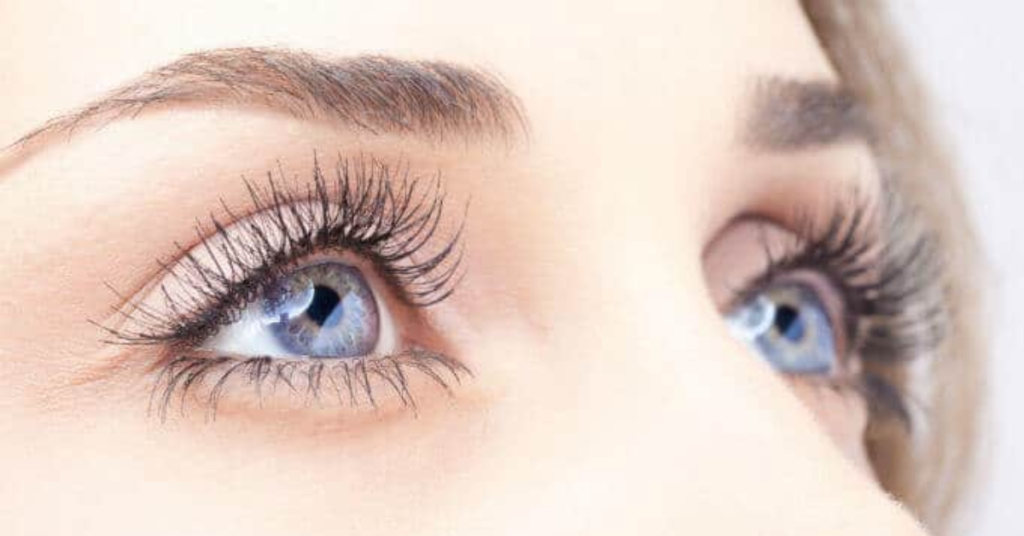
If you’re searching for a dramatic lash look without the worry of irritation, magnetic lashes are a game-changer. Unlike traditional lash extensions, magnetic lashes rely on tiny magnets to attach securely to your natural lashes or a magnetic liner. This completely eliminates the use of adhesives, making them an ideal solution for those asking, “Why am I suddenly allergic to eyelash extensions?”

Modern magnetic lashes are lightweight, reusable, and easy to apply, making them a popular choice for people with allergies or sensitive skin. They come in various styles, from subtle to bold, giving clients the flexibility to customize their look without the fear of redness, itching, or swelling.

Now that we’ve explored alternatives, let’s move on to tips that lash technicians can follow to avoid client allergies altogether.

Tips for Lash Technicians to Avoid Client Allergies

How to Identify At-Risk Clients

One of the first steps to preventing eyelash extension allergy reactions is identifying clients who may be at risk. During the consultation, ask about their medical history, previous experiences with lash extensions, and any known allergies. Questions like, “Do you often experience itching or irritation after beauty treatments?” or “Have you noticed any recent sensitivity to products?” can help gauge their suitability for lash extensions.

Clients prone to seasonal allergies or experiencing low immunity due to stress or illness may also be more likely to react. This knowledge allows you to recommend safer alternatives or take extra precautions during the application process.

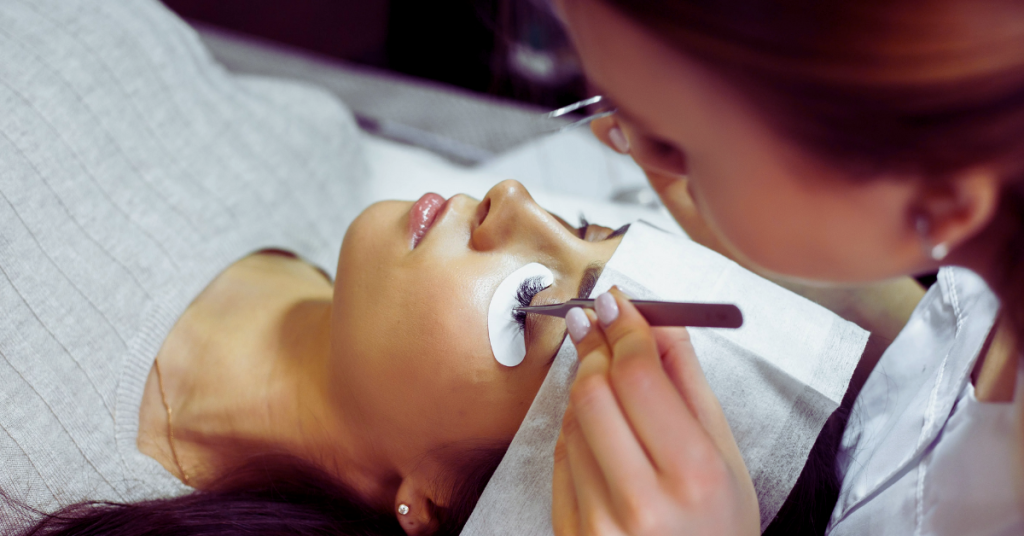
Best Practices for Reducing Glue Exposure During Application

Reducing exposure to adhesive fumes is crucial for preventing reactions in clients and protecting yourself as a lash technician. Here are some best practices:

  1. Use Anti-Allergy Gels: Placing an anti-allergy gel jar near the workstation can absorb adhesive fumes before they reach your client’s eyes and nose.
  2. Fan the Lashes: After applying extensions, use a fan to help cure the glue faster and reduce lingering fumes.
  3. Ventilate the Workspace: A well-ventilated room ensures that fumes don’t accumulate, lowering the risk of irritation for both clients and technicians.

By following these steps, you can create a more comfortable and safe environment for everyone involved.

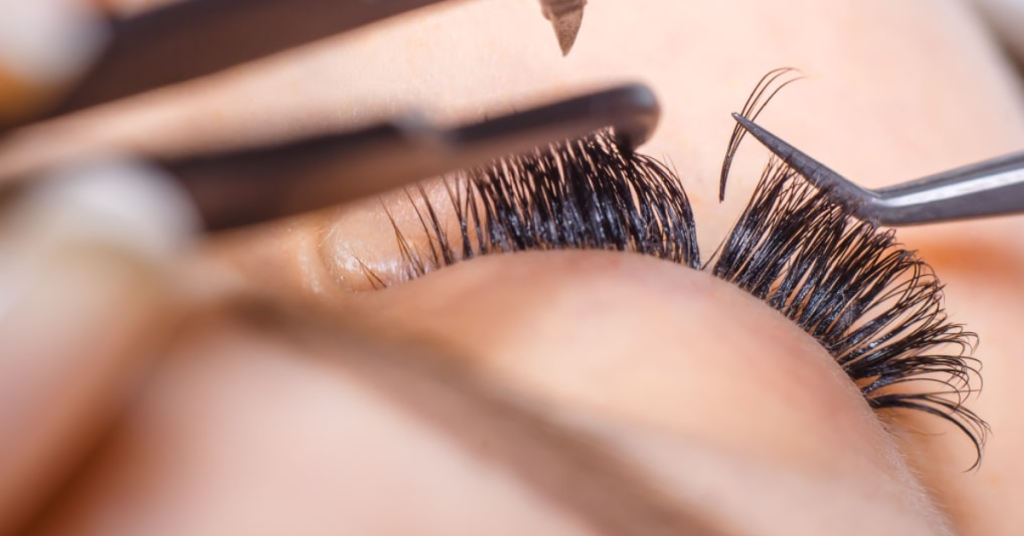
Handling Allergic Reactions Professionally

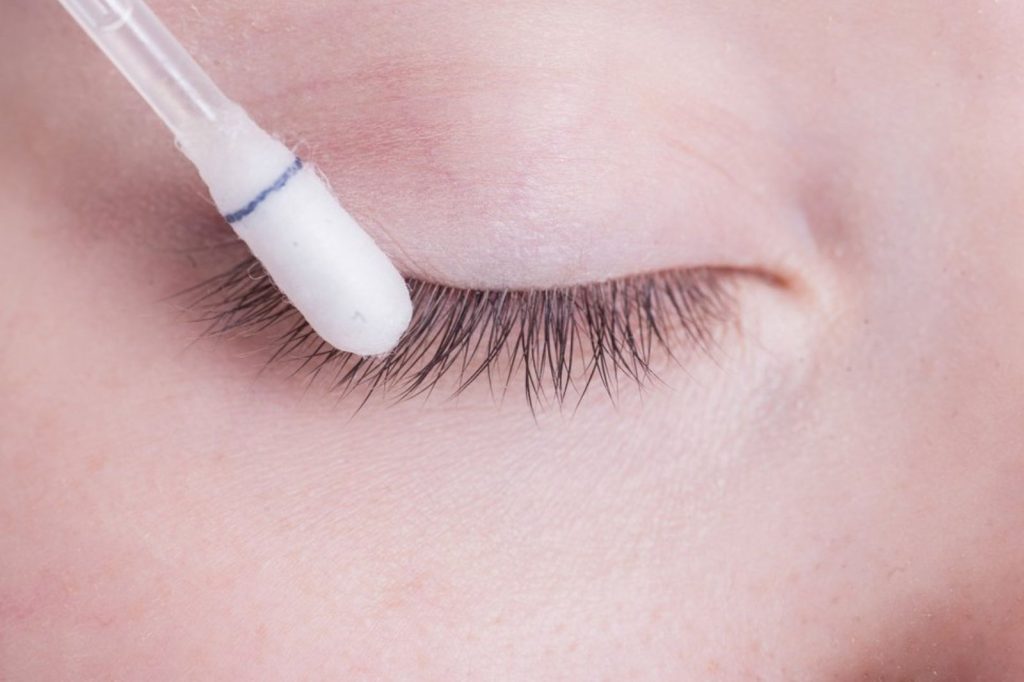
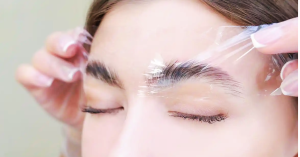
Even with all precautions, allergic reactions can still happen. The key is to stay calm and act professionally. Start by removing the lash extensions immediately, using a gentle cream remover to avoid further irritation. Always reassure your client and explain that you prioritize their safety and well-being.

If symptoms persist beyond 24 hours or worsen, recommend that they consult a medical professional. Handling these situations with care not only ensures client safety but also builds trust in your expertise.

Next, let’s wrap up with some final thoughts and why Beauty Box is the best choice for lash services.

Final Thoughts on Eyelash Extension Allergies

Ensuring a Safe and Glamorous Lash Experience

Experiencing an eyelash extension allergy doesn’t mean giving up on beautiful lashes. By understanding the causes, symptoms, and treatment options, clients and technicians alike can take steps to prevent or manage these reactions effectively. Alternatives like lash lifts, tints, and magnetic lashes offer safe and stunning options for sensitive clients.

Remember, prioritizing safety doesn’t compromise beauty—it enhances it. By staying informed and adopting best practices, everyone can enjoy a glamorous lash experience without unnecessary risks.

Why Choose Beauty Box for Your Lash Needs?

The team of  Beauty Box has experienced lash technicians who are trained to recognize and address eyelash extension allergies while providing personalized solutions for every client. We offer patch tests, sensitive adhesives, and a variety of safe alternatives to ensure a worry-free lash journey.

Conclusion

Dealing with an eyelash extension allergy can be frustrating, but it doesn’t have to mean giving up on beautiful lashes. By understanding the causes, recognizing the symptoms, and taking proactive steps to prevent reactions, you can enjoy the confidence that comes with stunning lashes without worry. Knowledge is your best tool for creating a safe and glamorous lash experience, whether you’re a lash enthusiast or a lash technician.

Whether you’re new to lash extensions or looking for a trusted salon, Beauty Box delivers expert care and flawless results. Book your appointment today to experience beauty without compromise!

FAQs

Question: Can You Develop an Allergy to Eyelash Extensions Over Time?

Answer: Yes, it’s possible. Repeated exposure to lash glue can sensitize the body, leading to allergies even after years of trouble-free applications.

Question: Is Eyelash Extension Glue Allergy Permanent?

Answer: Unfortunately, yes. Once the body forms antibodies against an allergen, it doesn’t forget. Subsequent exposures may trigger stronger reactions.

Question: Can Lash Artists Develop Glue Allergies?

Answer: Absolutely. Lash technicians who are constantly exposed to glue fumes can develop allergies over time. Wearing a mask and ensuring proper ventilation can reduce the risk.

How Much Should You Pay for Eyelash Extensions?

How Much Should You Pay for Eyelash Extensions

How Much Should You Pay for Eyelash Extensions? Eyelash extension may sound like a very small part of your beauty enhancement, but it plays a crucial role in lifting your overall look. Then the question comes, “How much do eyelash extensions cost?” It depends on the type of lashes and service, but prices typically range between $130 to $300 for a full set. This cost is influenced by the lash style, materials used, and the expertise of your lash technician. Refills and upkeep can add to the total, with touch-ups costing around $50 to $130. While this may seem a luxury, eyelash extensions offer unmatched convenience and a custom look that enhances natural beauty.

Each set is customized to flatter your unique features, ensuring the best value for your investment. Ready to transform your lashes? Beauty Box has you covered with expert service and stunning results. Don’t worry – we’ll break it all down for you.

What Are Eyelash Extensions?

Eyelash extensions are semi-permanent fibers applied individually to your natural lashes to enhance length, volume, and curl. Unlike strip lashes or magnetic lashes, extensions offer a more natural and long-lasting look tailored specifically to your preferences. They’re applied by skilled lash technicians using professional-grade adhesive to ensure a safe and flawless finish. Whether you want a subtle enhancement or a bold, dramatic look, there’s a style of eyelash extensions for everyone.

Types of Eyelash Extensions Explained

  • Classic Lashes
    Classic lashes are perfect for beginners who want a natural, clean look. In this style, one extension is applied to each natural lash, creating a mascara-like effect. It’s ideal for adding length and definition without overwhelming your natural lashes.
  • Hybrid Lashes
    Hybrid lashes combine the best of both worlds: individual lashes and volume fans. This style is great for anyone who wants a fuller look with more texture and dimension. It’s versatile and perfect for balancing between natural and dramatic.
  • Volume Lashes
    Volume lashes are lightweight, handmade fans attached to each natural lash to create a dense, fluffy appearance. They’re ideal for people with sparse natural lashes or looking for a glamorous, eye-catching look. Volume lashes are all about adding both length and density.
  • Mega Volume Lashes
    Mega volume lashes are the most dramatic option, using ultra-fine fans to create an intense, dark look. They’re perfect for special occasions or anyone who wants their eyes to be the center of attention. This style takes longer to apply but delivers a striking and bold finish.

Benefits of Eyelash Extensions

Eyelash extensions save time by eliminating the need for mascara, eyeliner, or curling your lashes daily. They’re customizable to your preferences, from natural elegance to dramatic glam. Plus, they enhance your natural beauty, giving you a polished, put-together look all day long.

Now that we know what eyelash extensions are let’s talk about the big question: What is the price of eyelash extensions?

How Much Do Eyelash Extensions Cost?

The price of eyelash extensions can vary greatly depending on your salon’s style, materials, and location. Refills, maintenance, and other services add to the total cost, but the results are worth it for many lash enthusiasts. Here is a chart given below to know all the prices at a glance.

Average Prices for Different Lash Styles

StylePriceDuration
Classic Set$150120 mins
Hybrid Set$175150 mins
Volume Set$200150 mins
Mega Volume Set$235180 mins

Each style requires a different level of skill and time, which explains the price variation. For example, classic sets are quicker to apply, while mega-volume sets involve creating intricate, lightweight fans for a dense look.

Factors That Influence the Cost

  • Lash Technician’s Expertise
    An experienced lash technician with advanced skills will charge more, but you’re paying for safety and quality. Always choose a professional with good reviews.
  • Lash Material
    Materials like silk, faux mink, and real mink have varying prices. A faux mink is durable and lightweight, while a real mink gives a softer, more natural appearance at a higher price.
  • Salon Location and Demand
    Salons in urban areas or with luxurious settings tend to charge more. Similarly, prices often rise during the wedding season or the holidays due to high demand.

Next, let’s explore the additional costs you might need to budget for beyond the initial application.

Additional Costs to Consider

When getting eyelash extensions, thinking beyond the initial appointment is important. Refills, removals, and aftercare products all play a role in maintaining your gorgeous lashes. These costs ensure your extensions stay safe, healthy, and beautiful.

Refills and Maintenance Costs

Refills are essential every 2–4 weeks to replace fallen lashes and keep your set looking fresh. These appointments typically cost $55 to $110, depending on the style and the amount of work required. Without regular refills, your lashes can appear uneven and lose their charm.

Lash Removal Charges

If you ever decide to remove your extensions, it’s best to let a professional handle it. Lash removal appointments cost between $25 and $50 and prevent damage to your natural lashes. Avoid DIY removals—they can lead to breakage or even infections.

Cost of Aftercare Products and Tools

Specialized cleansers, lash brushes, and oil-free makeup removers are essential to keep your extensions clean and long-lasting. These products can add $20 to $50 to your expenses, but they’re worth it to maintain the health and appearance of your lashes.

Now that you know the costs, let’s decide if this investment is truly worth it for you.

Is Paying for Eyelash Extensions Worth It?

Yes! Eyelash extensions are worth the cost if you value convenience, confidence, and a polished look. They eliminate the daily hassle of applying mascara or false lashes, saving you time and effort. Plus, they’re completely customizable to match your personal style.

Comparing Cost to Benefits

While the upfront cost may seem high, the benefits often outweigh the price. Think about the time saved in your daily routine and the confidence boost from waking up with flawless lashes. For many, this is a beauty investment that’s hard to beat.

How Eyelash Extensions Save Time and Effort

Extensions simplify your life by eliminating smudged mascara, clumped lashes, and mid-day touch-ups. With extensions, you’ll always look fresh and ready to tackle your day.

Next, let’s discuss how to find the perfect lash technician to ensure you get the best results.

How to Choose the Right Lash Technician

Finding the right lash technician is essential for achieving beautiful, safe, and long-lasting eyelash extensions. A skilled lash artist ensures your extensions look stunning and takes care of your natural lashes’ health. This decision can distinguish between flawless, damage-free lashes and a disappointing experience.

Checking Portfolios and Reviews

Before committing to a lash technician, ask to see their portfolio. A good portfolio showcases their expertise, range of styles, and ability to create custom looks that suit different clients. Additionally, online reviews from past clients can provide valuable insights into their professionalism, reliability, and overall quality of work.

Asking About Materials and Techniques

It’s important to ask your lash technician about the materials they use and their techniques. For instance, premium materials like faux mink or silk ensure durability and comfort. A skilled technician will also use high-quality adhesives and apply extensions carefully to avoid damaging your natural lashes, so don’t hesitate to ask for details.

Importance of Cleanliness and Safety

Cleanliness and safety should always be a top priority when choosing a lash technician. Ensure the salon and tools are properly sanitized and disposable supplies like under-eye pads are used. This prevents infections and shows the technician’s commitment to providing a safe and professional service.

By considering these factors, you’ll be able to find a lash technician who delivers beautiful, long-lasting extensions while maintaining the health of your natural lashes.

Alternative Options to Eyelash Extensions

Extensions aren’t for everyone, and that’s perfectly okay! Whether you’re looking for something simpler, more budget-friendly, or less time-consuming, there are plenty of alternatives to explore. Let’s look at popular options and how they compare to lash extensions.

Lash Lifts and Tints

A lash lift is like a perm for natural lashes, giving them a beautiful curl that opens up your eyes without needing extensions. Pair it with a lash tint, which darkens your lashes for a mascara-like effect, and you’ve got a low-maintenance, natural-looking solution. Lash lift treatment lasts for 4-6 weeks, depending on hair growth, making them a great option if you’re not ready to commit to extensions but still want a polished, enhanced look.

Strip Lashes and Magnetic Lashes

For those who need lashes only on special occasions, strip lashes and magnetic lashes are lifesavers. Strip lashes come in endless styles and can be applied in minutes, while magnetic lashes eliminate the hassle of glue altogether. Though they’re affordable and reusable, they can’t quite match the seamless, natural finish of professionally applied extensions—but they’re perfect for a quick glam fix.

Comparing Costs and Results

While alternatives like lash lifts and strip lashes may cost less upfront, extensions often deliver better long-term value. Extensions give you a flawless, ready-to-go look for weeks, eliminating the need for daily effort or frequent replacements. If you’re someone who loves waking up with perfect lashes, the investment in extensions may be well worth it compared to these alternatives.

No matter what you choose, there’s a lash option for everyone. Whether you go for extensions or a simpler solution, the key is finding what makes you feel confident and beautiful!

Final Thoughts: Finding the Best Value for Your Lash Extensions

Why Eyelash Extensions Are an Investment in Self-Care

Eyelash extensions are more than a beauty treatment—they invest in confidence, convenience, and looking your best every day. They save you time, enhance your natural beauty, and make you feel fabulous.

How Beauty Box Delivers Exceptional Lash Services

At Beauty Box, we’re dedicated to providing high-quality, customized lash extensions that suit your style and budget. Whether you want a subtle enhancement or a bold, dramatic look, our skilled technicians are here to make it happen. Book your appointment today and experience the magic of stunning lashes!

Conclusion

When considering how much you should pay for eyelash extensions, weighing the technician’s skill, the quality of materials used, and the desired style is important. At Beauty Box, we pride ourselves on delivering exceptional services tailored to your needs, ensuring you receive the best value for your investment. Investing in professionally applied eyelash extensions enhances your natural beauty, boosts your confidence, and simplifies your daily beauty regimen. Choose a technician who prioritizes premium materials and rigorous hygiene standards to ensure your extensions are stunning and durable.

Here’s the big question: What lash style fits your personality best—natural, voluminous, or mega drama? We’d love to help you find out! Book your appointment with Beauty Box today, and let us create a look you’ll love. Your journey to beautiful, head-turning lashes starts here!

FAQs

Question: How long do eyelash extensions last?

Answer: Eyelash extensions typically last between 4 to 6 weeks, depending on your natural lash growth cycle and how well you care for them. Regular refills every 2–3 weeks can help maintain their fullness and keep your lashes looking fresh. Avoiding oil-based products and excessive rubbing can also extend their lifespan.

Question: Are eyelash extensions safe for my natural lashes?

Answer: Yes, eyelash extensions are safe when applied by a trained and experienced lash technician. They use professional-grade adhesive and techniques that don’t damage your natural lashes. However, improper application or neglecting aftercare can weaken your lashes, so it’s crucial to choose a reputable salon.

Question: What’s the difference between classic and volume lash extensions?

Answer: Classic lash extensions involve attaching one extension to each natural lash, giving a clean and natural look. Volume lashes, on the other hand, use lightweight, handmade fans to add density and fullness for a more dramatic appearance. The choice depends on whether you prefer a subtle enhancement or a bold, glamorous effect.

Question: Can I wear makeup with eyelash extensions?

Answer: Yes, but it’s important to use makeup that’s compatible with extensions. Avoid oil-based products, waterproof mascaras, and liquid eyeliners, as they can weaken the adhesive and cause your extensions to fall out faster. Opt for water-based or extension-safe makeup products to keep your lashes intact.

Eyelash Extensions: Is Curling Them Safe?

Eyelash Extensions Is Curling Them Safe

Eyelash extensions are a beauty revolution, offering effortlessly glamorous, volumized lashes that enhance your natural beauty. But one question frequently arises among lash enthusiasts: Can you curl eyelash extensions? The answer isn’t as straightforward as you might think. While extensions are pre-curled during manufacturing and don’t require further curling, there are safe methods to enhance your lash look without causing damage. Most synthetic eyelash extensions are made from a thermoplastic fiber called PBT, which comes with a preset curl from the manufacturer. Trying to curl these extensions can damage their structure or weaken the bond with your natural lashes. 

That said, there’s a professional solution! To achieve a seamlessly lifted look, you can use a heated eyelash curler to gently curl your natural lashes. This technique helps your natural lashes contour beautifully with the extensions for a flawless, cohesive finish.

Our skilled specialists at Beauty Box tailor your lash extensions to match your style, ensuring long-lasting curls and a stunning finish. Visit us to experience luxury beauty services and keep your lashes flawless!

Let’s dive deep into the topic and explore everything you need to know about curling eyelash extensions. 

What Are Eyelash Extensions?

Eyelash Extensions: Is Curling Them Safe?

The Rise in Popularity of Eyelash Extensions

Eyelash extensions have become a staple in the beauty industry, adored for their ability to create a polished, camera-ready look without daily effort. From celebrities to everyday beauty enthusiasts, lash extensions offer the convenience of waking up with flawless lashes. According to market research, the eyelash extension industry is expected to grow by 6% annually, proving that this beauty trend is here to stay.

How Eyelash Extensions Enhance Natural Beauty

Eyelash Extensions: Is Curling Them Safe?

Extensions aren’t just about length-they add volume, curl, and definition to your natural lashes, creating a brighter, more youthful appearance. By reducing the need for mascara or strip lashes, extensions save time and effort, making them a favorite for busy professionals and beauty lovers alike.

Materials Used in Eyelash Extensions: PBT and Beyond

Most synthetic eyelash extensions are made from Polybutylene Terephthalate (PBT), a durable thermoplastic polymer known for its flexibility and heat resistance. PBT lashes are pre-curled during manufacturing using precise heat tools, ensuring the curl lasts for the duration of the extension’s life. Natural options, such as mink or silk lashes, are less common and can lose their curl when wet.

Why Do People Want to Curl False Eyelashes?

Eyelash Extensions: Is Curling Them Safe?

Achieving a More Voluminous Look

Despite the preset curl of false lashes, some clients seek an even more dramatic, lifted appearance. Curling can enhance the overall aesthetic by creating a cohesive look between natural lashes and extensions. Sometimes, natural lashes don’t perfectly align with the extension’s curve. Curling the natural lashes gently can bridge this gap, ensuring a seamless blend that looks natural yet striking.

The Desire for a Lifted, Glamorous Effect

For special occasions, photoshoots, or even a glamorous night out, the allure of perfectly lifted lashes is hard to resist. A subtle lift to your natural lashes can dramatically enhance your overall look, framing your eyes in a way that exudes elegance and sophistication. Think of it as the finishing touch to your makeup routine—the detail that takes your appearance from everyday chic to red-carpet ready. Whether it’s to complement a smoky eye or to stand out in a natural, no-makeup makeup look, lifted lashes effortlessly draw attention to your eyes, making them appear larger, brighter, and more defined.The lifted, glamorous lash look is not just a style statement—it’s a confidence boost that helps you own the spotlight, wherever you go.

Is Curling False Lashes Safe?

Eyelash Extensions: Is Curling Them Safe?

Why Curling Synthetic Extensions Is Not Recommended

Synthetic eyelash extensions are pre-curled and designed to hold their shape. Attempting to curl them further can compromise the fibers, causing them to lose their structure or even snap. Additionally, curling the extension itself can weaken the adhesive bond, leading to premature shedding.

Risks of Using Traditional Curlers on Extensions

Mechanical curlers apply pressure to the lash, which can bend or break synthetic fibers. Worse, they may tug on the adhesive bond, potentially damaging your natural lashes in the process. Traditional curlers are simply too harsh for delicate extensions.

How Heat Can Impact Adhesive Bonds and Fibers

Excessive heat can weaken the adhesive used to attach extensions to natural lashes, causing them to detach prematurely. Direct heat can also warp the synthetic fibers, leading to uneven curls or even a burned appearance.

Safe Alternatives for Curling Eyelash Extensions

The Role of Heated Lash Curlers

Heated eyelash curlers are a safer alternative for those seeking extra lift. These devices gently warm the lashes, helping to shape the natural lashes without damaging the extensions. They’re especially effective for blending natural lashes with extensions.

Why Heated Curlers Are Gentler on Extensions

Unlike traditional curlers, heated curlers don’t press or tug at the lashes. Instead, they use a soft heat application to create a subtle, long-lasting curl that enhances the look of both natural and extended lashes.

Steps to Use a Heated Lash Curler Safely

  1. Clean your lashes thoroughly to remove any oils or debris.
  2. Dry your lashes completely—wet lashes won’t hold a curl.
  3. Turn on the heated curler and allow it to warm up.
  4. Gently run the curler from the middle of your lashes to the tips, avoiding the base where the extension is bonded.
  5. Hold for a few seconds, then release for a natural, lifted look.

Choosing Pre-Curled Extensions for Desired Effects

For clients who prefer a more pronounced curl, requesting pre-curled extensions during your appointment is the best option. Lash artists offer various curl types, from subtle to dramatic, ensuring you achieve the perfect look without the need for additional curling.

Maintaining the Curl and Longevity of Eyelash Extensions

Aftercare Essentials for Lash Extensions

Caring for your lash extensions doesn’t have to be a chore—it’s the secret to keeping them lush, curled, and envy-worthy for weeks! Use a lash-safe, oil-free cleanser daily to gently wash away dirt and oil without weakening the adhesive. After cleansing, grab a soft spoolie and give your lashes a quick brush to keep them perfectly separated and looking fresh. And remember: pat them dry like a delicate masterpiece—no rubbing or tugging allowed!

Cleaning and Brushing Tips for Extensions

Want your lashes to look like they just walked out of the salon every day? Cleaning and brushing are your new best friends. Start with an oil-free cleanser and a gentle hand—no harsh scrubbing here! Let them air-dry, then take a clean spoolie and brush them into place. Daily brushing not only keeps them looking full and fluttery but also prevents pesky tangles that can dull their charm. Pro tip: brushing is your moment to admire those gorgeous extensions!

Preventing Curl Loss from Sleeping Positions

Did you know how you sleep can affect your lash extensions? If you’re a stomach sleeper, it’s time to flip the script. Sleeping face-down can crush your lashes, flatten their curl, and shorten their lifespan. Try sleeping on your back for lash-friendly beauty sleep. And here’s a little luxury hack: invest in a silk or satin pillowcase to reduce friction and help your lashes stay flawless while you dream. Wake up pretty every morning—it’s that easy!

Protecting Extensions from Heat and Moisture

Think of your lash extensions like couture—they need protection from the elements! Avoid heat-heavy environments like saunas, steaming-hot showers, or even standing too close to your stovetop. Excess heat can weaken the adhesive and warp the curl of synthetic fibers. Blow-drying your hair? Keep the heat setting low and steer the airflow away from your face. A little extra care will keep your lashes looking red-carpet ready for weeks is Curling Them Safe!

Common Mistakes to Avoid with Eyelash Extensions

Using Mechanical Curlers on Extensions

Stop right there! If you’re tempted to grab a mechanical lash curler, put it down. These old-school tools are far too aggressive for your delicate extensions, bending and breaking synthetic fibers or even pulling out lashes. Want a lift? A heated lash curler is your go-to for safely adding that extra bit of glam.

Applying Mascara on Lash Extensions

Mascara on extensions? Don’t even think about it! It clumps, it’s hard to clean, and it can damage the adhesive bond. Plus, who needs mascara when your extensions already give you that full, voluminous look? If you absolutely must, stick to a lash-safe, water-based formula—but we promise, you’ll hardly miss it.

Neglecting Professional Lash Touch-Ups

Extensions are an investment, and skipping your refills is like letting your manicure chip away. Schedule touch-ups every 2–3 weeks to keep your lashes full, fresh, and camera-ready. It’s also your chance to let your lash artist work their magic, ensuring your extensions stay in top-notch shape.

Enhancing the Appearance of Eyelash Extensions Without Curling

Opting for a More Pronounced Curl During Application

Want a dramatic, lifted look that doesn’t require curling? Your lash artist has you covered! Ask for pre-curled extensions like D-curl or CC-curl during your appointment. These styles give you the bold, eye-opening effect you’re craving—no extra tools required.

Using Lash Serums to Support Natural Lashes

Healthy natural lashes are the secret to stunning extensions. Treat them to a nightly dose of lash serum to keep them strong, nourished, and ready to hold your extensions like a pro. Bonus: lash serums also promote growth, giving your lash line that extra “wow” factor.

Brushing Techniques for a Polished Look

Think of brushing your extensions as giving them their daily beauty boost. Use a clean spoolie to gently comb through, starting at the base and working outward. Not only will this keep them looking sleek and tidy, is Curling Them Safe but it also prevents tangles and clumps. Pro tip: brushing is best when your lashes are dry—it’s a little ritual that keeps them salon-perfect every day!

Why Choose Beauty Box for Eyelash Extensions?

Personalized Lash Styling by Licensed Specialists

At Beauty Box, our licensed lash artists customize each set of extensions to suit your unique style and preferences, ensuring a flawless result every time. We use only premium products that guarantee durability and comfort, giving you confidence in your lash investment.

A Luxury Experience Tailored to Your Needs

From the moment you step into Beauty Box, we’re dedicated to providing a luxurious, refreshing experience. Our lash services cater to every style, from natural elegance with a Classic Set to bold drama with Mega Volume. Want the best of both worlds? Try our Hybrid Set or Volume Set for the perfect balance. For maintenance, we offer Foreign Fills, a gentle Lash Bath, and safe Lash Extension Removal. Looking for a natural lift? Our Lash Lift creates stunning is Curling Them Safe, low-maintenance curls without extensions. We’re here to perfect your lashes and elevate your beauty routine with expert care at Beauty Box.

Conclusion

Eyelash extensions are a game-changer, but they require proper care and attention. While curling synthetic extensions is not safe, heated curlers offer a gentle is Curling Them Safe alternative for blending natural lashes. For a flawless, long-lasting look, trust the experts at Beauty Box to create the perfect lash extensions tailored to you. Visit us today for a luxury lash experience!

FAQs

Question: Can I use a traditional mechanical eyelash curler on my extensions?

Answer: No, using a traditional mechanical curler on eyelash extensions is not recommended. These curlers can apply excessive pressure, bending or breaking the synthetic fibers and potentially loosening the adhesive bond. Instead, consider using a heated eyelash curler to gently lift your natural lashes without damaging the extensions.

Question: Do eyelash extensions lose their curl over time?

Answer: High-quality synthetic eyelash extensions are designed to hold their curl for the duration of their wear. However, certain factors like heat exposure, improper sleeping positions, or using oil-based products can weaken the curl or the adhesive. Following proper aftercare can help maintain the extensions’ curl and longevity.

Question: What’s the safest way to blend my natural lashes with my extensions?

Answer: The safest way is to use a heated eyelash curler specifically designed for lash extensions. This tool gently lifts your natural lashes to match the curl of your extensions without compromising the bond. Avoid using mechanical curlers or applying heat directly to the extensions to prevent damage.

How Much Is A Spray Tan Cost? Your Guide To Pricing And Perfection

How Much Is A Spray Tan Cost? Your Guide To Pricing And Perfection

Picture this: you’ve got a big event coming up maybe it’s a wedding, a vacation, or just a special night out. You want that flawless, tanned glow without the risks of sun damage or the hassle of hours spent outside.

You’ve decided on a spray tan, but here’s the catch-you’re wondering, How much is a spray tan? It’s a fair question, and the good news is that spray tans are not only affordable but also incredibly customizable to fit your needs. On average, a professional spray tan costs between $30 and $70 per session, depending on the type of service and location. For instance, a basic spray tan at a salon typically starts at $45, while the convenience of a mobile spray tan where a technician comes to your home costs around $70. Let’s explore everything you need to know about the price of spray tans, what influences their cost, and how to get the best value for your money.

At Beauty Box, we pride ourselves on offering premium spray tanning experiences tailored to your needs. Our 100% vegan, paraben-free, and fragrance-free solutions are made from naturally derived ingredients, ensuring a flawless glow that’s as kind to your skin as it is to the environment. Whether you prefer a session in our Philadelphia studio or the convenience of a mobile spray tan, we deliver a luxurious, streak-free finish every time. Ready to learn more about the cost and benefits of spray tanning?

Let’s dive in!

Understanding Spray Tan Costs

When it comes to spray tan cost, there’s no one-size-fits-all answer. Prices can vary depending on factors like where you live, the type of service you choose, and the salon you visit. On average, though, you’re looking at a range of $30 to $70 per session. But what exactly determines that price? 

Let’s break it down.

What Determines the Price of a Spray Tan?

The biggest factor in determining the cost is location. Salons in big cities like Philadelphia or New York might charge more than those in smaller towns due to higher operating costs. Beyond that, the type of spray tan matters too. A basic booth tan might cost less than a custom airbrush tan performed by a technician. Lastly, extras like exfoliation treatments or rapid tans can add to the price. So, when budgeting, keep in mind the kind of experience you’re after.

 Basic Spray Tans or Mobile Spray Tans which one to choose?

If you’re trying to decide between a salon spray tan or having a mobile technician come to your home, it’s worth comparing the costs and benefits. A basic spray tan at a salon typically costs around $45 and includes a quick, even application in a professional setting. Mobile spray tans, on the other hand, are slightly pricier, averaging $70, but they offer the convenience of not having to leave your house. Perfect for busy schedules, right?

Why Customization Impacts the Cost

The more personalized your spray tan, the higher the price tends to be. For instance, a custom airbrush tan lets you work with a technician to choose the perfect shade for your skin tone. While this level of detail costs more than a standard booth tan, the results are usually worth it, giving you a streak-free, flawless glow.

Average Spray Tan Prices by Type

When choosing the right spray tan, knowing the options can help you decide what works best for your budget and needs. Here’s a breakdown of the most common types of spray tans and their average prices.

Basic Spray Tan

A basic spray tan is ideal for anyone who wants a quick and affordable option. Priced at around $30 to $50, it usually involves stepping into a booth where the spray is applied automatically. The session only takes about  30 to 60 minutes, making it a great option for those on the go. However, keep in mind that booth tans aren’t as tailored as custom airbrush tans.

Mobile Spray Tans

If convenience is your priority, a mobile spray tan is worth considering. For just $65 to $120, you can have a professional spray tan technician bring the glow to you! In just 30 to 60 minutes, they’ll set up a portable spray tan booth right in your home, giving you the ultimate convenience and a flawless, look without ever stepping outside. It’s perfect for busy schedules or those who want privacy, especially before big events.

Custom Airbrush Spray Tan

For a truly tailored experience, opt for a custom airbrush tan. Prices range from $40 to $80, depending on the salon. This service involves a technician applying the tan manually, ensuring even coverage and a shade that suits your skin tone. While it takes a little longer—typically 20 to 30 minutes—the results are unmatched.

Regional Variations in Spray Tan Pricing

The cost of a spray tan isn’t the same everywhere, so knowing the average prices in your area can help you budget effectively.

Spray Tan Costs in Urban Areas vs. Suburbs

In metropolitan areas like Philadelphia, spray tan costs are often higher due to increased demand and overhead expenses for salons. A basic tan might start at $45, while custom services can go as high as $100. In suburban areas, prices are generally more affordable, but the quality of services may vary.

Philadelphia Spray Tan Prices: What to Expect

If you’re in Philadelphia, you’re in luck! Beauty Box offers competitive pricing for both basic and mobile spray tans. A basic spray tan costs $45, while a mobile spray tan—perfect for at-home convenience—is priced at $70. Plus, all solutions are vegan, paraben-free, and made from naturally derived ingredients, giving you luxury results at a fair price.

Comparing Costs Across the U.S.

Spray tan prices in cities like Los Angeles or Miami tend to skew higher, with custom airbrush tans averaging around $80. In smaller towns, you might find basic spray tans for as low as $25. Wherever you are, it’s worth doing a little research to find the best balance of price and quality.

Cost-Effective Spray Tan Options

Looking to save money without compromising on results? Here are a few tips to get the most value out of your spray tan sessions.

Are Spray Tan Packages Worth It?

Absolutely! Many salons offer package deals that significantly lower the price of spray tans. For example, you might pay $150 for a package of five tans, reducing the cost per session to $30. If you’re planning to tan regularly, this is a smart way to save.

DIY Self-Tanning Products vs. Professional Spray Tans

While self-tanning products are cheaper—ranging from $10 to $30—they don’t always deliver the same flawless results as a professional tan. If you’re aiming for perfection, investing in a salon or mobile spray tan is worth the extra cost.

Why Choose “Beauty Box” for Your Spray Tan?

At Beauty Box, we believe that a beautiful tan starts with high-quality ingredients and personalized service. Our solutions are 100% vegan, paraben-free, and sulfate-free, ensuring a safe and luxurious experience every time. Whether you visit our Philadelphia studio for a basic spray tan or enjoy the convenience of our mobile spray tanning service, we’re here to help you achieve the perfect glow.

So, now that you know the price of a spray tan, are you ready to experience the best? Book your appointment with Beauty Box today and enjoy a flawless tan that’s worth every penny!

FAQ

Question 1: How Much Does a Spray Tan Typically Cost?

Answer: A spray tan typically costs between $30 and $70 per session, depending on the type of service, location, and salon. Basic booth tans are on the lower end, while custom airbrush or mobile spray tans can cost more due to their personalized and convenient nature. Additional factors like salon reputation and any add-on services can also influence the price.

Question 2: Are Mobile Spray Tans More Expensive?

Answer: Yes, mobile spray tans are generally more expensive than in-salon services. Prices range from $65 to $120, reflecting the added convenience of having a technician come to your home. This premium covers travel costs, setup, and the luxury of a private, personalized experience in your own space. It’s an excellent option for busy schedules or special events.

Question 3: Can I Save Money With Spray Tan Packages?

Answer: Absolutely! Many salons offer spray tan packages that lower the cost per session. For instance, buying a package of five sessions might cost $150, reducing the per-tan cost to $30. If you tan regularly, packages or memberships are a cost-effective way to maintain your glow without overspending.

Question 4: What Should I Budget for Maintaining a Spray Tan?

Answer: To maintain your spray tan, budget for follow-up sessions every 7–10 days, which could cost $30 to $70 per session, depending on the type of tan. Additionally, consider investing in maintenance products like tan extenders, moisturizers, or gentle body washes, which range from $15 to $40. On average, maintaining a spray tan for a month could cost between $100 and $200, including both sessions and products.

How Long Do Spray Tans Last? A Complete Guide To A Lasting Glow

How long do spray tans last

If you’re considering a spray tan or already love the bronzed look, one of the first questions that comes to mind is, How long do spray tans last?While the answer can vary based on several factors, the average spray tan lasts from a minimum of 4 to a maximum of 10 days. With proper preparation and care, you can extend that glowing, tanned look even longer. In just 30 to 60 minutes, a professional spray tan gives you a smooth, even finish, customized to achieve the perfect shade you’re looking for.

Spray tans are the go-to solution for achieving a radiant, suntanned glow without exposing your skin to harmful UV rays. Whether you’re prepping for a big event, or vacation, or simply want to elevate your everyday look, understanding the factors that affect spray tan longevity can help you make the most of it. Here’s everything you need to know about making your spray tan last, keeping it flawless, and why Beauty Box is your go-to for achieving the perfect whether you prefer the convenience of a mobile spray tan at home or the indulgence of a basic spray tan in our luxurious studio.

What Is a Spray Tan and How Does It Work?

Many girls have a question about spray tans and how long it last. Let’s first dig into what spray tan is. A spray tan is a professional tanning method where a fine mist of tanning solution is applied to your skin to create a natural, sun-kissed glow. The active ingredient, DHA (dihydroxyacetone), interacts with the outer layer of your skin to temporarily darken its appearance. Unlike traditional tanning methods that rely on UV rays, spray tans are a safe and customizable option that lets you achieve your desired shade without damaging your skin. Perfect for special occasions or simply enhancing your everyday look, spray tans have become a go-to beauty treatment for those seeking a healthy, radiant glow. The process is quick, convenient, and offers instant results, making it an ideal choice for anyone short on time or wary of the sun’s harmful effects.

Science behind spray Tan: How Does It Work?

Spray tans work through the magic of DHA (dihydroxyacetone), a colorless sugar that interacts with amino acids in the outer layer of your skin. This reaction produces a natural-looking tan that begins developing within 2–4 hours of application and fully develops over the next 24 hours.

The process is safe and effective, with DHA earning FDA approval for external cosmetic use since the 1970s. Because the reaction only affects dead skin cells on the surface of the skin, the tan fades naturally as your skin exfoliates. This means the color is temporary and non-invasive, making spray tans a fantastic alternative to traditional tanning methods. The depth of your tan depends on the concentration of DHA in the tanning solution, which typically ranges from 5% for a light glow to 15% for a deep bronze.

The Benefits of Spray Tans Over Traditional Tanning

Spray tans have gained immense popularity not just for their convenience but also for the numerous advantages they offer over traditional tanning methods. First and foremost, they eliminate the risks associated with UV exposure, such as premature aging, sunburns, and an increased risk of skin cancer. Unlike tanning beds or sunbathing, which can cause long-term damage to your skin, spray tans offer a safer alternative with immediate results.

Another major advantage is the speed and convenience. A professional spray tan session takes from 30 minutes to 60 minutes, and you walk out with a perfectly even, streak-free tan that can be customized to your desired shade. Whether you prefer a subtle, summery glow or a deep, bronzed look, spray tans can be tailored to your exact preference.

Additionally, spray tans are perfect for busy individuals who want to look their best without dedicating hours to sunbathing or waiting for self-tanners to develop. The results are instant and ideal for those last-minute plans or events.

Who Should Get a Spray Tan?

Spray tans are a versatile beauty treatment, ideal for anyone who wants to enhance their appearance effortlessly. They are particularly popular for special events like weddings, proms, and photoshoots, where a flawless, glowing complexion is essential. They’re also a favorite for vacations, ensuring you arrive at your destination with a bronzed glow from the start. But spray tans aren’t limited to special occasions; they’re perfect for achieving everyday confidence with a natural, healthy-looking tan that doesn’t rely on sun exposure.

How Long Do Spray Tans Last on Average?

The longevity of a spray tan typically ranges between 5 to 10 days, depending on several factors, including your skin type, pre- and post-care routine, and the quality of the tanning solution. Dry skin tends to shed cells faster, which can cause the tan to fade more quickly, while oily skin might sometimes affect the evenness of application. However, with proper preparation and aftercare, most clients can enjoy their tan for a full week or more.

During the first three days, your tan will appear its most vibrant, showcasing a rich, even color that enhances your natural features. By days 4–7, gradual fading begins, particularly in areas that experience more friction, such as hands, feet, and elbows. By the eighth to tenth day, you’ll notice significant fading as the outer layer of your skin exfoliates naturally.

The quality of the tanning solution also plays a key role. High-quality products, like those used at Beauty Box, are designed to last longer and fade more evenly, ensuring that your tan looks natural and beautiful throughout its duration.

How Spray Tans Fade Naturally Over Time

The fading process of a spray tan is directly tied to your skin’s natural exfoliation cycle, which typically lasts around 28–30 days. As dead skin cells are shed, the tan gradually diminishes. However, external factors such as frequent showers, sweating, or swimming in chlorinated water can accelerate the fading process. Maintaining your skin’s moisture levels is crucial for prolonging the life of your tan. Well-hydrated skin retains the tanning solution more effectively, ensuring that the color fades evenly and lasts longer.

Real-World Data on Spray Tan Longevity

A 2021 survey revealed that 80% of spray tan users noticed a significant fade by Day 7. However, 25% of users who followed meticulous aftercare routines reported their tans lasting up to 10 days or longer. This underscores the importance of both preparation and maintenance in achieving a long-lasting spray tan.

Factors That Impact Spray Tan Longevity

Your skin type plays a crucial role in determining how long your spray tan lasts. From the condition of your skin to your daily habits, understanding these variables can help you maximize your tan’s longevity. By tailoring your preparation and aftercare to suit your unique needs, you can significantly extend the life of your tan and maintain that flawless finish for days longer. Let’s take a closer look at how your skin type and other key factors can impact the durability of your spray tan.

Dry skin: 

Dry skin exfoliates more quickly, leading to faster fading. Moisturizing regularly can help counteract this and keep the tan vibrant. 

Oily skin: 

It can sometimes even prevent application, but using a prep spray before tanning can resolve this issue. 

Combination skin: 

Often requires special attention to drier areas like elbows and knees, ensuring a smooth and even finish.

Pre tanning preparation: 

Proper preparation is essential for a lasting tan. Exfoliating 24 hours before your appointment removes dead skin cells and creates a smooth base for the tanning solution. Hydration in the days leading up to your session is also key, though you should avoid lotions, perfumes, and deodorants on the day of your appointment as they can block the solution from adhering evenly.

Post tanning routine: 

Once tan is applied, gentle post-care practices will prolong its lifespan. Daily moisturizing with tan-friendly, oil-free products helps maintain the glow, while minimizing water exposure and avoiding hot showers to prevent premature fading. When drying off after a shower, pat your skin gently instead of rubbing to avoid removing the tan.

Swimming in chlorinated pools, for instance, can reduce the tan’s longevity by up to 30%, while excessive sweating or wearing tight clothing can cause streaks or uneven fading. To get the most out of your tan, opt for loose clothing and minimize friction-prone activities during its duration.

Conclusion

A spray tan is more than a beauty boost-it’s a healthier, time-saving way to achieve the perfect glow. With the right preparation, care, and quality products, your spray tan can last up to 10 days, leaving you radiant and confident for any occasion. Ready to experience a flawless tan? Trust Beauty Box to provide the ultimate spray tanning experience tailored to your needs.

FAQs

Question 1: How long does a spray tan last if you shower every day?

Answer: If you shower daily, your spray tan may last between 5 to 7 days, which is slightly less than the typical lifespan of 7 to 10 days. Frequent showers accelerate the fading process as water exposure and the use of soaps contribute to the natural exfoliation of your skin. However, you can still extend your tan’s life with proper care. Use lukewarm water instead of hot water, as heat can dry out your skin and cause the tan to fade faster. Opt for sulfate-free body washes that are gentle on your tan, and avoid harsh scrubbing or loofahs. After showering, pat your skin dry with a soft towel rather than rubbing, and always moisturize immediately with an oil-free, tan-friendly lotion to keep your skin hydrated and your tan looking fresh. These small adjustments can make a big difference, even with daily showers.

Question 2: Do spray tans look natural?

Answer: Spray tans can look incredibly natural when applied correctly and with the right products. Modern tanning solutions are specifically designed to avoid the orange tones associated with older methods, providing a realistic, sun-kissed glow that enhances your natural beauty. A professional spray tan technician will customize the shade based on your skin tone and preferences, ensuring a result that complements your complexion. Additionally, proper preparation, such as exfoliating your skin before your appointment, helps the tan develop evenly and smoothly. When done professionally, a spray tan can mimic the look of a natural tan while giving your skin a healthy radiance.

Question 3: Is a spray tan safe during pregnancy?

Answer: Yes, most spray tans are considered safe during pregnancy, as DHA only reacts with the outer layer of the skin. However, it’s always best to consult with your healthcare provider and ensure the tanning solution used is free from harsh chemicals.

Question 4: Can I work out after a spray tan?

Answer: It’s recommended to wait at least 8 to 12 hours after getting a spray tan before working out. This time allows the DHA in the tanning solution to fully develop and bond with the outer layer of your skin. Sweating too soon after your spray tan can lead to streaking, uneven patches, or premature fading as the solution may not have set properly. Once the development period has passed, you can resume working out, but it’s important to take precautions to preserve your tan. Wear loose, breathable clothing to minimize friction, and blot sweat with a towel rather than wiping it away to avoid disrupting the tan. After your workout, rinse off gently in lukewarm water and moisturize your skin to maintain its hydration and the evenness of your tan. With these steps, you can stay active without compromising your glow.

How to Clean Eyelash Extension: 10 Easy Steps to Eyelash Care

How to Clean Eyelash Extension 10 Easy Steps to Eyelash Care

How to clean eyelash extension is simple and essential for maintaining their look and health. Start by using an oil-free lash cleanser or diluted baby shampoo to remove dirt, oil, and makeup residue. Apply the cleanser with a soft lash brush or clean spoolie, gently brushing in a downward motion. Rinse thoroughly with lukewarm water and pat dry with a lint-free towel. Once dry, use a clean spoolie to fluff and separate the extensions. Avoid rubbing your eyes or using oily products, as these can weaken the adhesive. Clean your lashes daily to keep them fresh, healthy, and long-lasting.

Cleaning eyelash extensions is budget-friendly. Lash cleansers cost $10–$20, while spoolies or brushes are $5–$10. Oil-free baby shampoo is a cheaper alternative at around $5. Proper cleaning prevents buildup, extending the life of your extensions and saving money.

At Beauty Box, we recommend regular cleaning to keep your lashes looking flawless and healthy. Explore our range of lash care products and expert tips to maintain your extensions effortlessly!

Keeping your eyelash extensions clean is key to their durability and your eye health. Use a gentle, oil-free cleanser, rinse thoroughly, and pat dry to remove dirt, oil, and makeup, ensuring your lashes stay fresh, beautiful, and long-lasting. By following a few easy steps, you can enjoy beautiful, healthy lashes while extending the life of your extensions.

Why Is Cleaning Eyelash Extensions Important?

Cleaning eyelash extensions is crucial to maintain their appearance, longevity, and your natural lash health. Daily cleaning removes dirt, oil, and makeup residue that can accumulate on the extensions, which, if left unaddressed, can lead to bacterial buildup, irritation, or even infections. Proper hygiene also prevents the lash adhesive from breaking down prematurely, ensuring your extensions last longer and stay securely in place. Clean lashes remain fluffy, neat, and natural-looking, enhancing your overall appearance. Additionally, regular cleaning promotes healthy natural lashes by reducing the risk of clogged follicles. Keeping your lash extensions clean ensures they stay beautiful, safe, and long-lasting.

What Happens If You Don’t Clean Lashes?

If you don’t clean your lashes, dirt, oil, and makeup can build up, leading to bacteria growth and potential eye infections. Dirty lashes may also cause irritation, redness, and clogged follicles, which can harm your natural lashes. Additionally, buildup weakens the adhesive, causing extensions to fall out prematurely. Regular cleaning keeps your lashes healthy, prevents problems, and ensures your extensions look fresh and last longer. Clean lashes are safe and beautiful!

When to Clean Eyelash Extensions?

You should clean your eyelash extensions:

  1. Daily or Every Other Day: Regular cleaning prevents dirt, oil, and makeup buildup.
  2. After Wearing Makeup: Especially if using mascara, eyeliner, or eyeshadow near the lash line.
  3. After Sweating or Swimming: To remove salt or chlorine that can weaken the adhesive.
  4. If Lashes Feel Dirty: Clean when lashes feel sticky or gritty.
  5. Before Bed: To remove daily residue and keep lashes fresh overnight.

Consistent cleaning keeps lashes healthy, neat, and long-lasting.

Tools and Products You’ll Need

  • Lash Cleanser: Choose an oil-free, lash-safe cleanser specifically designed for eyelash extensions to remove dirt and makeup gently.
  • Soft Lash Brush: Use a small, soft brush to apply the cleanser and clean between the extensions.
  • Spoolie Brush: A clean, disposable spoolie is ideal for separating and fluffing your extensions after cleaning.
  • Lukewarm Water: Use to rinse off the cleanser thoroughly without damaging the adhesive.
  • Lint-Free Towel: Gently pat the lashes dry to avoid pulling or snagging.
  • Oil-Free Baby Shampoo (Optional): A cost-effective alternative for cleaning extensions.

Step-by-Step Guide on How to Clean Eyelash Extension

Here’s a Step-by-Step Process for Cleaning Eyelash Extensions-

Step 1: Preparing Your Cleaning Area

You can select a clean, well-lit space for cleaning your eyelash extensions. Gather all necessary tools, including a lash cleanser, soft brush, spoolie, lukewarm water, and a lint-free towel. Ensure your hands are clean to avoid transferring dirt or oil. Keep everything within easy reach for a smooth process.

Step 2: Choosing the Right Cleanser

Select a gentle, oil-free cleanser designed for eyelash extensions to avoid breaking down the adhesive. Look for products labeled as lash-safe or opt for diluted, unscented baby shampoo as an alternative. Avoid cleansers with oils, alcohol, or harsh chemicals, as these can damage your extensions and irritate your eyes.

Step 3: Dispense the Cleanser

Pump a small amount of oil-free, foam-based cleanser onto your lash brush, applicator, or fingertips.

Dispensing the cleanser properly is crucial for cleaning eyelash extensions. Use a small amount of lash-safe, oil-free foam cleanser on a clean brush, applicator, or fingertips. Ensure the quantity is just enough to cover the lashes without excess. This step prepares your lashes for gentle yet effective cleaning.

Step 4: Apply to Lashes

To apply cleanser to clean eyelash extensions, gently close your eyes and use a soft brush or applicator to apply a small amount of lash-safe cleanser. Focus on the lash line, moving in gentle circular motions to remove dirt and oil. Be careful not to tug or pull on the lashes to maintain their integrity.

Step 5: Focus on the Lash Line

Pay extra attention to the base of the lashes, where makeup, dirt, and oil often accumulate. Be gentle to avoid pulling or damaging the extensions.

Step 6: Gently Rinsing with Water

Rinse your eyelash extensions thoroughly with lukewarm water to remove all cleanser residue. Use a gentle stream or cup your hands to avoid strong pressure. Proper rinsing keeps the adhesive intact and prevents buildup or irritation

Step 7: Using a Lint-Free Towel

After rinsing your eyelash extensions, gently pat them dry with a soft, lint-free towel. Avoid rubbing or pulling, as this can weaken the adhesive or damage the extensions. The lint-free towel ensures no fibers stick to your lashes, keeping them clean and neat. Handle your lashes with care for the best results.

Step 8: Drying

Let your lashes air-dry naturally for a few minutes to remove any remaining moisture. For faster drying, use a handheld fan on a low setting, ensuring it’s at a safe distance from your eyes. This prevents clumping, preserves the adhesive bond, and keeps your extensions looking tidy and beautiful.

Step 9: Brush and Fluff

Once your lashes are completely dry, use a clean spoolie brush to gently comb through the extensions. This restores their shape, adds volume, and prevents tangling. Always brush in upward or outward motions for a fluffy, polished look without putting stress on the adhesive.

Step 10: Repeat Regularly

Maintain your eyelash extensions by cleaning them 2–3 times a week, or daily if you wear makeup. Regular cleaning helps prevent buildup, ensures hygiene, and prolongs the lifespan of your extensions. Keep up this routine to enjoy clean, fresh, and long-lasting lashes!

Following these steps ensures your eyelash extensions remain clean, fresh, and long-lasting.

10 Common Mistakes to Avoid When Cleaning Eyelash Extensions

  1. Using Oil-Based Products
    Oil-based cleansers or makeup removers can break down the lash adhesive and cause extensions to fall out prematurely.
  2. Skipping Regular Cleaning
    Not cleaning lashes regularly can lead to dirt buildup, bacteria, and infections.
  3. Using Harsh Cleansers
    Avoid cleansers with alcohol, sulfates, or strong chemicals that can damage lashes and irritate eyes.
  4. Scrubbing or Tugging Lashes
    Rough handling can weaken the adhesive and damage both extensions and natural lashes.
  5. Applying Too Much Pressure
    Pressing too hard while cleaning can loosen extensions or cause discomfort.
  6. Neglecting the Lash Line
    Failing to clean the lash line can result in clogged follicles and irritation.
  7. Rubbing Lashes Dry
    Using rough towels or rubbing lashes to dry them can lead to breakage or lash loss.
  8. Skipping the Rinse
    Not rinsing thoroughly leaves behind residue that can irritate eyes or weaken the adhesive.
  9. Using Dirty Brushes or Tools
    Reusing unclean brushes can spread bacteria, causing potential infections.
  10. Over-Cleaning
    Excessive cleaning can weaken the adhesive, so aim for a balanced routine.

Tips on Cleaning Your Lash Extensions

DosDon’ts
Use an oil-free, lash-safe cleanser.Avoid oil-based or alcohol-containing products.
Gently brush lashes with a soft lash brush.Don’t scrub, tug, or pull your lashes
Rinse thoroughly with lukewarm water.Never use hot water as it can weaken the adhesive
Pat lashes dry with a lint-free towel.Don’t rub lashes with rough towels
Clean lashes daily or every other dayDon’t skip cleaning, as it leads to buildup
Use a clean spoolie to separate and fluff lashesDon’t use dirty or reused tools.
Focus on cleaning the lash line gently.Don’t apply too much pressure near the base
Let the lashes air dry or use a gentle fanAvoid using a hairdryer on lashes
Check cleanser ingredients for lash safety.Don’t use products with harsh chemicals
Be consistent with your cleaning routineDon’t over-clean, which can weaken the adhesive.

Conclusion

Properly cleaning your eyelash extensions is key to keeping them beautiful, long-lasting, and safe for your natural lashes. Regular cleaning removes dirt, oil, and residue, preventing infections and maintaining the adhesive’s strength. By using a gentle, oil-free cleanser and soft tools, you can easily maintain your extensions without damaging them. Remember to rinse thoroughly, dry carefully, and fluff your lashes with a spoolie to keep them neat and fresh. Establishing a consistent cleaning routine, whether daily or every other day, ensures your lashes stay healthy and flawless. Avoid common mistakes like using harsh products, rubbing, or neglecting regular care.

At Beauty Box, we offer more than just expert lash care. Enhance your beauty routine with our other premium services, including Teeth Whitening in Philadelphia for a radiant smile, Eyebrow Shaping  to frame your eyes perfectly, and Spray Tan services for a sun-kissed glow. Looking to complete your look? Our professional Makeup Services ensure you’re event-ready and flawless.

Visit our website to explore lash care essentials and tips, along with our range of beauty services, to enjoy beautiful, long-lasting results every day! Taking care of your extensions not only extends their life but also protects your eyes and natural lashes. With just a few simple steps, your lashes and overall look can always be at their best.

What’s your favorite tip for keeping your eyelash extensions clean and long-lasting?

Frequently Asked Questions About Cleaning Eyelash Extensions

Q: What Should I Do If My Extensions Start Falling Out?

Answer: If your eyelash extensions start falling out, don’t panic- some shedding is normal as part of your natural lash growth cycle. Avoid pulling at the remaining extensions to prevent damage to your natural lashes. Review your aftercare routine to ensure you’re cleaning your lashes regularly with an oil-free cleanser and avoiding products that may weaken the adhesive, such as oil-based skincare or makeup. Be gentle when touching or brushing your lashes. Schedule a fill appointment with your lash technician to restore their fullness. If excessive fallout persists, consult your technician to assess potential issues like improper application, adhesive quality, or lifestyle factors.

Q: What can happen if lashes aren’t cleaned properly?

Answer: If lashes aren’t cleaned properly, dirt and oil buildup can clog follicles, cause irritation, and lead to infections like blepharitis or conjunctivitis. Dirty lashes may attract mites, weakening natural lashes and causing extensions to fall out prematurely. Regular cleaning ensures healthy, long-lasting extensions and prevents discomfort or serious eye issues.

Q: Can I use micellar water to clean lash extensions?

Answer: Yes, you can use oil-free micellar water to clean lash extensions. Ensure it’s free of oils and harsh chemicals, as these can weaken the adhesive and cause extensions to fall out.

Q: Can I use shampoo to clean my eyelash extensions?

Answer: Yes, you can use a lash-safe, oil-free baby shampoo or a cleanser specifically designed for eyelash extensions. Dilute it with water and gently cleanse your lashes using a soft brush. Avoid regular shampoos, as they may contain oils or harsh chemicals that can damage the adhesive and cause extensions to fall out.

Q: How Often Should I Clean My Eyelash Extensions?

Are Eyelash Extensions Bad for Your Lashes? Truth Revealed

Are Eyelash Extensions Bad for Your Lashes? Truth Revealed

Are eyelash extensions bad for your lashes? This is a common question for anyone considering this popular beauty treatment. Eyelash extensions have become a popular beauty trend, offering a way to achieve fuller, longer, and more dramatic lashes without the need for mascara or false strips. But with their growing popularity, have also come concerns about their potential impact on natural lashes.

The answer isn’t simple, But it depends on several factors, including the application process, the quality of the materials used, and how well they are maintained. When applied and maintained properly, Eyelash extensions can enhance your look without causing any major damage. However, improper use, frequent use, or neglecting the health of your eyelash can lead to issues like weakening your natural eyelashes, breakage, or even allergic reactions.

In this article, we’ll analyze the potential benefits and risks of eyelash extensions, how they interact with your natural lashes, and offer expert tips for keeping your lashes healthy while enjoying them. Whether you’re considering lash extensions or simply want to learn more about their impact, this guide will help you make an informed decision tailored to your beauty needs and lash health. Let’s uncover the truth about eyelash extensions!

What Are The Risks of Getting Eyelash Extensions?

Since eyelash extensions can enhance your look, they come with potential risks that should be carefully considered. One common issue is allergic reactions to the adhesive used during the application process. These glues often contain chemicals, such as formaldehyde, which can cause irritation, redness, or swelling.

Another risk is damage to natural lashes, particularly if extensions are applied too thick or heavy, leading to breakage or premature shedding. Improper application by an inexperienced technician can also cause clumping, pulling, or uneven weight distribution.

Eye infections are another concern, as poor hygiene during application or aftercare can introduce bacteria, leading to conditions like conjunctivitis. Additionally, traction alopecia, a condition where natural lashes fall out due to prolonged tension from the extensions, can occur if extensions are overused without breaks.

Minimizing these risks involves choosing a skilled technician, using high-quality materials, and following aftercare instructions diligently.

Why Lash Extensions Don’t Ruin Your Eyelashes

Lash extensions, when applied and maintained properly, do not ruin your natural eyelashes. The key is ensuring the process is done by a licensed, experienced technician who understands how to attach extensions without stressing your natural lashes. High-quality adhesive and correctly chosen lash extensions- appropriate in weight and length are crucial to avoiding damage.

Natural lashes grow, shed, and regrow as part of a normal cycle, and lash extensions, when properly applied, simply adhere to the existing lashes without interrupting this cycle. Problems often arise when extensions are applied too thick or heavy for the natural lash to support, or when improper aftercare like tugging, rubbing, or neglecting lash hygiene occurs.

By following expert-recommended aftercare tips, such as cleaning your lashes and avoiding oil-based products, you can maintain the health of your natural lashes while enjoying the beauty and convenience of extensions. With proper care, damage is minimal to nonexistent.

Who Should Avoid Eyelash Extensions

Eyelash extensions are a beauty enhancement that many enjoy, but they aren’t suitable for everyone. Individuals with certain conditions or sensitivities should avoid lash extensions to prevent potential complications.

People with sensitive skin or allergies to adhesives or lash materials should steer clear, as the glue used can cause irritation or allergic reactions. Those prone to eye infections, such as blepharitis or conjunctivitis, may experience aggravated symptoms due to the presence of extensions.

If you have naturally weak or sparse lashes, lash extensions may not hold well and could strain your lashes further. Similarly, those with habitual eye rubbing tendencies or who frequently use oil-based products around their eyes may find extensions difficult to maintain.

Additionally, if you lead an active lifestyle involving frequent swimming, heavy sweating, or intense makeup removal routines, extensions may not last long, making them less practical. Consulting a lash technician or dermatologist is advised to determine suitability.

Are Eyelash Extensions Right for You?

Eyelash extensions are a popular beauty enhancement, but they aren’t suitable for everyone. To decide if they’re the right choice for you, it’s important to weigh their advantages and drawbacks while considering your lifestyle and lash goals. Let’s dive deeper into these factors to help you make an informed decision.

Weighing the Pros and Cons

Eyelash extensions come with several benefits, such as a fuller, more dramatic lash appearance and the convenience of skipping mascara or lash curling. They’re perfect for special occasions or enhancing everyday beauty. However, extensions also have downsides, such as the cost of upkeep, the need for regular fills, and potential risks like irritation or natural lash weakening if not properly applied or maintained. Balancing these pros and cons can help you determine if the benefits outweigh the effort and potential risks for you.

Considering Your Lifestyle and Lash Needs

Your lifestyle plays a key role in deciding if eyelash extensions are right for you. If you lead an active lifestyle involving swimming, heavy sweating, or frequent travel, extensions may require extra care to last. Additionally, consider how much time and money you’re willing to invest in maintenance. Extensions are ideal for those who want low-effort beauty, but they require regular fills and diligent aftercare. At Beauty Box Philly, we help you assess your needs and lifestyle to determine the best lash solution for you.

5 Common Mistakes That Can Ruin Your Eyelashes

1. Skipping Professional Lash Technicians

Choosing an uncertified or inexperienced lash technician is one of the most common mistakes that can ruin your eyelashes. Proper application requires precision and skill, as each extension should be attached to a single natural lash using an appropriate amount of adhesive. Untrained technicians may use incorrect methods, such as clumping extensions together or applying too much glue, which can cause strain and damage to your natural lashes.

Additionally, poor hygiene practices during application can lead to eye infections or irritation. A licensed professional not only has the training to apply extensions safely but also uses high-quality materials and follows industry-standard hygiene protocols. When selecting a lash technician, check for certifications, reviews, and portfolios to ensure they meet professional standards. Investing in a skilled technician may cost more, but it protects the health and appearance of your natural lashes in the long run.

2. Overloading with Heavy or Long Extensions

Using lash extensions that are too heavy or long for your natural lashes can cause significant damage. Natural lashes have a limited capacity to support weight, and overly thick or long extensions put unnecessary strain on the lash follicle. This strain can lead to premature shedding, breakage, or even permanent damage to the hair follicle.

A professional lash technician assesses the strength and health of your natural lashes before recommending suitable extensions. Properly chosen extensions will complement your natural lash extension  without causing harm.

Heavy extensions can also disrupt the natural lash growth cycle, leading to uneven regrowth or thinning over time. If you prefer a bold look, it’s essential to work with a technician who can safely create volume using lightweight materials. By choosing extensions that are appropriate for your natural lashes, you can achieve your desired style without compromising lash health.

3. Neglecting Lash Hygiene

Neglecting proper lash hygiene is a common mistake that can harm both your extensions and natural lashes. Dirt, oil, and makeup residue can accumulate on the lash line, creating an environment for bacteria to thrive. This buildup increases the risk of eye infections, such as blepharitis, and can weaken the adhesive bond, causing extensions to fall off prematurely.

Regular cleaning is essential to maintain healthy lashes. Use an oil-free lash cleanser specifically designed for extensions to gently remove dirt and debris. Avoid using harsh makeup removers or rubbing your eyes, as this can damage the extensions and natural lashes.

Additionally, poor hygiene can cause your natural lashes to become brittle and more prone to breakage. Maintaining a clean lash line not only extends the life of your extensions but also prevents irritation and keeps your natural lashes healthy and strong.

4. Rubbing or Pulling on Lashes

Habitually rubbing your eyes or pulling at your lashes can lead to severe damage. These actions cause unnecessary stress on your natural lashes, leading to premature shedding or breakage. Repeated pulling can even result in traction alopecia, a condition where hair stops growing due to excessive strain on the follicle.

Many people rub their eyes without realizing the impact it has on their lashes. Extensions are particularly vulnerable to this behavior, as the added weight can make the lashes more prone to pulling out when rubbed or tugged. Additionally, improperly removing lash extensions at home can strip your natural lashes, leaving them thin and weak.

To protect your lashes, be mindful of your habits and avoid touching your eyes unnecessarily. If you need to remove extensions, always seek professional assistance to minimize the risk of damage and preserve the health of your natural lashes.

5. Overusing Extensions Without Breaks

Continuously wearing lash extensions without taking breaks can weaken your natural lashes over time. While extensions enhance your appearance, they place constant weight on your lashes, which can strain the follicles. Prolonged use without recovery periods can lead to thinning, slower regrowth, and weaker natural lashes.

Taking breaks between lash extension applications allows your lashes to recover and grow back to their full strength. During these breaks, using a nourishing lash serum can help promote healthy regrow and strengthen the lashes.

Overuse of extensions can also disrupt the natural lash growth cycle, causing uneven growth or bald spots. It’s essential to work with your lash technician to schedule rest periods and ensure you’re not overloading your natural lashes. By incorporating regular breaks and prioritizing lash health, you can enjoy the beauty of extensions without compromising the long-term condition of your lashes.

How to Prevent Damage with Eyelash Extensions

Choosing a Licensed Lash Technician

Selecting a licensed and experienced lash technician is crucial to preventing damage to your natural lashes. Certified professionals are trained in proper application techniques, ensuring that extensions are applied individually without causing strain or clumping. They also use high-quality adhesives and materials designed to minimize irritation and allergic reactions. Additionally, a licensed technician follows strict hygiene standards, reducing the risk of infections. Always check for certifications, reviews, and a portfolio of the technician’s work to ensure they meet industry standards. Taking the time to find a skilled professional can prevent common issues like lash breakage, discomfort, or long-term damage.

Tips for Proper Lash Extension Aftercare

Proper aftercare is essential to maintaining both your lash extensions and the health of your natural lashes. Clean your lashes daily using an oil-free cleanser to remove dirt, oil, and bacteria. Avoid rubbing your eyes or pulling at your extensions, as this can lead to premature shedding or damage. Use only water-based or extension-safe makeup and removers to prevent weakening the adhesive. Sleeping on your back is also recommended to avoid crushing your lashes. By following these aftercare tips, you can extend the life of your extensions while keeping your natural lashes strong and healthy.

Avoiding Overuse of Extensions

Wearing eyelash extensions continuously without breaks can weaken your natural lashes over time. Extensions add weight to your lashes, and prolonged use can strain the follicles, leading to thinning or slower regrowth. To prevent overuse, schedule regular breaks between applications to allow your natural lashes to recover. During these rest periods, apply a nourishing lash serum to promote regrowth and strengthen your lashes. Opt for lightweight extensions that minimize stress on your natural lashes. By balancing extension use with proper recovery time, you can maintain the health of your lashes while enjoying their beauty.

Picking the Right Lashes- Thickness

Choosing the correct thickness for your lash extensions is essential for preventing damage. Extensions that are too thick or heavy can put excessive strain on your natural lashes, leading to breakage or premature shedding. A professional lash technician will assess the health and strength of your natural lashes before recommending a suitable thickness. For most individuals, lightweight extensions are ideal, as they provide volume and length without compromising lash integrity. Ensuring that the thickness matches the capacity of your natural lashes helps maintain their health and reduces the risk of long-term damage.

Picking the Right Lashes- Length

Lash extensions that are too long can act as levers, putting undue stress on your natural lashes and weakening their roots. To prevent this, it’s essential to select extensions that are proportionate to your natural lash length. A general rule is to select extensions that are no more than 2-3 mm longer than your natural lashes. This ensures a dramatic yet safe look that doesn’t compromise the health of your lashes. A skilled technician will assess your lash type and recommend a suitable length, ensuring you achieve your desired style while protecting your natural lashes.

Avoid Stickies

Stickies occur when multiple natural lashes are glued together with a single extension, causing discomfort, pulling, and potential lash loss. This issue arises from improper application techniques and can lead to long-term damage if not addressed. A trained technician will ensure proper isolation during application, separating each lash to prevent stickies. It’s important to inspect your lashes after the procedure to ensure they are correctly applied. Avoiding stickies allows your natural lashes to grow and shed freely without unnecessary strain, ensuring the long-term health of your lashes and the comfort of your extensions.

Which Should You Choose?

When it comes to enhancing your lashes, there are multiple options to choose from. Eyelash extensions, mascara, lash serums, and false lashes all have unique benefits and drawbacks. Deciding which option is right for you depends on your lifestyle, budget, and desired look. Let’s compare these popular choices to help you make an informed decision.

Eyelash Extensions vs. Mascara

Eyelash extensions provide a semi-permanent solution for achieving longer, fuller lashes without the daily hassle of applying mascara. Extensions save time, are waterproof, and eliminate smudging. On the other hand, mascara is more affordable, requires no commitment, and allows for easy experimentation with different looks. If you prioritize convenience and a dramatic, long-lasting effect, extensions are ideal. However, if you enjoy versatility and a lower cost, mascara might be the better choice.

Eyelash Extensions vs Lash Serums

Lash serums enhance the growth and strength of your natural lashes over time, offering a natural solution to improve lash health. However, results take weeks to show and vary by individual. Eyelash extensions, by contrast, provide instant volume and length, making them a great option for immediate results. If you prefer a non-invasive approach and are patient with results, lash serums are worth exploring. For instant transformation, extensions are the way to go. BeautyBoxus offers expert advice on combining both for the best outcomes.

Eyelash Extensions vs. False Lashes

False lashes are a quick, temporary way to enhance your look, making them perfect for one-time events. They come in a variety of styles and are more affordable than extensions. However, they can be time-consuming to apply and may cause irritation if adhesive isn’t applied properly. Extensions, on the other hand, offer a semi-permanent solution with a more natural feel and require less daily effort. For a long-term, hassle-free option, eyelash extensions are superior. 

Tips for Healthy Lashes with Extensions

  1. Clean Your Lashes Regularly
    Use a gentle, oil-free lash cleanser to remove dirt, oils, and debris from your lashes daily. Keeping your lash line clean prevents bacteria buildup, which can lead to infections or irritation.
  2. Avoid Rubbing or Pulling on Lashes
    Refrain from touching, rubbing, or pulling at your lash extensions. These actions can cause premature shedding of extensions and weaken your natural lashes over time.
  3. Choose Lightweight Extensions
    Opt for extensions that are appropriate in length and thickness for your natural lashes. Heavy extensions can strain your lash follicles, leading to breakage or thinning.
  4. Take Breaks Between Applications
    Give your natural lashes time to recover by taking breaks from extensions every few months. Using a nourishing lash serum during rest periods can promote regrowth and maintain lash health.
  5. Sleep on Your Back
    Avoid sleeping face-down or on your side, as this can crush your extensions and damage your natural lashes. Consider using a silk pillowcase to minimize friction and maintain lash longevity.

Conclusion

Do you think eyelash extensions are bad for your lashes? Eyelash extensions can be a game-changer for enhancing your beauty routine, offering a fuller, more dramatic look without daily mascara. While some concerns exist about their impact on natural lashes, damage is typically the result of improper application, poor aftercare, or overuse. With proper techniques, high-quality materials, and diligent aftercare, extensions can be worn safely and without harming your natural lashes.

At Beauty Box Philly, we prioritize the health of your natural lashes while delivering stunning, customized extensions. Our licensed professionals use safe, high-quality products and techniques to ensure your lash experience is both beautiful and worry-free. We also educate our clients on aftercare and maintenance to keep their lashes healthy and long-lasting.Curious about whether eyelash extensions are right for you? Visit beautyboxus.com to learn more or book a consultation today! What’s your biggest concern about getting eyelash extensions?

How Long Does Eyebrow Tinting Last and How to Prolong It

How Long Does Eyebrow Tinting Last and How to Prolong It

Are you interested about how long does eyebrow tinting last? Typically, it stays vibrant for 3 to 6 weeks, depending on factors like skin type, hair growth, and maintenance. Oily skin or frequent exposure to water can shorten its duration, while proper care extends the results. Avoid exfoliation, sun exposure, and oil-based products near your brows. Regular touch-ups every 4 to 6 weeks keep them looking bold and well-defined.

Eyebrow tinting costs range from $20 to $40 per session, with additional services like waxing raising the total to around $75. Combining tinting with eyebrow lamination can cost $80 to $130. Results last 3 to 8 weeks, depending on skin type, sun exposure, and care. Always opt for a licensed professional to ensure safety and quality.

Perfect for those seeking low-maintenance beauty, eyebrow tinting saves time while enhancing your natural look. 

At Beauty Box, we specialize in long-lasting, natural-looking tints tailored to your needs. With proper aftercare, you can enjoy bold, defined brows without daily effort. Check out our services to get the perfect brows!

Learn expert tips on how long does eyebrow tinting last and prolong with maintaining flawless brows effortlessly!

What Is Eyebrow Tinting?

Eyebrow tinting is a cosmetic procedure that enhances the visual appearance of your eyebrows through the application of a semi-permanent dye. This treatment is particularly beneficial for individuals with light-colored, sparse, or patchy eyebrows, but it is widely used by anyone seeking more defined and fuller-looking brows.

The process involves a careful application of safe, specially formulated dyes intended for use on facial hair. A professional beautician first cleans the eyebrow area to remove oils and makeup, ensuring the dye adheres properly. The dye is then applied to match or deepen the natural color of the brows, filling in lighter areas to create an even, cohesive look. The application typically takes about 10 to 15 minutes, during which the dye sets into the hairs.

The results of eyebrow tinting are immediate and can last between three to six weeks, depending on hair growth and care routines. Tinted eyebrows require little to no daily maintenance, which makes this treatment a convenient option for enhancing facial features. It eliminates the need for daily eyebrow makeup, offering a natural-looking enhancement that accentuates the eyes and improves overall facial symmetry.

Difference Between Brow Tint and Brow Lamination

FeatureBrow TintBrow Lamination
DefinitionSemi-permanent dye applied to enhance color.Chemical treatment to lift and shape brow hairs.
PurposeAdds color for a fuller, darker look.Tames and reshapes brows for a polished look.
LongevityLasts 3–6 weeks.Lasts 6–8 weeks.
EffectDarkens brow hairs and may stain the skin.Creates a lifted, sleek, and uniform appearance.
Time for Procedure15–20 minutes.30–45 minutes.

Why People Choose to Tint?

People select to tint their eyebrows for a fuller, more defined look without the need for daily makeup. Eyebrow tinting enhances the natural shape and color of the brows, making them appear thicker and more polished. It’s a time-saving solution for busy individuals and a great option for those with light, sparse, or uneven brows. Tinting offers a temporary but noticeable transformation, typically lasting 3–6 weeks. It’s a cost-effective and non-invasive way to frame the face, boosting confidence and simplifying beauty routines. This quick procedure is popular for its convenience and ability to create a polished, natural appearance.

Pros and Cons of Eyebrow Tinting

Pros

  1. Enhanced Definition: Tinting gives your brows a fuller, more defined look without the need for makeup.
  2. Time-Saving: Reduces daily makeup routines, as brows stay perfectly tinted for weeks.
  3. Customizable Shades: The tint can be tailored to match your hair color and style preferences.
  4. Natural Look: Provides a polished, natural appearance by darkening lighter or sparse hairs.
  5. Temporary Commitment: Lasts 3–6 weeks, making it a non-permanent solution for eyebrow enhancement.
  6. Cost-Effective: Offers a budget-friendly alternative to more permanent options like microblading.
  7. Boosts Confidence: Well-defined brows frame the face, enhancing overall facial features.
  8. Enhanced Appearance: Creates fuller, more defined brows.
  9. Quick Procedure: Takes only 15–20 minutes for noticeable results.

Cons

  1. Temporary Results: Requires regular touch-ups every 4–6 weeks.
  2. Potential Allergic Reactions: Dye may irritate sensitive skin or cause allergies.
  3. Fading Issues: Sun exposure, water, or skincare products can fade the tint quickly.
  4. Limited Effectiveness for Sparse Brows: May not fill in gaps as well as microblading.
  5. DIY Risks: At-home tinting can result in uneven application or skin staining..

Eyebrow Tint Before and After

Before eyebrow tinting, brows may appear light, sparse, or uneven. After tinting, they become fuller, darker, and more defined, enhancing facial features and lasting for 3–6 weeks with proper care.

How Long Does Eyebrow Tinting Typically Last?

Eyebrow tinting usually lasts between 3 to 6 weeks, depending on a few factors. The dye gradually fades as your eyebrow hairs grow out or shed naturally. Your skin type also plays a role – oily skin can cause the tint to fade faster. Frequent washing of your face or exposure to sunlight can shorten its lifespan as well. Proper aftercare, like avoiding harsh cleansers and using gentle products, can help your tint last longer. On average, most people notice the color staying vibrant for the first couple of weeks before it starts to fade, requiring touch-ups to maintain the look.

Factors That Affect Eyebrow Tint Longevity

If you pair eyebrow tinting with a brow lamination, the results may last a bit longer. However, the duration can vary for each individual. Let’s explore the key factors that influence how long does eyebrow tinting last.

Dye Type 

The type of dye used significantly affects how long does eyebrow tinting last. Vegetable-based dyes are natural and gentle, making them ideal for sensitive skin, but they typically last only 2–4 weeks. On the other hand, chemical-based dyes are more durable, offering a longer-lasting effect of 4–6 weeks. These penetrate deeper into the hair shaft, providing a richer color. The selection of dye also depends on individual preferences, skin type, and hair texture. Those seeking a natural look with minimal risk may opt for vegetable dyes, while chemical-based options are preferred for their longevity and vibrant results.

Skin Type

lose-up view of a woman's beautifully tinted eyebrows, showcasing enhanced depth and definition.Tag: eyebrow tinting, eyebrow shaping and tinting, Beauty Service.

Skin type affects how long an eyebrow tint lasts. Oily skin causes the tint to fade faster because natural oils break down the dye, usually lasting about 2–3 weeks. Dry or normal skin holds the tint longer, often up to 4–6 weeks, as there’s less oil to interfere. For sensitive skin, it’s important to use gentle, hypoallergenic dyes to avoid irritation, and a patch test is highly recommended. If you have combination skin, the tint may last differently on oily and dry areas. Knowing your skin type helps you select the right tint and ensures better, longer-lasting results.

Eyebrow Hair Type

Eyebrow hair type plays a big role in how long tinting lasts and how it looks. Thick or coarse eyebrow hairs tend to hold tint better and longer because they absorb the dye more effectively. The color appears richer and can last up to 4–6 weeks. In contrast, fine or thin eyebrow hairs may not absorb the tint as deeply, so the color might fade faster, usually within 2–4 weeks. The natural color of your eyebrows also matters; lighter brows may require more frequent touch-ups to keep the tint noticeable. Additionally, if your brow hairs are sparse, the tint might stain the skin beneath for a fuller look, but this effect fades faster than on the hair itself.

Sun Exposure

Sun exposure can cause eyebrow tints to fade faster. UV rays break down the dye pigments, reducing their longevity. Frequent outdoor activities or prolonged sun exposure can lighten the tint within weeks. To protect your brows, wear a hat or use sunscreen on the area around your brows, ensuring it’s non-oily to avoid interfering with the tint.

Hair Texture

Hair texture affects how long eyebrow tints last. Thicker, coarser hairs hold the tint better, making the color last longer and look richer, often up to 4–6 weeks. Finer or thinner hairs absorb less dye, so the tint may fade faster, typically within 2–4 weeks. Knowing your hair texture helps in setting realistic expectations for tint longevity.

Aftercare Practices

Proper aftercare is key to making eyebrow tints last longer. Avoid washing your brows for 24 hours after tinting to let the dye set fully. Use gentle, oil-free cleansers around the area, as oil-based products can fade the tint faster. Avoid rubbing or scrubbing your brows, and limit exposure to sun, chlorine, or excessive sweating. Following these practices can help maintain vibrant, long-lasting tinted brows for up to 4–6 weeks.

Application Technique

The application technique greatly affects the quality and longevity of an eyebrow tint. Properly cleaning the brows before applying the tint ensures better adhesion by removing oils and residue. The tint should be applied evenly, covering all hairs for consistent color. Allowing the tint to process for the recommended time helps achieve a deeper, longer-lasting shade. Finally, carefully removing the tint without rubbing ensures the results are intact. A skilled application can enhance both durability and appearance.

Average Duration of Brow Tint

Brow tints typically last 3–6 weeks, depending on dye type, skin type, and care. Chemical-based tints last longer than vegetable-based ones. Proper aftercare, like avoiding oils and sun exposure, helps extend the tint’s vibrancy and longevity.

For longer-lasting results, consider microblading, also known as permanent eyebrow makeup. This technique creates natural, semi-permanent brows that can last up to two years with proper care. It’s an ideal option for those seeking low-maintenance, defined eyebrows without the need for frequent tinting or touch-ups, offering a polished look over an extended period.

Do’s and Don’ts After Eyebrow Tinting

Do’sDon’ts
Keep brows dry for 24 hours.Avoid washing or scrubbing brows.
Use gentle, oil-free cleansers.Don’t use oil-based products.
Apply sunscreen to protect tint.Avoid excessive sun exposure.
Brush brows gently to shape them.Don’t rub or touch brows excessively.
Schedule touch-ups every 4–6 weeks.Avoid chlorine or saltwater pools.
Follow your technician’s advice.Don’t exfoliate or use harsh products.
Use a hydrating brow gel to maintain the tint.Don’t pick or scratch at your brows.
Apply sunscreen around the brows.Avoid excessive sun exposure or tanning beds.

Which Eyebrow Tint Lasts The Longest?

The longest-lasting eyebrow tint is chemical-based tint, which can last 4–6 weeks. It penetrates the hair shaft deeply, making it more durable. Henna tints also last long, with color staying on hair for 2–4 weeks and staining the skin for about 1–2 weeks for a fuller look. Vegetable-based tints are gentler but fade faster, lasting around 2–3 weeks. Proper aftercare helps extend the lifespan of any eyebrow tint.

Final Thoughts

In conclusion, eyebrow tinting is an excellent choice for achieving beautifully defined, fuller-looking brows without the need for daily makeup. With proper care, the tint can last between 3–6 weeks, influenced by factors like your skin type, hair growth cycle, and aftercare practices. Using high-quality dye and following tips like avoiding oils, excessive sun exposure, and water contact can help extend the tint’s longevity. While eyebrow tinting is generally safe, a patch test is crucial to ensure compatibility with your skin.

If you’re considering a semi-permanent solution to enhance your brows, tinting is quick, affordable, and non-invasive. For a professional, long-lasting eyebrow tinting experience, visit Beauty Box today. 

If you’re seeking even more permanent results, microblading is also a great option to explore.

Have you tried eyebrow tinting before, or are you considering it for your beauty routine?

Frequently Asked Questions About Eyebrow Tinting

Q: Can I Tint My Eyebrows at Home?

Answer: Yes, you can tint your eyebrows at home using an eyebrow tinting kit designed for safe, at-home use. Follow the instructions carefully, perform a patch test to avoid allergic reactions, and clean your brows before application. Use a precise applicator to apply the tint evenly, and wipe off excess immediately. While it’s cost-effective and convenient, beginners may prefer professional tinting to ensure even and safe results.

Q: How Often Can I Re-tint My Eyebrows?

Answer: You can re-tint your eyebrows every 4–6 weeks, depending on how quickly the tint fades and your hair growth cycle. As the tinted hairs shed and new ones grow in, the color may lighten, requiring a touch-up. Avoid re-tinting too often, as overexposure to dye can irritate the skin and weaken brow hairs. Following this schedule helps maintain vibrant, healthy, and evenly tinted brows.

Q: Is Eyebrow Tinting Safe for Everyone?

Answer: Eyebrow tinting is generally safe but not suitable for everyone. A patch test is essential 24–48 hours before tinting to check for allergic reactions. Those with sensitive skin, eczema, psoriasis, or open wounds around the brows should avoid tinting to prevent irritation. Pregnant individuals should consult a doctor due to possible reactions to chemicals. People with allergies to hair dyes or ingredients like PPD (paraphenylenediamine) should avoid the procedure. Additionally, individuals prone to eye infections or those wearing contact lenses during tinting should take extra precautions. For the safest results, seek professional services and disclose any skin or health concerns beforehand.

Q: What skincare can I use after eyebrow tinting?

Answer: After eyebrow tinting, use oil-free cleansers to gently clean your face without fading the tint. Apply a water-based moisturizer to keep the skin hydrated, and protect your brows with a non-oily sunscreen. Avoid oil-based products, exfoliants, or retinol near your brows, as they can break down the dye. Stick to gentle, non-irritating skin care to preserve the tint and keep your eyebrows looking vibrant for longer.

Q: Can You Get Eyebrow Tint When Pregnant?

Answer: Yes, you can get eyebrow tinting when pregnant, but precautions are essential. Pregnancy can make skin more sensitive, increasing the risk of irritation or allergic reactions. Perform a patch test at least 24–48 hours before the procedure, even if you’ve tinted before. Opt for gentle, vegetable-based tints free from harsh chemicals like ammonia or PPD. Avoid tinting during the first trimester as a precaution. Always consult your doctor or a professional technician for personalized advice to ensure safety for both you and your baby.

Top Twelve Reasons Why Are Eyelash Extensions Worth It?

Why Are Eyelash Extensions Worth It

Are Eyelash Extensions Worth It? Yes, these are a great option if you want longer, fuller lashes without using mascara every day. Eyelash extensions save you time by giving you a ready-to-go look as soon as you wake up. They can boost your confidence, enhance your natural beauty, and are perfect for special occasions or daily wear. However, they require some maintenance, like avoiding oil-based products and getting regular touch-ups. If you value convenience and love the look of bold, fluttery lashes, eyelash extensions can be a worthwhile investment that makes your beauty routine much easier and more enjoyable.

At Beauty Boxus, You can explore high-quality eyelash extension services starting at just $120, with regular refills averaging around $60-$80. While they do require maintenance, like avoiding oil-based products and gentle cleaning, the convenience and stunning results make them worth the investment. Proper care can help extensions last up to 3 weeks, giving you long-lasting glamor.

How Do You Sleep With Eyelash Extensions?

Sleeping with eyelash extensions requires special care to keep them looking fresh and lasting longer. Here are some essential tips for sleeping with your extensions:

First, try to sleep on your back. This position minimizes contact between your lashes and the pillow, reducing the risk of crushing or twisting the extensions. If you’re used to sleeping on your side or stomach, it may take some adjustment, but it’s worth it for the health of your lashes.

Switching to a silk or satin pillowcase can also make a big difference. These materials are much gentler than cotton and help reduce friction that can cause your extensions to snag or shed prematurely. A satin pillowcase also benefits your hair and skin, making it a great all-around beauty investment.

Can You Shower With Fake Eyelashes On?

Yes, you can shower with fake eyelashes on, but you need to be cautious to avoid damaging them. For strip lashes, it’s best to remove them before showering since water and steam can loosen the adhesive, causing eyelash extensions worth it to peel off. If you’re wearing eyelash extensions, they are designed to withstand water to a certain extent, but you should avoid direct contact with water within the first 24-48 hours after application to allow the adhesive to fully set.

When showering with eyelash extensions, avoid high-pressure water streams hitting your lashes directly. Use a gentle stream and keep your face away from the showerhead. Additionally, avoid using oil-based cleansers or makeup removers, as they can weaken the adhesive bond. After showering, gently pat your lashes dry with a soft towel and avoid rubbing them. Proper care ensures your lashes last longer and maintain their beautiful appearance.

What Are The Pros and Cons of Eyelash Extensions?

Pros of Eyelash Extensions

  1. Enhanced Natural Beauty: Eyelash extensions make your eyes look bigger, brighter, and more defined, enhancing your natural features.
  2. Saves Time: No need for mascara, lash curling, or strip lashes—extensions simplify your daily beauty routine.
  3. Customizable Look: Choose the length, curl, and thickness that best suits your style, from natural to dramatic.
  4. Long-Lasting Results: Extensions last 2-4 weeks with proper care, providing a semi-permanent beauty solution.
  5. Wake-Up Ready: You’ll wake up every morning with polished, voluminous lashes, eliminating the need for makeup.
  6. Perfect for Special Occasions: Ideal for weddings, vacations, and events where long-lasting glamor is needed.
  7. Smudge-Free: Say goodbye to mascara mishaps, clumps, or running makeup.

Cons of Eyelash Extensions

  1. Cost: The initial application can cost $100-$300, with regular refills adding ongoing expenses.
  2. Maintenance: Requires regular fills every 2-3 weeks and proper aftercare to maintain their appearance.
  3. Potential Damage: Improper application or overuse can damage natural lashes.
  4. Time-Consuming Application: Initial application can take 1-2 hours, and refills require additional appointments.
  5. Sensitivity Issues: Some people may experience irritation or allergic reactions to the adhesive or lash materials.
  6. Lifestyle Adjustments: You need to avoid oil-based products, rubbing your eyes, and certain activities like saunas.

12 Reasons Why Eyelash Extensions Are Worth It

Here, Twelve reasons why eyelash extensions are worth it, enhancing beauty, saving time, and boosting confidence effortlessly.

1. Instant Volume and Length

Eyelash extensions are a game-changer when it comes to achieving fuller, longer lashes. Unlike traditional methods like mascara or false lashes, extensions provide instant results without extra effort. Each extension is applied directly to your natural lashes, creating a seamless and natural appearance. Whether you prefer a subtle enhancement or a bold, dramatic look, eyelash extensions can be customized to suit your style. They offer a significant transformation, making your eyes look more prominent and expressive. This added volume and length save time and hassle, allowing you to skip steps in your daily makeup routine. For those with sparse or short natural lashes, extensions provide a confidence boost and a long-lasting solution. The result is not only beautiful but also highly convenient, making eyelash extensions worth the investment.

2. Wake-Up-Ready Beauty

With eyelash extensions, you wake up every morning with perfect lashes, eliminating the need for mascara or lash curlers. This feature is especially beneficial for those with busy schedules or who value a streamlined morning routine. Imagine rolling out of bed and already looking polished and put-together it’s the ultimate time-saver. Extensions enhance your eyes naturally, so you look bright-eyed and refreshed even without additional makeup. This convenience is perfect for anyone who wants to simplify their beauty routine while maintaining a glamorous appearance. For frequent travelers or early risers, the wake-up-ready look provided by extensions is unbeatable. By investing in eyelash extensions, you save time, effort, and the stress of getting your lashes just right each morning.

3. Save Time on Your Routine

Eyelash extensions drastically reduce the time spent on your daily beauty routine. No more fumbling with mascara, eyeliner, or lash curlers every morning. With extensions, your lashes are already perfectly styled, cutting down preparation time and allowing you to focus on other aspects of your routine—or enjoy a few extra minutes of sleep. Over weeks or months, these small time savings add up, making extensions a highly efficient beauty solution. For professionals, students, or parents juggling multiple responsibilities, this convenience is invaluable. The streamlined routine also reduces stress, as you no longer have to worry about smudged mascara or uneven lashes throughout the day.

4. Long-Lasting Results

Eyelash extensions offer semi-permanent results that last up to 2-4 weeks, depending on the growth cycle of your natural lashes and how well you maintain them. This durability makes them a great alternative to daily makeup or strip lashes, which only provide temporary enhancement. Regular maintenance appointments, often called “fills,” can extend the life of your extensions indefinitely, ensuring your lashes always look flawless. This long-lasting feature saves you time, effort, and money in the long run, as you don’t need to buy or apply other lash products. The convenience of waking up every day with perfect lashes that last for weeks is one of the main reasons eyelash extensions are considered worth the investment.

5. Customizable Styles

Eyelash extensions are highly versatile, allowing you to customize your look to match your personality, preferences, or occasion. From natural-looking enhancements to bold, dramatic effects, there’s a lash style for everyone. Extensions come in various lengths, curls, and thicknesses, enabling your technician to tailor the application to your unique eye shape and desired outcome. Whether you’re looking for subtle volume for everyday wear or a striking effect for a special event, extensions can achieve the look you want. This level of personalization ensures that your lashes not only enhance your eyes but also complement your overall appearance, making them a valuable beauty addition.

6. No More Smudging

One of the most frustrating aspects of using mascara is dealing with smudging, clumping, or flaking throughout the day. Whether it’s caused by sweat, tears, or humidity, mascara can quickly ruin your look. Eyelash extensions eliminate this problem entirely, as they don’t require mascara to enhance your lashes. Extensions maintain their perfect appearance regardless of the conditions, making them a reliable option for all-day beauty. You no longer have to worry about reapplying or touching up your lashes, even during long days or active moments. This smudge-free convenience is a major reason why many find eyelash extensions worth the investment, especially for those who lead busy or outdoor lifestyles.

7. Enhance Your Natural Beauty

Eyelash extensions enhance your natural beauty by framing your eyes and making them appear larger and more expressive. Unlike heavy makeup, extensions provide a subtle yet striking enhancement that looks polished without appearing overdone. They work harmoniously with your features, ensuring a balanced and flattering look. For those who prefer a minimalist approach to beauty, extensions allow you to skip eyeliner or mascara while still looking radiant and put-together. This natural enhancement boosts your confidence and ensures you feel your best in any setting, from casual outings to professional environments. The way extensions amplify your natural beauty makes them a popular choice for individuals seeking effortless glamor.

8. Perfect for Special Occasions

Whether it’s a wedding, vacation, or special event, eyelash extensions provide a reliable and glamorous solution for looking your best. They save time and effort on makeup application, ensuring your lashes stay flawless throughout the event. Extensions are especially useful for occasions where you’ll be photographed, as they enhance your eyes beautifully without the need for touch-ups. Their long-lasting nature also makes them ideal for multi-day events or trips, allowing you to look polished and photo-ready at all times. With eyelash extensions, you can focus on enjoying the moment rather than worrying about your makeup, making them a worthwhile choice for any special occasion.

9. Boosts Confidence

There’s something undeniably empowering about having long, voluminous lashes that draw attention to your eyes. Eyelash extensions can give you a significant confidence boost by enhancing your natural features and making you feel more attractive. They provide a polished, put-together appearance that’s hard to achieve with other lash-enhancing products. Whether you’re at work, socializing, or relaxing at home, knowing your lashes look great can improve your mood and self-esteem. This added confidence is priceless and a key reason why many people consider eyelash extensions a worthwhile investment. The positive impact they have on how you feel about yourself is as valuable as the aesthetic benefits.

10. Low Maintenance

Once applied, eyelash extensions require minimal maintenance compared to daily lash care routines. You won’t need to worry about applying mascara, using lash curlers, or removing makeup from your lashes each night. Basic aftercare, like avoiding oil-based products and cleaning them gently, is all that’s needed to keep them in great condition. Regular refills every 2-3 weeks ensure they stay full and fresh. Their low-maintenance nature is particularly appealing to those with busy schedules or who want a beauty solution that doesn’t require constant upkeep. With eyelash extensions, you enjoy consistent results with minimal effort, making them a practical and time-saving choice.

11. Safe for Active Lifestyles

Eyelash extensions are perfect for people with active lifestyles. Whether you’re hitting the gym, swimming, or practicing yoga, extensions stay intact and maintain their beauty. Unlike mascara, which can run or smudge during physical activity, extensions are durable and water-resistant. This makes them ideal for people who want to look great even during intense workouts or while enjoying outdoor adventures. Their ability to withstand sweat, humidity, and water ensures you can maintain your active routine without compromising your appearance. Extensions allow you to feel confident and stylish, no matter how busy or active your lifestyle is.

12. Long-Term Value

Although the initial cost of eyelash extensions might seem high, they offer excellent long-term value. By eliminating the need for mascara, lash curlers, and false lashes, extensions reduce your beauty expenses over time. Regular refills are more affordable than constantly purchasing lash-enhancing products, making them a cost-effective choice. The convenience and durability of extensions also save time, which is invaluable in today’s busy world. For those who prioritize looking their best with minimal effort, the consistent and long-lasting results of eyelash extensions justify the investment. Over time, you’ll find that the benefits far outweigh the costs, making them a worthwhile beauty solution.

Final Thoughts

Eyelash extensions are more than just a beauty trend- they’re a lifestyle upgrade that offers convenience, confidence, and a stunning look every day. Whether you’re tired of the daily mascara routine, want to simplify your beauty regimen, or are preparing for a special event, eyelash extensions provide a customizable solution that enhances your natural beauty. From instant volume and length to long-lasting results, the benefits of extensions make them a worthwhile investment for anyone seeking effortless glamor. They’re perfect for busy professionals, moms, and anyone who values looking polished without spending hours in front of the mirror.Properly applied eyelash extensions save time, eliminate mascara smudging, and suit active lifestyles, making them an excellent choice for all occasions. At Beauty Boxus, we take pride in offering high-quality, professionally applied eyelash extensions tailored to your unique needs. Our experienced technicians ensure your lashes are safe, beautiful, and long-lasting.

How to Laminate Eyebrows: 10 Secrets Tips and Techniques

How to Laminate Eyebrows: 10 Secrets Tips and Techniques

How to Laminate Eyebrows: 10 Secrets Tips and Techniques

Do you want to know how to laminate eyebrows at home? Eyebrow lamination is a popular beauty treatment that helps achieve fuller, smoother, and more defined brows.  To laminate your eyebrows, you’ll need a eyebrow lamination kit, which typically includes a perm solution, setting lotion, and nourishing oil. Start by cleansing your brows to remove any oils or makeup. Apply the perm solution to the brow hairs, comb them into place, and let it set for the recommended time. Follow with the setting lotion to lock the shape in place. Finally, apply the nourishing oil to hydrate and finish the look. The result is sleek, long-lasting brows.

Here’s a quick rundown of the 10 essential steps to master eyebrow lamination at home:

  • Step-1: Cleanse Your Brows
  • Step-2: Protect Your Skin 
  • Step-3: Brush Your Brows 
  • Step-4: Apply the Perming Solution
  • Step-5: Cover with Plastic Wrap 
  • Step-6: Remove the Perming Solution 
  • Step-7: Apply the Setting Lotion
  • Step-8: Remove the Setting Lotion 
  • Step-9: Nourish the Brows 
  • Step-10: Final Touches 

The average price range for eyebrow lamination varies depending on whether you choose professional services or opt for a DIY approach. Professional treatments typically cost between $100 and $150 per session, depending on the salon’s location and reputation. For a more budget-friendly option, at-home eyebrow lamination kits are available for $50 to $100, offering a convenient way to achieve similar results. 

At Beauty Box, we offer expert eyebrow lamination services for long-lasting, perfectly styled brows. Whether you want to tame unruly hairs or create a fuller look, lamination is a quick, non-invasive solution to elevate your beauty routine.

What Is Eyebrow Lamination?

Eyebrow lamination is a cosmetic procedure that enhances the natural shape and thickness of your brows by setting the hairs into place, often achieving the trendy brushed-up effect.

Difference Between Professional Services and DIY Kits

Aspect

Professional Services

DIY Kits

Cost

$100–$150 per session

$50–$100 per kit

Expertise Required

None- handled by trained professionals

Requires basic knowledge and careful application

Convenience

Requires booking an appointment

Can be done at home anytime

Precision

High- tailored to your brow shape

Varies- depends on your skill level

Safety

Low risk with professional handling

Risk of irritation or errors if instructions aren’t followed

Customization

Customized based on your face structure

Limited customization depending on your kit

Time Commitment

1- 2 Hours per session

1–3 hours depending on experience

Longevity of Results

4–6 weeks

4–6 weeks

Tools and Products

Professional-grade solutions and tools

Comes with the kit, often more basic

Ideal For

First-timers, special occasions, and precision

Budget-conscious users and regular maintenance

Key Takeaways

  • Choose Professional Services if you’re new to eyebrow lamination, need precise results, or want a hassle-free experience.
  • Opt for DIY Kits if you’re comfortable following instructions and want a cost-effective option for regular upkeep.

Both options can deliver excellent results with proper care and application!

Why Laminate Your Eyebrows?

Eyebrow lamination is a game-changing beauty treatment that offers numerous benefits for enhancing your natural brows. Whether you’re dealing with sparse areas, unruly hairs, or simply want a more defined look, lamination can help. Here’s why you might consider laminating your eyebrows:

  1. Achieve Fuller, Thicker Brows
    Eyebrow lamination lifts and smooths brow hairs, creating the illusion of fuller, thicker brows. It’s perfect for filling in sparse areas without the need for makeup.
  2. Tame and Reshape Brow Hairs
    If your brow hairs grow in different directions or are hard to manage, lamination helps align them for a sleek, polished look.
  3. Low Maintenance, Long-Lasting Results
    With results lasting 4–6 weeks, eyebrow lamination offers a low-maintenance solution for keeping your brows in place, saving you time in your daily routine.
  4. Enhance Natural Features
    Laminated brows emphasize your natural shape, highlighting your face’s structure and creating a balanced, symmetrical appearance.
  5. Stay on Trend
    Get the trendy brushed-up look seen on celebrities and influencers, giving your brows a bold, modern edge with minimal effort.

Eyebrow lamination is an excellent option for anyone looking to elevate their brow game and enjoy long-lasting, effortless beauty.

Tools and Products Needed

Here’s a list of essential tools and products required to laminate your eyebrows effectively:

Tool/Product

Purpose

Eyebrow Lamination Kit

Includes perm solution, fixing solution, and nourishing serum for reshaping and setting brows.

Gentle Cleanser

Used to clean the eyebrow area, removing oils and makeup before starting the process.

Disposable Spoolie

A mascara wand for brushing and shaping brow hairs into the desired position.

Cotton Pads/Swabs

For applying and removing solutions with precision and care.

Plastic Wrap (Cling Film)

For applying and removing solutions with precision and care.

Applicator Brushes

Provided in some kits or used for evenly applying solutions to the brows.

Petroleum Jelly (Optional)

Protects the skin around the brows from irritation caused by solutions.

Small Timer

Ensures you follow the recommended processing times for the solutions.

Brow Scissors (Optional)

Used to trim long brow hairs before starting for a neater finish

Brow Oil/Serum

Keeps brows hydrated and healthy post-lamination.

Optional Additions

  • Tweezers: For cleaning up stray hairs around the brow area after lamination.
  • Eyebrow Gel: To maintain the laminated look daily, if needed.

Having these tools and products on hand ensures a smooth, effective lamination process, whether done at home or by a professional.

Step-by-Step Guide to Laminating Eyebrows

Eyebrow lamination is a fantastic way to achieve sleek, lifted, and perfectly groomed brows without the need for daily maintenance. This guide provides detailed, easy-to-follow instructions so you can confidently laminate your eyebrows. Let’s dive into each step and ensure you get the best results!

Step-1: Cleanse Your Brows

The first step in eyebrow lamination is thoroughly cleansing your brows. Use a gentle, oil-free facial cleanser and lukewarm water to remove all makeup, dirt, and oils from your face, especially around the brow area. This step is critical because any residue can prevent the lamination solutions from adhering properly to the hair.

Pat your skin and brows dry with a clean, lint-free towel. Avoid rubbing, as it can cause irritation or accidentally tug on brow hairs. Clean brows ensure a smooth application and optimal results.

Tip: If your skin is oily, use a toner after cleansing to remove any extra oil from the brow area.

Next, we’ll prepare the skin to ensure it’s protected during the process.

2. Protect Your Skin

Before applying any solutions, it’s important to protect the delicate skin around your eyebrows. Use a small amount of petroleum jelly or a barrier cream and carefully apply it around the perimeter of your brows. This creates a shield that prevents the chemicals in the lamination solutions from irritating your skin.

Ensure the petroleum jelly doesn’t touch the brow hairs, as this can interfere with the solution’s effectiveness. This step is especially important if you have sensitive skin or are prone to redness.

Why This Matters: Protecting your skin ensures a comfortable lamination experience and prevents any post-treatment sensitivity or irritation.

Next, we’ll focus on brushing and shaping your brows for the perfect look.

3. Brush Your Brows


 Now, it’s time to brush your brows into the desired shape. Using a clean spoolie brush, comb your eyebrow hairs upward and outward. This step is where you create the foundation of how your laminated brows will look. Spend a little extra time ensuring all hairs are aligned neatly, as the perming solution will set the brows in this position.

If there are stray hairs outside the desired shape, leave them for now. You can trim them later during the finishing touches.

Pro Tip: For a more dramatic, lifted look, brush your brows straight upward. For a softer, natural look, brush slightly outward.

Next, we’ll begin applying the first solution to soften the brow hairs.

4. Apply the Perming Solution


 Using a small applicator or brush, apply the perming solution evenly to your brow hairs. This solution softens the hairs, making them pliable so they can hold their new shape. Work carefully to coat every strand, but avoid letting the solution touch your skin.

Timing: Leave the solution on for 8–12 minutes, depending on your brow hair thickness. For finer hairs, 8 minutes is sufficient, while thicker brows may need closer to 12 minutes. Always follow the specific instructions provided with your kit.

Important: Monitor the time carefully, as leaving the solution on too long can weaken or damage your brow hairs.

Next, we’ll enhance the solution’s effectiveness with a simple step.

5. Cover with Plastic Wrap


 To activate the perming solution and ensure it works effectively, cover your brows with a small piece of plastic wrap or cling film. The plastic wrap traps heat, which enhances the solution’s ability to soften the brow hairs. Cut the wrap into a manageable size that fits comfortably over your brows. Press it gently to ensure it stays in place.

Why This Works: The trapped heat helps the perming solution penetrate deeper into the hair, ensuring all strands are ready for the next step.

Next, we’ll move on to removing the solution and applying the setting lotion.

6. Remove the Perming Solution

After the recommended time has passed, carefully remove the plastic wrap. Use a damp cotton pad to gently wipe away the perming solution. Avoid rubbing or pressing too hard, as the brow hairs are still soft and can be easily disturbed.

Ensure all traces of the perming solution are removed before proceeding to the next step. This ensures the setting lotion can work effectively without interference.

Next, we’ll set the brows in place with the setting lotion.

7. Apply the Setting Lotion

With a clean applicator or brush, apply the setting lotion evenly to your brows. This step locks the brow hairs into their newly brushed position, creating the laminated effect. Take your time to coat every strand thoroughly.

Timing: Cover your brows with plastic wrap again and let the setting lotion sit for 8–10 minutes. As with the perming solution, the exact time depends on your brow hair type and the instructions in your kit.

Why This Matters: The setting lotion is what holds the brows in place, giving you that sleek, polished finish.

Next, we’ll finish off by removing the setting lotion and nourishing the brows.

8. Remove the Setting Lotion

Once the recommended time has passed, remove the plastic wrap and gently wipe off the setting lotion with a damp cotton pad. Be careful not to disrupt the brows’ shape. Your brows should now look perfectly groomed and lifted.

Next, let’s condition and nourish your brows to keep them healthy and shiny.

9. Nourish the Brows

To restore moisture and condition your brows after the chemical treatment, apply a nourishing oil or serum that comes with your lamination kit. Use a small amount and gently comb it through your brows with a spoolie. This step not only hydrates your brows but also adds a shiny, healthy finish to the look.

Next, we’ll give the final touches to perfect your laminated brows.

10. Final Touches

Once your brows are dry, use scissors to trim any excess hairs that fall outside the desired shape. You can also tweeze stray hairs around the perimeter for a clean finish. Brush your brows one last time with a spoolie to ensure they are aligned and styled perfectly.

Your laminated brows are now complete! Enjoy the sleek, polished look that lasts for weeks. Repeat the process every 4 – 6 weeks to maintain the effect.

Lamination Done, Now Time to Tint: Achieving the Brow Look

When you visit a salon, eyebrow tinting usually takes just about 2 minutes and costs around $15. While this isn’t a huge expense, why not save that money and do it yourself at home? With the right tools and a tint that matches your hair color, you can easily achieve salon-quality results without the extra cost. Here’s a simple guide on how to tint your eyebrows at home:

How to Apply the Eyebrow Tint

Start by applying a thin layer of Vaseline around the skin of your eyebrows. This acts as a barrier to prevent the tint from staining the surrounding skin.

Next, apply the tint to your eyebrows, making sure to cover all the hairs evenly. Leave it on for about 3 minutes. After the time is up, use a cotton bud to gently remove the tint from your brows. Comb through the hairs to ensure every strand is coated. Repeat the process on the other eyebrow to achieve a symmetrical look.

Apply Nourishing Oil

You can use a cotton bud, gently apply nourishing oil to your eyebrows. Let the oil soak in for about 8 to 10 minutes, then use a clean cotton bud to remove any excess product.

Note: If your eyebrows appear darker than your hair after tinting, don’t worry! The color will fade slightly after a few washes.

And that’s it! You just saved both time and money by skipping the salon. In just one hour, you’ve completed your eyebrow lamination and eyebrow shapping all on your own!

Aftercare Tips for Laminated Eyebrows

To keep your laminated eyebrows looking sleek and lasting as long as possible, follow these aftercare tips:

  • Avoid Water for 24 Hours:
    Keep your brows dry for the first 24 hours to allow the lamination to fully set.
  • Skip Makeup on Brows:
    Refrain from applying makeup or heavy products on your brows for at least 24–48 hours to prevent irritation or smudging.
  • Moisturize with Brow Oil:
    Use a nourishing brow oil or serum daily to keep your brows hydrated and prevent dryness or brittleness.
  • Avoid Harsh Skincare Products:
    Stay away from exfoliants, retinols, or acidic products around your brow area to avoid weakening the laminated hairs.
  • Brush Gently:
    Use a clean spoolie to brush your brows daily, maintaining their shape and polished look.
  • Avoid Heat and Steam:
    Skip saunas, hot showers, or intense heat exposure for 24–48 hours after lamination to protect the results.
  • Be Gentle:
    Avoid rubbing, scratching, or pulling on your brows to keep the hairs in place and prevent damage.
  • Touch Up as Needed:
    Reapply a light brow gel or serum to refresh the laminated look between sessions.
  • Wait Between Laminations:
    Allow at least 6 weeks before re-laminating to give your brows time to recover and stay healthy.

Following these tips ensures your laminated brows remain healthy, shiny, and beautifully styled for weeks!

Common Mistakes to Avoid

  • Skipping Proper Cleaning:
    Not thoroughly cleaning your brows before starting can prevent the solutions from working effectively.
  • Overusing the Perm Solution:
    Applying too much perm solution can damage your brow hairs, making them brittle and weak.
  • Exceeding the Processing Time:
    Leaving the solutions on longer than recommended can lead to over-processing and damage to your brows.
  • Getting Solutions on the Skin:
    Allowing solutions to touch the skin around your brows can cause irritation or sensitivity.
  • Neglecting to Brush Hairs Properly:
    Failing to brush brow hairs into the desired position before applying solutions can lead to uneven results.
  • Using Low-Quality Kits:
    Choosing cheap or untrusted kits can result in poor outcomes and potentially damage your brow hairs.
  • Skipping the Nourishing Serum:
    Omitting this step can leave your brows dry and prone to breakage after lamination.
  • Getting Brows Wet Too Soon:
    Exposing your brows to water within 24 hours after lamination can ruin the set shape.
  • Using Harsh Skincare Products:
    Applying exfoliants or strong acids near your brows post-lamination can weaken the hairs or cause irritation.
  • Rushing the Process:
    Hurrying through the steps without following instructions carefully can lead to subpar results or mistakes.

Avoiding these mistakes ensures your brows stay healthy, sleek, and beautifully laminated for weeks!

Final Tips:

We think now you know how to laminate eyebrows at home , eyebrow lamination offers a low-maintenance solution for achieving the trending brushed-up look. Whether you select professional beauty services Philadelphia or a DIY kit, proper technique and aftercare will ensure long-lasting, beautiful results.

eyebrow lamination is a transformative treatment that can significantly improve your brow game when performed correctly and cared for adequately. With the right approach, you can enjoy well-kept brows that enhance your facial features effortlessly.

Have you considered how your eyebrow shape and texture might change after the lamination process?10eye

join the beauty box club

Get exclusive offers and news delivered right to your inbox!

Subscription Form