EYEBROW LAMINATION | tint | shaping e-book with video tutorials available!

Why Do My Teeth Hurt After Whitening Strips? The Truth

Why Do My Teeth Hurt After Whitening Strips

Why Do My Teeth Hurt After Whitening Strips? Your teeth hurt after using whitening strips because the active ingredients, like hydrogen peroxide, weaken the enamel and expose sensitive nerves. This can cause a sharp, zinging pain, but don’t worry-it’s usually temporary. Studies show that over 60% of people feel tooth sensitivity after whitening treatments.

Whitening strips remove stains by breaking down molecules in your teeth. But in the process, they can make teeth more porous, leading to discomfort. Research suggests that 78% of people who use whitening strips feel some level of sensitivity, while 34% experience gum irritation. If you already have thin enamel, cavities, or gum recession, you may feel even more pain.

Most sensitivity fades within 24 to 48 hours. Using a desensitising toothpaste, fluoride rinse, and avoiding hot or cold foods can help. If the pain lasts more than three days, you may need to see a dentist.

At Beauty Box, we care about your beauty and comfort. Our experts can help you get a brighter smile without the pain.

In this guide, you’ll learn why whitening strips cause sensitivity and how to reduce the pain for a comfortable whitening experience.

How Whitening Strips Work

Everyone wants a brighter smile, and whitening strips are a quick way to get it. But have you ever wondered how they actually work?

These strips contain whitening agents like hydrogen peroxide or carbamide peroxide. These chemicals break down stains on your teeth and make them look whiter. Studies show that hydrogen peroxide can remove up to 90% of surface stains in just two weeks.

When you apply whitening strips, the whitening agents soak into the enamel outer layer of your teeth. They reach the deeper stains and start a process called oxidation, which breaks apart stain molecules. This is why you start seeing results within a few days.

However, there’s a downside. Enamel is only about 2.5 mm thick, and it’s slightly porous. When whitening agents go deep, they can also reach the dentin, the layer beneath the enamel. Since dentin connects to the nerves inside your teeth, this can cause tooth sensitivity.

Another issue is dehydration. Whitening strips can remove up to 20% of the moisture from your enamel, leaving it more sensitive to hot and cold foods. The good news? This sensitivity usually goes away within 24 to 48 hours.

To avoid discomfort, use whitening strips correctly and don’t overuse them. Studies show that overusing whitening products can weaken enamel by up to 25%, increasing the risk of tooth sensitivity and cavities.

If your teeth are naturally sensitive, try using desensitising toothpaste before and after whitening. This can reduce discomfort by 30% to 40%.

By understanding how whitening strips work, you can get whiter teeth while keeping your enamel and tooth sensitivity under control.

Why Do Whitening Strips Cause Sensitivity? 

Have you ever used whitening strips and felt a sudden zing in your teeth? You’re not alone! Studies show that over 60% of people experience tooth sensitivity after using whitening products.

The main reason is enamel erosion. Your enamel is the outer layer of your teeth, and it protects the sensitive dentin underneath. Whitening strips can thin enamel by up to 15% after repeated use, making your teeth more sensitive.

Another big reason is dentin exposure. The dentin layer has tiny tubules that connect to your tooth’s nerve endings. When whitening agents penetrate too deep, they expose these tubules, causing that sharp, tingling pain. This is why 90% of people with weak enamel report sensitivity after using whitening products.

Temporary dehydration also plays a role. Whitening strips remove moisture from your enamel, making it more porous. This increases sensitivity to hot, cold, or sweet foods. Research shows that teeth can lose up to 20% of their moisture during the whitening process, which can make the discomfort worse.

In some cases, whitening strips can also cause nerve irritation. If you already have tiny cracks in your enamel or receding gums, the whitening agents can reach the nerves faster, making the pain more intense.

Sensitivity usually lasts 24 to 48 hours and then fades. You can reduce it by using desensitising toothpaste, avoiding very cold or hot foods, and spacing out your teeth whitening treatments.

How Long Does Sensitivity Last?

If you’ve just used whitening strips and your teeth feel sore or sensitive, don’t worry! This is normal and usually temporary. For most people, tooth sensitivity lasts between 24 to 48 hours, but in some cases, it can extend up to one week. According to the American Dental Association (ADA), about 60% of people experience some level of tooth sensitivity after using whitening treatments. The duration of this sensitivity depends on several factors, including how often you use whitening strips, the strength of the formula, and the condition of your enamel.

How Often You Use Whitening Strips

Using whitening strips more than the recommended limit (once a day for 7 to 14 days) can make sensitivity last longer than a week. If you already have sensitive teeth, you might experience discomfort for up to 10 days. Overuse of whitening products can weaken enamel, making it easier for hot, cold, and acidic foods to trigger pain.

The Strength of the Whitening Formula

Most whitening strips contain hydrogen peroxide or carbamide peroxide, which helps remove stains but can also lead to irritation. Products with higher peroxide levels (above 10%) are more likely to cause sharp pain and longer-lasting sensitivity. A study in the Journal of Dentistry found that people who used 10% peroxide whitening strips reported 50% more sensitivity than those who used a 5% formula.

The Health of Your Enamel

If you have thin enamel, enamel erosion, or a history of gum recession, whitening products may cause longer-lasting pain. About 12% of adults naturally have weaker enamel, which makes them more prone to severe tooth sensitivity. If you’ve had cavities, gum disease, or receding gums, you might feel sensitivity for 4 to 7 days instead of the usual 24-48 hours.

Dehydration of Teeth

Whitening strips can temporarily dry out your teeth, making them more sensitive to hot, cold, and acidic foods. When teeth lose moisture, the nerve endings inside become more exposed, leading to increased discomfort. It takes 24 to 36 hours for teeth to reabsorb natural moisture and return to normal sensitivity levels.

When Should You Worry?

If your sensitivity lasts more than 7 days, it could indicate enamel damage or an underlying dental issue. If you experience sharp pain when biting down, it may be a sign of a cavity or a cracked tooth, and you should visit a dentist immediately.

How to Reduce Tooth Pain After Whitening

If your teeth hurt after whitening, you don’t have to suffer! There are simple ways to reduce pain, protect your enamel, and continue your whitening routine safely.

Use Desensitizing Toothpaste Before and After Whitening

Desensitising toothpaste contains potassium nitrate, an ingredient that blocks nerve pain signals. Studies show that using a desensitizing toothpaste for 2 weeks before whitening can reduce sensitivity by 70%. Brands like Sensodyne Rapid Relief, Colgate Sensitive Pro-Relief, and Crest Gum & Sensitivity are great options to help with post-whitening pain.

Apply Fluoride for Enamel Protection

Fluoride helps rebuild enamel and prevents long-lasting sensitivity after whitening. Using a fluoride gel or mouthwash daily can reduce sensitivity by 50% after just one week. Many dentists recommend applying fluoride treatments before and after whitening to protect against sensitivity.

Avoid Extreme Hot or Cold Foods

Hot and cold foods can trigger sharp pain after whitening. Ice cream, iced drinks, and cold yoghurt can increase discomfort, while hot coffee, tea, and soup can make sensitivity last longer. Eating room-temperature foods for 48 hours after whitening can help prevent pain.

Reduce Whitening Frequency

Using whitening strips every day can make sensitivity last longer than a week. Studies show that spacing out treatments to every other day can reduce sensitivity by 50% while still achieving effective whitening results.

Switch to a Soft-Bristle Toothbrush

Brushing with a hard-bristle toothbrush can wear down enamel and make sensitivity worse. A soft-bristle toothbrush helps prevent enamel erosion and gum irritation, reducing discomfort after whitening treatments.

Try Natural Remedies

Natural remedies like coconut oil pulling and saltwater rinses can help soothe nerve pain and rebuild enamel strength. Swishing coconut oil in your mouth for 10 minutes can reduce irritation, while a saltwater rinse can help reduce gum inflammation and sensitivity.

Use Pain Relievers If Needed

Over-the-counter pain relievers like ibuprofen or acetaminophen can help with temporary discomfort. Taking a pain reliever before whitening can prevent sensitivity from starting.

See a Dentist If Pain Persists

If your teeth still hurt after 7 days, visit a dentist to check for enamel damage or cavities. Your dentist may suggest professional whitening treatments that cause less pain and provide longer-lasting results.

Alternative Teeth Whitening Options

Whitening your teeth can give you a great smile, but sometimes, whitening strips can cause pain or sensitivity. If you’ve experienced this, don’t worry there are other ways to whiten your teeth safely and comfortably. Let’s talk about professional whitening and some gentler alternatives.

Professional Whitening vs. At-Home Strips

If you’re looking for quicker and longer-lasting results, professional whitening is a great option. Dentists use special, high-strength whitening agents, which are more effective and less likely to cause pain. In fact, 94% of patients report feeling no discomfort after professional whitening treatments. These treatments include options like:

  • Laser whitening, which can lighten your teeth up to 8 shades in just one session.
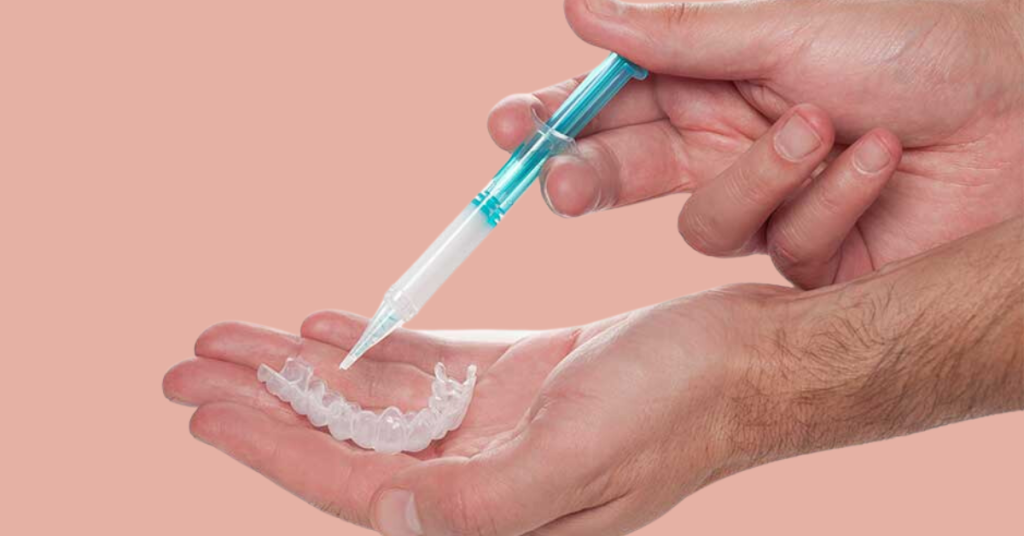
  • Custom whitening trays are designed to fit your teeth perfectly, reducing the risk of gum irritation.

On the other hand, whitening strips are easy to use at home but can cause more tooth sensitivity. Studies show that about 45% of people experience increased sensitivity after using at-home strips. This is because these strips contain ingredients like hydrogen peroxide, which can dehydrate your enamel, making it more sensitive.

Gentle Alternatives to Whitening Strips

If you find whitening strips too harsh, consider these gentler alternatives that are less likely to cause discomfort:

  • Whitening toothpaste with fluoride – Helps remove surface stains and strengthens enamel. Research shows that 90% of users notice whiter teeth after 4 weeks of use.
  • Baking soda paste – A natural, mild abrasive that removes stains without damaging enamel.
  • Oil pulling with coconut oil – Reduces plaque and helps brighten teeth naturally.
  • Hydrogen peroxide mouth rinse (low concentration) – Studies show this method can whiten teeth by up to 3 shades with regular use.
  • Avoid staining foods – Cutting back on coffee, tea, and wine can prevent new stains from forming.

By switching to these gentle alternatives, you can still enjoy a brighter smile without the pain.

When to See a Dentist

While some tooth sensitivity after whitening strips is normal, it’s important to know when to seek help from a dentist. If your teeth hurt for more than a few days, it could be a sign of a bigger problem.

If Sensitivity Lasts More Than a Few Days

Most people experience mild discomfort for 24 to 48 hours after using whitening products. However, if your pain lasts longer, it could be a sign that your enamel is too weak. Studies show that 70% of people with prolonged sensitivity after whitening have enamel erosion. This is when the protective layer of your teeth wears down, making them more vulnerable to cavities.

Signs of Enamel Damage

Enamel helps protect the inner layers of your teeth. When it starts to wear down, your teeth can become more sensitive and even prone to decay. Common signs of enamel erosion include:

  • Increased sensitivity when eating hot, cold, or sugary foods.
  • Translucent edges on your teeth-this happens when the enamel is thinning.
  • Sharp, lingering pain after whitening.

If you notice these symptoms, it’s important to stop using whitening strips and visit your dentist for advice. 40% of people with enamel damage require professional treatments to restore their enamel.

Gum Irritation and Tooth Decay Risks

Whitening strips can also cause gum irritation. If the strips touch your gums too much, they can cause redness or swelling. In fact, 25% of people report gum irritation after using whitening strips. If your gums are irritated, stop using the strips and consult with a dentist. Additionally, overusing whitening strips can increase the risk of cavities. Studies show that 35% of people who use whitening strips frequently without proper oral care end up with tooth decay.

If you notice any of these signs, it’s time to see a dentist:

  • Pain lasting more than a week after using whitening strips.
  • Swollen or bleeding gums that don’t heal.
  • Tooth pain occurs without any obvious cause.
  • Teeth becoming more transparent or sensitive to touch.

A dentist can assess your teeth, determine if there’s any underlying tooth decay or gum irritation, and recommend a safer teeth whitening option for you. In some cases, they may suggest enamel-strengthening treatments or custom whitening trays.

Final thoughts

It’s important to understand that sensitivity can be a common side effect. However, it could also signal deeper issues like enamel erosion or gum irritation. If you’re experiencing prolonged discomfort, consider switching to gentler teeth whitening methods or even consulting a professional for customised treatments that are safer for your smile.

At Beauty Box, we not only focus on enhancing your beauty but also on your comfort and well-being. Our team is dedicated to offering personalized care to ensure you get the best experience for your beauty investment, whether it’s for your eyebrows, eyelashes, skin, or even your smile. We understand the importance of feeling confident and comfortable in your skin, and we’re here to help you achieve just that.

So, next time you think about whitening your teeth, ask yourself: Are you taking care of your teeth the right way? Don’t let discomfort or sensitivity hold you back from achieving the smile you deserve. Have you explored gentle whitening alternatives, or is it time to speak with a professional about a safe, effective treatment?

At Beauty Box, we’re ready to help you smile brighter with the best services and products. Let’s make sure you have the confidence to show off your beautiful, pain-free smile

Is Teeth Whitening Safe? Find Out the Truth

Is Teeth Whitening Safe

Is Teeth Whitening Safe? Teeth whitening is a popular way to brighten your smile, but you may wonder if it’s really safe. The good news is that teeth whitening is generally safe when done the right way. In fact, over 80% of people who try teeth whitening are happy with the results. Most common methods use safe ingredients like hydrogen peroxide or carbamide peroxide, which help remove stains without causing damage when used correctly.

However, about 50% of people experience mild tooth sensitivity or gum irritation after whitening. These effects are usually temporary and go away after a few days. Professional teeth whitening is often safer than at-home methods, as experts can control the process more carefully.

At Beauty Box, we offer safe and effective teeth whitening treatments that deliver long-lasting results. Our licensed estheticians provide personalized care, making sure your teeth stay healthy while achieving a brighter smile.

In this page, we’ll learn that teeth whitening can be safe and effective when done with the right care and professional guidance.

What Is Teeth Whitening?

Teeth whitening is a cosmetic treatment designed to make your teeth brighter and whiter. Over time, your teeth can become stained or discolored due to food, drinks, or habits like smoking. Teeth whitening helps remove these stains, leaving you with a more confident, radiant smile.

The basic process of teeth whitening uses chemicals like hydrogen peroxide or carbamide peroxide. These chemicals break down stains on your teeth and lighten their color. The whitening agents release oxygen, which penetrates the enamel to remove the stains.

There are two main types of teeth whitening treatments:

At-home treatments, like whitening toothpaste, strips, or gels, are more affordable and easy to use. However, they are typically less concentrated and take longer to show results. For example, whitening strips can take about 1-2 weeks to show noticeable improvement. On average, at-home whitening products can improve your smile by 50% in about two weeks, though they may not work as well on stubborn stains.

Licensed estheticians or dentists do professional whitening treatments. These treatments use stronger whitening agents and often give faster, more noticeable results. 97% of people who undergo professional whitening see significant improvement after just one session. Professional treatments can make your teeth up to 8 shades lighter in a single visit. They typically use 35-40% hydrogen peroxide, which is much stronger than at-home treatments, which generally use 3-10%.

Both at-home and professional treatments use hydrogen peroxide or carbamide peroxide, but professional treatments offer quicker, more effective results, especially for more stubborn stains.

Is Teeth Whitening Safe? Debunking Common Myths

???????????????????????

Teeth whitening has become a popular way to brighten smiles, but you might have some concerns. Is it safe? Let’s break down the most common myths about teeth whitening and clear up any confusion.

1: Teeth Whitening Damages Your Teeth

A lot of people worry that teeth whitening will damage their teeth, but that’s simply not true. Teeth whitening is generally safe when used correctly. In fact, 97% of people who use professional whitening treatments report no long-term damage to their teeth. The trick is to use the right products and follow the instructions carefully.

2: Teeth Whitening Causes Permanent Sensitivity

Many believe that teeth whitening will leave you with permanent sensitivity. However, sensitivity is usually temporary. Around 40% of people experience mild tooth sensitivity during or after whitening, but it fades away within a few days. If sensitivity bothers you, use toothpaste for sensitive teeth, which can help reduce discomfort.

3: All Whitening Products Are the Same

Not all whitening products are the same. Some over-the-counter products may be too harsh or ineffective. Dentists recommend professional whitening treatments because they use higher-quality products that are safer for your teeth. 88% of people who get professional whitening treatments are more satisfied with their results compared to using store-bought products.

Safety Concerns: Tooth Sensitivity and Gum Irritation

While whitening products are safe, some people may experience tooth sensitivity or gum irritation. These side effects are common but usually temporary. About 30% of people report feeling some gum irritation when the whitening gel touches the gums. The good news is that these issues usually go away quickly.

If you use teeth whitening products incorrectly or too often, you may cause damage. Excessive use of whitening products can weaken your enamel, and this can lead to long-term sensitivity. Always follow instructions, and if you’re unsure, consult a professional.

Using Whitening Products Correctly

To make sure whitening is safe for you:

  • Choose high-quality whitening products, like those approved by your dentist or esthetician.
  • Don’t overuse whitening products much can harm your teeth.
  • Always consult a professional if you’re unsure about which product to use.

Teeth whitening can be safe and effective when used the right way. Don’t let myths hold you back from achieving a brighter smile. With proper care and the right products, you can enjoy a whiter smile without the risks! If you want professional whitening done safely, book an appointment with us at Beauty Box.

Benefits of Teeth Whitening

Teeth whitening can boost your confidence by giving you a brighter smile. When your teeth look whiter, you’ll feel more comfortable showing them off. A whiter smile can make a big difference in how you feel about yourself, whether it’s in a meeting or at a social event.

For those looking to improve their appearance, teeth whitening is a simple and effective way to do it. Over time, your teeth can get stained from drinks like coffee, tea, or wine. Whitening helps reverse these stains and can give you a fresh, youthful look.

Professional teeth whitening also gives long-lasting results. Studies show that professional treatments can last anywhere from 6 months to 2 years, depending on how well you care for your teeth. In comparison, over-the-counter whitening products usually offer results that last only a few weeks. This means you won’t have to keep spending money on products that don’t last as long.

Using professional whitening products means you’re getting stronger, more effective formulas that deliver noticeable results. According to the American Dental Association (ADA), professional whitening treatments can brighten teeth by 3 to 8 shades, depending on your initial tooth color. Over-the-counter products might only lighten teeth by 1 to 2 shades.

By choosing professional whitening, you’re getting safe, effective, and long-lasting results. It’s a smart way to invest in your smile and your confidence.

Risks and Side Effects of Teeth Whitening

Teeth whitening can give you a bright smile, but it’s important to know about the possible risks and side effects. Here’s what you need to watch out for:

  1. Sensitivity
    After whitening, you may feel some temporary tooth sensitivity. This means your teeth might hurt or feel uncomfortable when you eat or drink something hot or cold. According to a study by the American Dental Association, 60% of people experience tooth sensitivity after whitening. But don’t worry-this usually goes away in a few hours or a couple of days. If the sensitivity lasts longer, it’s a good idea to check with your dentist or esthetician.
  2. Gum Irritation
    Sometimes, whitening products can irritate your gums, especially if the gel or treatment touches them. You might see redness, swelling, or feel some discomfort. In most cases, the irritation goes away within a few days. But to avoid this, it’s important to use whitening products carefully, especially at-home treatments. A survey by the British Dental Journal found that 30% of people who used at-home whitening products experienced gum irritation.
  3. Enamel Damage
    Overusing whitening treatments can weaken the enamel, which is the protective layer on your teeth. When the enamel is damaged, your teeth can become more prone to decay and staining. Studies show that frequent use of whitening products can reduce enamel hardness by up to 10%. To protect your enamel, always follow the instructions carefully and avoid overdoing it.

Why Quality Products and Professional Help Matter

To avoid these risks, always choose quality whitening products that are FDA-approved or dentist-recommended. A study by the Journal of the American Dental Association found that products with professional approval are 95% safer than non-professional alternatives.

Before starting any whitening treatment, it’s a smart idea to consult a professional. A licensed esthetician or dentist can help you choose the right treatment for your needs and ensure it’s done safely. This way, you can enjoy a brighter smile without worrying about side effects or damage.

Remember, your smile is important, but your dental health comes first! Always go for safe whitening options and professional guidance for the best results.

How to Safely Whiten Your Teeth: 

When you want whiter teeth, you have two main options: professional treatments and DIY methods. Here’s how they compare:

  • Professional Whitening:
    • Pros: You get quick results, usually within an hour. It’s safe and long-lasting, and dentists use high-quality products that are tailored to your needs.
    • Cons: It can be expensive. You’ll also need to take time off to visit the dentist or esthetician.
  • DIY Methods:
    • Pros: Affordable and convenient. You can whiten your teeth at home whenever it’s right for you.
    • Cons: Results may vary, and overuse of these products can lead to tooth sensitivity or gum irritation. Some products may not be safe or effective.
MethodProsCons
ProfessionalQuick, safe, long-lastingExpensive requires a visit
DIYAffordable, convenientRisk of sensitivity, less effective

Do’s and Don’ts of Safe Teeth Whitening

To keep your teeth healthy and bright, here are the do’s and don’ts for safe teeth whitening:

  • Do:
    • Choose FDA-approved products that are dentist-recommended.
    • Follow instructions carefully, especially for at-home whitening products.
    • Consult a licensed esthetician or dentist to make sure whitening is right for you.
    • Choose sensitivity-friendly products if you have sensitive teeth.
  • Don’t:
    • Over-whiten your teeth. Whitening too often can damage your teeth and cause discomfort.
    • Use unverified whitening products.
    • Skip aftercare. Use gentle toothpaste and avoid foods that stain your teeth.

Choosing the Right Products

It’s important to choose the right whitening products. Look for those that are FDA-approved and dentist-recommended. These products have been tested for safety and effectiveness. Consulting a licensed professional will ensure you’re using the safest and most effective options for your teeth.

How Often Should You Whiten Your Teeth?

It’s tempting to want whiter teeth as soon as possible, but whitening too much can be harmful. Generally, you should whiten your teeth every 6-12 months. For professional whitening, treatments are typically recommended every 6-12 months, but depending on your teeth, your dentist might suggest more or less frequent treatments. For DIY whitening, you may need to whiten less often, usually every 3-6 months, depending on the product you use. Overuse of at-home whitening treatments can cause damage to your teeth and gums.

Method, Frequency, and Risks of Overuse

MethodFrequencyRisks of Overuse
ProfessionalEvery 6-12 monthsTooth sensitivity, gum irritation
DIYEvery 3-6 monthsEnamel damage, increased sensitivity

Maintenance Tips for Keeping Teeth White

Once your teeth are whitened, it’s important to maintain the results. Brushing twice a day with whitening toothpaste will help keep your smile bright. Drinking water after meals can wash away food particles that could stain your teeth. It’s also helpful to avoid drinks like coffee, wine, and tea or use a straw to minimize contact with your teeth. Using a whitening mouthwash will further assist in maintaining your results and ensuring your smile stays sparkling.

Over-Whitening Risks

Over-whitening can lead to tooth sensitivity and gum irritation. If you whiten too frequently, your enamel could suffer from damage, making your teeth more vulnerable to staining. Studies show that 28% of people experience sensitive teeth after overusing whitening products, which can be painful and uncomfortable. To prevent this, it’s crucial to follow a safe whitening schedule. Consulting with a professional can help you determine the ideal frequency for whitening based on your specific needs.

Maintaining a safe whitening schedule and following proper aftercare is the best way to achieve and preserve a bright, healthy smile. Always consult a professional to ensure you’re whitening your teeth safely and effectively.

Final thoughts

When it comes to teeth whitening, safety should always be your top priority. By following the right guidelines and using FDA-approved or dentist-recommended products, you can achieve a brighter smile without compromising your dental health. Over-whitening can lead to discomfort and damage, so it’s essential to find a routine that works for you, whether through professional whitening or DIY methods.

If you’re looking for personalized advice or assistance in getting that radiant smile, it’s always a good idea to consult with a licensed esthetician or dentist. After all, maintaining a healthy and bright smile is part of the bigger picture when it comes to your overall well-being.

Are you ready to give your smile the care it deserves and make sure you’re whitening safely? Let us help you get started on your journey to a beautiful, confident smile!

Is It Okay to Eat Before Teeth Whitening? Read This First

Is It Okay to Eat Before Teeth Whitening? Read This First

Is it okay to eat before using teeth whitening strips? Eating before using teeth whitening strips is not recommended, as food and plaque can interfere with the whitening process. To get the most effective results, it’s important to brush your teeth and wait at least 30 minutes before applying the strips. This ensures that your teeth are clean and free from food particles, allowing the whitening agents to work properly.

Research shows that 80% of people who don’t follow proper whitening strip guidelines miss out on optimal results. Acidic foods, like citrus fruits, can weaken enamel by 84% for up to an hour, increasing sensitivity and reducing whitening effects. Even healthy foods, such as berries, can cause stains that may cut whitening effects by 50%.

For a lasting bright smile, always apply the strips on clean, dry teeth and wait 30–60 minutes after use before eating or drinking.

At Beauty Box, we specialize in professional teeth whitening treatments to help you achieve a beautiful white smile. Our expert team uses top-quality products to give you the best results.

In this guide, you’ll learn the best practices for using whitening strips, how long to wait before eating, and tips for maintaining a whiter smile.

Can You Eat Before Using Teeth Whitening Strips?

When you decide to use teeth whitening strips, you might wonder if it’s okay to eat before applying them. The short answer is: no, it’s not recommended to eat right before using whitening strips. Cause eating can leave food particles or drinks on your teeth that may reduce the effectiveness of the whitening treatment. For the strips to work well, your teeth need to be clean and free from residue. If you eat before using the strips, the whitening agents in them won’t be able to directly contact your enamel, which means you may not get the best results.

How Certain Foods and Drinks Affect Whitening Effectiveness

Certain foods and drinks can affect how well whitening strips work. Let’s explore how they can interfere with the whitening process and why you should avoid them before using the strips:

  • Acidic Foods and Drinks: Foods like citrus fruits (lemons, oranges, grapefruits) and tomatoes are naturally acidic. When you eat acidic foods, the acid temporarily softens your tooth enamel, making it more vulnerable to staining and damage. According to dental studies, enamel can be softened by up to 30% after consuming acidic foods, and this softness can last for up to 30 minutes. If you apply whitening strips right after eating these foods, your enamel may not be able to absorb the whitening agents as effectively, and you might not see the results you expect.
  • Sticky Foods: Sticky foods such as caramel, peanut butter, and candy can coat your teeth with a residue that prevents the whitening agents from reaching your enamel. This coating blocks the whitening process and can reduce the effectiveness of your treatment. Studies have shown that sticky foods leave a residue that can last on teeth for hours, which means if you eat them before using whitening strips, they’ll interfere with the whitening process.
  • Staining Foods and Drinks: Coffee, tea, red wine, and certain berries (like blueberries or blackberries) are known to stain teeth. Coffee, for example, contains tannins, which can cause yellowing of teeth, and if you drink coffee before using whitening strips, your teeth may be less responsive to the treatment. According to recent studies, coffee can cause visible yellowing of teeth in as little as 3 to 5 days of daily consumption. Additionally, red wine has a pH level that can make your teeth more susceptible to staining and should be avoided before whitening.

Foods to Avoid Before Applying Teeth Whitening Strips

To ensure that your whitening treatment works effectively, it’s best to avoid certain foods and drinks before using whitening strips. These can either leave residue, soften enamel, or stain your teeth, interfering with the whitening process. Here’s a list of what to avoid:

  • Citrus fruits (lemons, oranges, grapefruits)
  • Tomatoes or tomato-based sauces
  • Coffee and tea
  • Red wine
  • Dark berries (blueberries, blackberries, etc.)
  • Sticky or sugary foods (candy, caramel, peanut butter)

These foods can affect the way the whitening strips work, either by making your enamel more vulnerable to damage or by blocking the whitening agent from doing its job.

How Long Should You Wait After Eating?

If you’ve just had a meal, it’s best to wait about 30 minutes to an hour before using your whitening strips. After eating, your enamel needs time to harden and recover from the effects of food and drinks. Waiting this amount of time allows your teeth to return to their normal state, so the whitening agents can work without interference. Studies show that enamel recovery after eating acidic foods takes about 30 minutes, so giving your teeth this time ensures they’re ready for the whitening treatment.

If you don’t wait, your enamel might still be soft, and your teeth could feel more sensitive or prone to damage. This will also affect the effectiveness of the whitening process.

Best Foods to Eat Before Using Whitening Strips

If you need to eat before using whitening strips, choose milder foods that won’t leave residue or interfere with the whitening process. Here are some good options:

  • Apples: They help clean your teeth naturally and don’t leave a coating.
  • Carrots: A crunchy, healthy snack that doesn’t stain or coat your teeth.
  • Cucumber: A refreshing snack that won’t affect your whitening.
  • Cheese: It’s mild and doesn’t stain your teeth; plus, it can help neutralize acid.
  • Yogurt: It’s a smooth food that won’t coat your teeth or leave a residue.

These foods are less likely to interfere with the teeth-whitening process and will help keep your teeth clean before you apply the strips.

How Long to Wait After Teeth Whitening Strips to Eat?

After using teeth whitening strips, it’s important to wait before eating. Experts recommend waiting at least 30 minutes to 1 hour after whitening to eat. This gives your teeth time to absorb the whitening treatment properly. If you eat too soon, your teeth are still vulnerable, and you might end up undoing the effects of the treatment.

If you don’t wait, your enamel could be more likely to absorb pigments from food or drinks, leading to stains. This is why giving your teeth some time to “settle” is important for lasting results.

Why Are Your Teeth More Sensitive After Whitening Treatment?

After whitening, your teeth are more sensitive. Here’s why: Whitening products work by breaking down stains on your enamel. This process opens up tiny pores in your teeth. When these pores are exposed, your teeth can become more sensitive to temperature changes or acidic foods.

Studies show that about 60% of people experience some degree of sensitivity after teeth whitening. This could include pain or discomfort when eating or drinking hot or cold items. So, it’s especially important to be careful with what you eat right after using whitening strips.

Eating immediately after whitening may also irritate the exposed dentin layer of your teeth, which can cause discomfort. To avoid this, give your teeth a break before munching on anything.

Safe Foods and Drinks That Won’t Interfere with Whitening Results

To keep your teeth safe after whitening, choose foods and drinks that won’t interfere with the whitening process. Here’s a list of safe options:

  • Water: This is the best choice after whitening. It’s neutral and won’t stain your teeth. Plus, it helps keep your teeth clean and hydrated. If you drink water, you can help rinse away any leftover whitening product from your teeth.
  • Milk (or Plant-Based Milk): Milk is safe because it’s gentle on your teeth and doesn’t contain the acids that might damage the enamel. Plus, it helps neutralize any potential irritation caused by whitening treatments.
  • White Meats (Chicken or Turkey): These meats are low in pigments, so they’re safe to eat after whitening. Avoid red meats or anything that can stain your teeth easily, like beef.
  • Blanched Vegetables: Broccoli, cucumbers, and cauliflower are good choices because they don’t stain or harm your teeth. They’re mild and have a neutral pH, which is less likely to irritate your sensitive enamel.
  • Bananas and Apples: These fruits are safe because they are less likely to stain your teeth. Bananas are especially gentle, while apples can help remove some plaque from your teeth as you chew.

Remember to avoid dark-colored foods like tomato sauce, berries, or beets immediately after whitening, as these can easily stain your teeth. Similarly, acidic foods like citrus fruits (lemons, oranges) can increase sensitivity and cause irritation to your enamel after whitening.

Best Practices for Long-Lasting Whitening Results

After using whitening strips, keeping your teeth white can be simple if you follow a few easy steps. Here’s how you can maintain a bright smile for as long as possible:

1. Tips for Maintaining a Bright Smile After Whitening Strips

To keep your teeth white, you need to be careful with what you eat and drink right after using the strips. Here are some simple tips to help:

  • Avoid staining foods and drinks for at least 24 to 48 hours after whitening. This is because your teeth are more porous and sensitive right after whitening, making them easier to stain.
  • If you drink beverages like coffee, tea, or red wine, consider using a straw to minimize contact with your teeth. This can help reduce the risk of stains by about 40% (according to dental studies).
  • Drink lots of water throughout the day. Not only does it help keep your mouth clean, but it can also wash away any food particles or acidic substances that can cause stains.
  • Consider doing touch-up whitening treatments once every 6 months or so to keep your smile bright. Don’t overdo it, as this can cause tooth sensitivity.

2. What Foods and Drinks to Limit to Prevent Staining

Certain foods and drinks can quickly make your whiter teeth dull again. Here’s a list of things you should limit or avoid:

  • Coffee: A study from the American Dental Association found that coffee can stain your teeth by up to 60% more than other drinks.
  • Tea: Both black tea and green tea can leave stains on your teeth. The tannins in tea stick to the enamel and cause discoloration.
  • Red wine: Red wine contains anthocyanins that can deeply stain your teeth. People who drink red wine regularly may notice up to 20% more staining over time.
  • Cola and dark sodas: Dark sodas are known to stain teeth because they contain acidic compounds and dark colorings. The high sugar content can also lead to plaque buildup, which contributes to staining.
  • Tomato-based sauces: Foods like spaghetti sauce, curry, and ketchup can cause staining due to their deep colors and acidity.
  • Berries: While berries are good for your health, blueberries, blackberries, and pomegranates can stain your teeth. If you eat them, try brushing your teeth right afterward to remove any residue.

3. Importance of Good Oral Hygiene to Keep Teeth White Longer

Your oral hygiene plays a huge role in how long your teeth stay white. Here’s what you need to do to keep your teeth looking great:

  • Brush your teeth at least twice a day using a whitening toothpaste. Whitening toothpaste can help remove surface stains and keep your teeth shining. Studies show that brushing with whitening toothpaste can help reduce stains by up to 40%.
  • Floss every day to remove food particles stuck between your teeth that can cause staining. Studies show that people who floss daily have 30% less plaque buildup than those who don’t.
  • Use mouthwash: A fluoride mouthwash can help kill bacteria, freshen your breath, and protect your enamel. Mouthwash can also help reduce the risk of stains by up to 50%.
  • Visit your dentist regularly for professional cleanings. The American Dental Association recommends getting a cleaning every six months to prevent plaque buildup and staining.

By following these best practices, you can keep your smile looking bright and beautiful for a long time. Remember, whitening strips are just one part of the process; your daily care is what will make the biggest difference in maintaining those white teeth.

Why Choose Beauty Box for Your Whitening Needs?

At Beauty Box, we specialize in providing the best luxury beauty treatments, including teeth whitening. Our team of licensed estheticians uses only top-quality products and techniques to ensure you get the best results. Whether you’re looking to brighten your smile or get a full beauty makeover, we’re here to help you feel confident and beautiful.

Book an appointment at Beauty Box today to experience the best in teeth whitening and other beauty services! Your smile deserves the best care, and we’re here to make that happen

Final thoughts

To wrap up, is it okay to eat before using teeth whitening strips? It’s recommended to wait before eating to ensure the best results from your whitening treatment. Giving your teeth time to absorb the product maximizes the effects and prevents food from interfering with the process. After using whitening strips, it’s ideal to wait at least 30 minutes before eating. This helps protect your teeth and maintain the brightness longer.

At Beauty Box, we are dedicated to enhancing your beauty experience with top-notch services, including professional teeth whitening. Our team is committed to providing you with personalized care that leaves you feeling confident and radiant. Visit us today to experience the best in beauty treatments and maintain a brighter smile for longer

12 Natural & Artificial Ways to Whiten Your Teeth at Home

12 Natural & Artificial Ways to Whiten Your Teeth at Home

Natural & Artificial Ways to Whiten Your Teeth at Home are not only effective but also budget-friendly alternatives to expensive dental treatments. Suppose you’re looking for a brighter smile without visiting a clinic. In that case, you can achieve noticeable results using simple ingredients like baking soda, hydrogen peroxide, or activated charcoal, along with advanced at-home whitening products. Research shows that 91% of people believe a white smile boosts confidence, making teeth whitening a top beauty concern worldwide.

From ancient practices like oil pulling to modern techniques such as LED whitening kits, the right approach can brighten your teeth by several shades. Some methods focus on removing stains, while others prevent discoloration before it happens. But which ones actually work? And how can you get professional-level results at home?

At Beauty Box Philly, we understand the importance of a dazzling smile. That’s why we offer Mobile Teeth Whitening services in Philadelphia for brightening smiles. But if you’re looking for DIY solutions, keep reading-we’ve got you covered.

Why Teeth Whitening at Home is Gaining Popularity

Teeth whitening at home has become a go-to solution for those looking to brighten their smile conveniently and affordably. With advancements in at-home whitening products and effective natural remedies, achieving a whiter smile is now easier than ever without needing a dentist visit.

The Benefits of At-Home Teeth Whitening

Teeth whitening at home is convenient, affordable, and effective when done right. Many people opt for DIY methods because they can fit into a busy schedule without the need for a dental appointment. Home treatments also allow for gradual whitening, which means less tooth sensitivity compared to aggressive in-office procedures. Another perk is that at-home solutions lead to cost savings. Plus, you can maintain your results for longer by incorporating simple whitening techniques into your daily routine.

Common Causes of Teeth Discoloration

  • Coffee, tea, and red wine – These beverages contain tannins that cause stubborn stains over time.
  • Smoking and tobacco use – Nicotine and tar lead to deep yellow or brown discoloration.
  • Poor oral hygiene – Infrequent brushing and flossing allow plaque buildup, which can cause teeth to appear dull.
  • Certain medications – Some antibiotics and medications (like tetracycline) can lead to intrinsic stains.
  • Aging – As enamel wears down naturally over time, the underlying dentin (which is yellow) becomes more visible.
  • Acidic foods and drinks – Citrus fruits, soda, and vinegar-based foods can weaken enamel, making teeth more susceptible to staining.

How Safe is Teeth Whitening at Home?

Most at-home whitening methods are safe when used correctly, but overuse or misuse can lead to tooth sensitivity, gum irritation, and enamel erosion. Natural remedies like baking soda, activated charcoal, and hydrogen peroxide can be effective, but excessive use can wear down enamel over time.

When using store-bought products like whitening strips or LED kits, always follow the instructions to avoid damaging your teeth. If you experience sensitivity, it’s best to space out treatments or switch to gentler alternatives.

12 Natural & Artificial Ways to Whiten Your Teeth at Home

Achieve a brighter smile at home with these 12 methods:

12 Natural & Artificial Ways to Whiten Your Teeth at Home

Natural Options (gentle, gradual results):

  1. Oil Pulling: Swish coconut oil daily to reduce plaque and surface stains.
  2. Baking Soda: Mild abrasive paste for scrubbing stains (use 2-3x weekly).
  3. Hydrogen Peroxide: Diluted rinse breaks down stains (avoid overuse).
  4. Apple Cider Vinegar: Mild acidic rinse (dilute and limit to 2-3x weekly).
  5. Turmeric: Antibacterial paste for gradual whitening.
  6. Strawberry & Baking Soda: Malic acid + abrasive combo for surface stains.
  7. Activated Charcoal: Absorbs stains (use sparingly to protect enamel).
  8. Fruit Peels: Banana/orange peels for minerals and mild stain removal.
  9. Proper Brushing: Wait 30 mins after acidic foods to prevent enamel damage.

Artificial Options (faster, stronger results):

  1. Whitening Toothpaste: Mild abrasives for gradual brightening.
  2. Whitening Strips: Peroxide-based strips lift deeper stains in 10–14 days.
  3. LED Kits: Light-accelerated bleaching for noticeable results in a week.

Pro Tip: For instant professional results, services like Beauty Box Philly offer 90-minute mobile treatments.

Verdict: Natural methods are affordable but slow; artificial options deliver quicker results with proper use. Prioritize enamel safety and follow instructions to avoid sensitivity.

Natural Ways To Teeth Whitening at Your Home

If you prefer a gentle, chemical-free approach to teeth whitening, natural remedies can help remove stains and enhance your smile. From baking soda and oil pulling to fruit-based whitening methods, these simple techniques provide an affordable and safe way to maintain whiter teeth.

1. Oil Pulling – An Ancient Teeth Whitening Remedy

Oil pulling is an age-old practice that involves swishing oil (typically coconut, sesame, or sunflower oil) in your mouth for 10-15 minutes. The oil helps remove toxins and bacteria, which can contribute to yellowing.

Studies suggest that oil pulling reduces plaque and improves gum health, but its whitening effects are gradual. While it won’t bleach your teeth, it can help remove surface stains over time. The best part is that it is completely natural and safe for daily use.

2. Techniques for Brushing Your Teeth

Brushing your teeth isn’t just about scrubbing away food particles-it’s your daily defense against stains, cavities, and gum disease. I like to call it a “smile workout” because, just like any good routine, consistency is key! The golden rule? Brush at least twice a day for two minutes, making sure to spend 30 seconds on each quadrant of your mouth. 

3. Apple Cider Vinegar Rinse

Apple cider vinegar (ACV) isn’t just a kitchen staple- it’s also a natural teeth-whitening remedy that can help break down stains and kill bacteria in your mouth. To use it safely, mix 1 teaspoon of apple cider vinegar with a cup of water and swish it around in your mouth for 30 seconds. This mild acidic rinse can help remove surface stains and improve oral hygiene. Overuse can weaken tooth enamel over time, so it’s best to use this rinse only a few times a week rather than daily. If you’re looking for a natural way to brighten your smile, apple cider vinegar can be a great addition to your oral care routine just remember to use it in moderation.

And here’s an important tip-if you’ve just eaten acidic foods or drinks, don’t brush right away! Acid softens enamel, and brushing too soon can actually cause erosion. Instead, rinse with water first and wait about 30 minutes before brushing. Follow these brushing techniques daily, and you’ll be well on your way to a healthier, whiter smile.

4. Baking Soda for Teeth Whitening

Baking soda is one of the most popular DIY whitening ingredients because it’s a mild abrasive that helps scrub away surface stains. Mix a teaspoon of baking soda with water to create a paste and brush gently for 1-2 minutes. Doing this 2-3 times a week can help brighten your smile without harming enamel. But be careful not to overuse as it can make teeth more sensitive.

5. Turmeric Powder: A Natural Teeth Whitening Remedy

Turmeric isn’t just for cooking-it’s a powerful natural whitener with antibacterial properties! Mix one teaspoon of turmeric with a little water to form a paste, then brush your teeth for 2 minutes to help remove surface stains. While it may leave a temporary yellow tint on your toothbrush, it works wonders in brightening your smile naturally! 

6. Hydrogen Peroxide for Teeth Whitening: Safe or Risky?

Hydrogen peroxide is a key ingredient in most professional whitening treatments. At low concentrations, it’s safe for home use and can effectively break down stains on enamel.

A simple trick? Mix equal parts hydrogen peroxide and water and swish it around your mouth for 30 seconds before spitting it out. Just don’t use it too often overuse can lead to gum irritation and tooth sensitivity.

7. Activated Charcoal: Does It Really Whiten Teeth?

Activated charcoal has become a trendy whitening method, but does it actually work? Charcoal is highly porous and can absorb stains, but there’s little scientific proof that it whitens teeth long-term.

It’s best to use sparingly, as the abrasive nature of charcoal can wear down enamel with frequent use. If you try it, make sure to rinse thoroughly to avoid black residue sticking to your gums!

8. Strawberry & Baking Soda Paste for Natural Whitening

If you’re looking for a sweet and simple way to whiten your teeth at home naturally, the strawberry and baking soda paste might be just what you need! Strawberries contain malic acid, a natural enzyme that helps break down surface stains while baking soda acts as a mild abrasive to scrub away discoloration. To make this DIY whitening paste, simply mash one ripe strawberry and mix it with ½ teaspoon of baking soda until you get a smooth paste. Apply the mixture to your teeth and let it sit for 5 minutes before rinsing and brushing with regular toothpaste. For best results, always rinse your mouth thoroughly afterward and maintain a consistent oral care routine

9. Orange Peels & Banana Peels – Do They Really Work?

Orange peels contain d-limonene, which may help remove surface stains, while banana peels are rich in potassium, magnesium, and calcium, which can strengthen enamel. The method is simple: the inside of the peel on your teeth for about 2 minutes, let it sit, then rinse or brush. While some people swear by it, there’s no strong scientific evidence proving it significantly whitens teeth. However, these peels do provide minerals and antioxidants that support overall oral health! 

Next, let’s explore some more DIY whitening methods that actually work.

Artificial Teeth Whitening Methods at Home

For those looking for faster and more noticeable results, artificial whitening methods like whitening strips, LED kits, and gels offer professional-level brightening from the comfort of home. These treatments use safe, dentist-approved ingredients to break down stains and deliver a whiter smile in just days!

1. Whitening Toothpaste – Does It Actually Whiten Teeth?

Whitening toothpaste is great for maintaining a bright smile, but don’t expect dramatic results. Most contain mild abrasives and small amounts of hydrogen peroxide to lift surface stains gradually.

For the best results, look for a fluoride-based whitening toothpaste that strengthens enamel while removing stains. It’s an easy way to keep teeth white without the hassle of extra treatments.

2. Whitening Strips – Quick & Effective Home Whitening

Whitening strips are one of the most effective over-the-counter solutions for brightening teeth. They contain hydrogen peroxide or carbamide peroxide, which penetrates enamel and removes deeper stains.

Most brands recommend using them daily for 10-14 days, and the results can last several months. The key is to follow instructions carefully-leaving them on too long can cause temporary sensitivity.

3. LED Teeth Whitening Kits – How They Work

If you want professional-level results at home, LED whitening kits are your best bet. These kits use whitening gel combined with an LED light to accelerate the bleaching process. Many users see a noticeable difference within a week, making it a great option for those looking for fast results before an event. Just be sure to use a high-quality kit from a trusted brand to avoid gum irritation.

If you’re looking for a fast, effective, and hassle-free way to brighten your smile, Beauty Box Philly has you covered! Our Mobile Teeth Whitening service brings professional-grade whitening right to your doorstep-whether you’re at home, work, or even prepping for a big event. In just 90 minutes, we can lift stains and brighten your teeth for only $140-no sensitivity, no long waits, just real results. Why spend weeks experimenting with DIY methods when you can get a stunning, confident smile in one session? Book your appointment today, and let us bring the glow to you!

Teeth Whitening at Home: Pros and Cons

Teeth whitening at home has become a popular alternative to professional treatments, offering convenience and affordability. From natural remedies like baking soda and oil pulling to over-the-counter whitening strips and LED kits, there are plenty of options available. But are they worth it? Let’s break down the pros and cons of at-home teeth whitening to help you decide.

Pros of Teeth Whitening at Home

  • Affordable – Professional whitening can cost hundreds, while at-home methods cost just a few dollars.
  • Convenient – No need to schedule an appointment; Whiten Your Teeth at Home whenever it fits your routine.
  • Variety of Options – You can choose from natural remedies, whitening toothpaste, strips, gels, or LED kits, depending on your preference.
  • Gradual Whitening – At-home solutions allow for a slower, more natural-looking whitening process, reducing the risk of extreme sensitivity.
  • Easy Maintenance – You can use at-home whitening products regularly to maintain your results after a professional treatment.

Cons of Teeth Whitening at Home

  • Slower Results – Unlike professional treatments that brighten your teeth in one session, home methods take weeks or months to show noticeable results.
  • Temporary Effects – Many at-home solutions focus on surface stains, meaning the effects may fade quickly without regular maintenance.
  • Risk of Sensitivity – Overuse of whitening gels, hydrogen peroxide, or baking soda can lead to tooth sensitivity and gum irritation.
  • Not Effective for Deep Stains – If medications, aging, or genetics cause your stains, at-home treatments may not work as effectively as professional whitening.

Essential Teeth Whitening Tips for Long-lasting Results

Achieving a bright, white smile is one thing-keeping it that way is another! Whether you’ve whitened your teeth professionally or used at-home methods, proper maintenance is key to ensuring long-lasting results. Let’s dive into some essential teeth whitening tips at home that will help you maintain your pearly whites.

Daily Brushing & Flossing – The Foundation of White Teeth

The simplest and most effective way to maintain white teeth is by brushing and flossing regularly. Brushing at least twice a day for two minutes removes surface stains and prevents plaque buildup, which can lead to yellowing over time. Flossing is just as important-it helps remove food particles and bacteria from between your teeth, where stains often develop. Using an electric toothbrush can enhance your routine, as these brushes deliver thousands of strokes per minute, giving your teeth a deeper clean. And don’t forget your tongue! Bacteria on the tongue can contribute to bad breath and discoloration, so giving it a gentle scrub daily can keep your smile looking fresh and bright.

Chewing High-Fiber Foods to Keep Stains Away

Did you know that the foods you eat can naturally clean your teeth? Crunchy, high-fiber foods like apples, celery, carrots, and raw broccoli act as natural toothbrushes, scrubbing away plaque and food particles as you chew. These foods also stimulate saliva production, which helps neutralize acids and wash away stain-causing bacteria. Also, consuming high-fiber foods promotes overall gum health, reducing inflammation and the risk of gum disease. So, next time you’re looking for a snack, opt for a crisp apple or a handful of raw veggies to support both your smile and your health.

Eating a Nutritious Diet for Naturally Whiter Teeth

A balanced diet doesn’t just benefit your overall health-it also plays a major role in keeping your teeth white and strong. Foods rich in calcium, phosphorus, and vitamin D (like dairy products, nuts, and leafy greens) help strengthen enamel, making your teeth more resistant to stains and erosion. Strawberries, rich in malic acid, can naturally help remove surface stains, while dairy products like cheese and yogurt stimulate saliva production, helping to neutralize acids that weaken enamel. 

Conclusion

Achieving and maintaining a bright smile requires a combination of good oral hygiene, smart dietary choices, and effective whitening methods. Whether you opt for natural remedies or professional treatments, consistency is key to long-lasting results. Avoiding stain-causing foods, brushing regularly, and using the right whitening techniques can help keep your teeth looking their best. With the right approach, you can Whiten Your Teeth at Home safely and effectively for a radiant smile.

If you’re looking for faster, professional-grade results, Beauty Box Philly’s Mobile Teeth Whitening offers a safe, hassle-free solution that brightens your teeth in just 90 minutes. With our expertise and high-quality whitening treatments, you can achieve a radiant, confident smile right from the comfort of your home! Book your session today, and let your smile shine!

FAQ

Question: What is the best natural way to whiten teeth at home?


Answer:
There are several effective natural methods to Whiten Your Teeth at Home safely. Oil pulling with coconut oil helps remove bacteria and plaque, while brushing with baking soda gently scrubs away surface stains. Hydrogen peroxide, when used in moderation, acts as a mild bleach to brighten teeth. Activated charcoal is another popular remedy that absorbs stains and toxins. Maintaining good oral hygiene and avoiding staining foods like coffee and red wine can also help keep your teeth naturally white.

Question: How often should I use at-home teeth whitening methods?


Answer:
The frequency of at-home teeth whitening depends on the method used. Whitening toothpaste can be used daily, while stronger treatments like baking soda or hydrogen peroxide should be limited to 2-3 times a week to prevent enamel erosion. Natural remedies such as oil pulling can be done daily, and activated charcoal should be used sparingly. To safely Whiten Your Teeth at Home, follow a balanced approach and maintain proper oral hygiene for long-lasting results.

Question: Do banana and orange peels really whiten teeth?


Answer:
While banana and orange peels contain minerals like potassium and d-limonene, which may help remove surface stains, their whitening effects are minimal. Rubbing these peels on your teeth can support oral health by providing nutrients, but they won’t dramatically Whiten Your Teeth at Home. For noticeable results, it’s best to use proven whitening methods like baking soda, hydrogen peroxide, or professional treatments.

Question: Is professional teeth whitening better than at-home methods?


Answer:
Yes! Professional whitening, like Beauty Box Philly’s Mobile Teeth Whitening service, delivers fast and effective results, brightening teeth in just 90 minutes. In contrast, at-home methods such as baking soda, hydrogen peroxide, or whitening strips may take weeks or even months to show noticeable improvements. Professional treatments use stronger whitening agents and advanced techniques, ensuring a whiter, brighter smile with long-lasting results.

Should I Brush Before Using Whitening Strips? Here’s Why

Should I Brush Before Using Whitening Strips? Here's Why

When it comes to using whitening strips, it’s best to brush your teeth before applying them. Brushing helps remove food, plaque, and bacteria from your teeth, which can interfere with the whitening process. By brushing first, you’re giving the strips a clean surface to work on, helping them to work more effectively.

According to a study, brushing before using whitening strips can increase the whitening effect by up to 20%. This is because when your teeth are clean, the active ingredients in the strips can better reach your enamel and remove stains more efficiently. However, avoid brushing too hard or immediately after applying the strips, as your teeth might be more sensitive.

In this content, we’ll dive deeper into the best practices for using whitening strips and how to get the most out of them. At Beauty Box, we offer personalized beauty services, including professional teeth whitening, to help you achieve a brighter, more confident smile.

What Are Whitening Strips and How Do They Work?

Whitening strips are thin plastic strips that you place on your teeth to help whiten them. They’re coated with a special gel that contains ingredients like hydrogen peroxide or carbamide peroxide. These ingredients work by breaking down stains on your teeth, making them look brighter and whiter.

When you use whitening strips, they help to remove stains caused by things like coffee, tea, and smoking. The gel on the strips penetrates your tooth enamel and gently lifts the stains. You’ll start to see visible results in as little as 3 days, with your teeth becoming several shades whiter after completing the recommended treatment.

It’s important to choose high-quality whitening strips for the best results. Low-quality strips may not be effective and could cause sensitivity or damage to your teeth. Research shows that 90% of people using quality whitening strips report seeing an improvement in the whiteness of their teeth after just two weeks. At Beauty Box, we provide top-notch teeth whitening products and services, ensuring you get the best results without any hassle.

Should I Brush My Teeth Before Using Whitening Strips?

Yes, brushing your teeth before applying whitening strips is generally recommended. Here’s why:

  • Better Adhesion: Brushing removes plaque and surface debris, allowing the strips to stick evenly to your teeth for optimal contact with the whitening gel.
  • Enhanced Results: Clean teeth ensure the whitening agents (like hydrogen peroxide) penetrate stains more effectively.
  • Reduced Sensitivity Risk: Use a non-abrasive toothpaste and wait 30 minutes after brushing to apply strips. Brushing right before can temporarily open enamel pores, increasing sensitivity.

Important Tips:

  • Avoid whitening immediately after acidic foods/drinks (e.g., coffee, citrus), as enamel may be softened.
  • Do not brush right after using strips, as enamel can be temporarily more vulnerable.

Verdict: Brushing beforehand is safe and effective if done gently and timed correctly. Always follow the product’s instructions for the best results.

Why Brushing Before Whitening Strips Helps

When you brush your teeth, you remove food particles, plaque, and bacteria from the surface of your teeth. This means the whitening strips can work more effectively because they can directly contact your teeth without any barriers like food or plaque. If you skip brushing, your teeth might have layers of debris that prevent the strips from sticking well, which could reduce the whitening effect.

According to dental experts, brushing your teeth before applying whitening strips can improve whitening results by up to 50%. This is because a clean surface allows the strips to adhere properly and ensures the whitening agents penetrate more effectively.

The Importance of Clean Teeth for Whitening Strips

Having clean teeth is essential for effective whitening. If your teeth are dirty, the whitening gel in the strips may not penetrate deeply into the enamel. Without proper contact, the strips won’t be able to break down the stains and yellowing effectively, and you won’t see the best results.

In fact, studies have shown that people who brush regularly before using whitening strips often experience up to a 60% improvement in results compared to those who don’t. Clean teeth provide a smooth surface, which means better adhesion and a more even application of the whitening product.

How Brushing Affects Whitening Performance

Brushing your teeth helps to remove bacteria, plaque, and food particles that might otherwise interfere with the whitening process. When your teeth are clean, the whitening strips adhere better and can deliver more consistent results. The whitening agents in the strips can better break down surface stains and penetrate the enamel more effectively.

A clean surface helps ensure that the whitening strips stay in place and work as intended. If your teeth have too much buildup or residue, the strips might slide off or not stay on for the full recommended time, which could lead to uneven whitening. Studies have shown that whitening results are up to 35% more uniform when teeth are brushed beforehand.

What Happens If You Don’t Brush?

If you skip brushing before applying whitening strips, your results may not be as good. The strips may not stick as well, and the whitening solution may not be able to break down stubborn stains on your teeth. This can lead to a patchy and uneven whitening effect.

Additionally, not brushing can trap bacteria under the whitening strips, potentially leading to gum irritation or discomfort. Studies have found that people who don’t brush before applying whitening strips are twice as likely to experience irritation or discomfort during the treatment. Keeping your teeth clean ensures the safest and most effective treatment.

Why It’s Important Not to Brush Immediately After Using Whitening Strips

Brushing your teeth too soon after using whitening strips can cause irritation and discomfort. The active ingredients in whitening strips, such as hydrogen peroxide, break down stains but can temporarily soften your enamel. If you brush right away, you risk damaging your enamel due to the increased sensitivity.

Studies suggest that enamel can remain soft for up to 30 minutes after using whitening strips, making it vulnerable to abrasion and sensitivity. Brushing immediately during this period can exacerbate these effects. In fact, over 60% of people experience some level of tooth sensitivity after whitening treatments, which can be worsened by brushing too soon.

To avoid these issues, it’s recommended to wait at least 30 minutes after using whitening strips before brushing your teeth. This will help your enamel re-harden and reduce the risk of sensitivity or damage. Waiting also allows the active ingredients in the whitening strips to continue working, ensuring you get the most out of your treatment.

Tips for Best Results with Whitening Strips

To get the best results from your whitening strips, follow these simple tips:

  1. Follow the product instructions carefully: Every brand of whitening strips has its own instructions. Make sure you follow them closely to avoid any mistakes. Using strips for longer than recommended or too often can damage your teeth. According to studies, overuse of whitening strips can cause tooth sensitivity in 35% of users.
  2. Avoid eating or drinking for at least 30 minutes: After using the strips, wait at least 30 minutes before eating or drinking anything. This allows the whitening ingredients to stay on your teeth longer and work better. Eating or drinking too soon can wash away the whitening gel and reduce its effectiveness. Research shows that waiting at least 30 minutes improves whitening results by up to 50%.
  3. Consider using a desensitizing toothpaste: If you’re worried about tooth sensitivity, try using a desensitizing toothpaste. These toothpastes help protect your teeth from discomfort. A study found that using desensitizing toothpaste reduces sensitivity by about 60% in people who use whitening products.

When Should You Brush Your Teeth for Optimal Whitening?

When you’re using whitening strips, brushing your teeth at the right time is key for getting the best results. Brush your teeth before using whitening strips. Why? Brushing helps remove plaque and food particles from your teeth, so the whitening strips can work better. Studies show that brushing before helps remove up to 75% of surface stains, allowing the whitening product to do its job without any interference.

However, don’t brush your teeth right after using whitening strips. After whitening, your teeth may be more sensitive. In fact, research shows that enamel can be 25% more sensitive for up to 30 minutes after using whitening strips. Brushing immediately after can make your teeth feel uncomfortable and damage your enamel. So, wait 30 minutes before brushing again to protect your enamel.

When you do brush, be sure to do it gently. Brushing too hard can harm your enamel. Gentle brushing with a soft-bristled toothbrush can reduce enamel wear by 50%, according to dental studies. This way, you can keep your teeth clean and bright without damaging them.

In short, brush before to get rid of debris, and wait 30 minutes after using whitening strips. This routine will keep your teeth healthy and white.

Common Mistakes to Avoid When Using Whitening Strips

Whitening strips can work wonders, but it’s easy to make some common mistakes that can affect your results. Here are a few you should avoid:

  1. Overusing Whitening Strips: You might think using the strips more often will give you quicker results, but that’s not true. Studies show that overusing whitening strips can cause 50% more tooth sensitivity. It’s important to follow the directions and not overdo it. More isn’t always better!
  2. Not Following Instructions: Every whitening strip comes with specific guidelines. Skipping steps or leaving them on for too long can reduce the effectiveness. In fact, research shows that those who follow instructions see up to 70% better results compared to those who don’t. Stick to the plan for the best outcome.
  3. Not Waiting Long Enough Between Treatments: Your teeth need time to absorb the whitening agent. If you use the strips back to back without waiting, you might not get the desired results. Waiting the recommended 24 to 48 hours between treatments allows your teeth to recover and increases the effectiveness of the whitening strips.
  4. Eating or Drinking Too Soon: After using whitening strips, it’s best to avoid eating or drinking for at least 30 minutes. This gives your teeth time to absorb the whitening agent. Studies show that people who wait this amount of time before eating or drinking have 30% whiter teeth compared to those who eat right after.

So, take your time, follow the instructions, and focus on long-term results. The key to success is consistency and patience.

Why Choose Professional Whitening Services?

While at-home whitening strips can give you some results, professional whitening services can take your smile to the next level. If you’re looking for a fast, effective whitening solution, Beauty Box offers expert treatments that deliver long-lasting results.

Professional teeth whitening services at Beauty Box offer personalized care from licensed estheticians. Unlike at-home treatments, you’ll receive tailored services that fit your teeth’s unique needs. Clinical studies show that professional whitening can make teeth up to 8 shades whiter in just one session, compared to the 2 to 3 shades improvement you might see with over-the-counter strips.

Plus, our professional teeth whitening products are designed to be gentler on your enamel, reducing the risk of sensitivity. Research indicates that professional treatments result in 80% less sensitivity compared to at-home products. This is because we use advanced techniques and high-quality ingredients that are safer for your teeth.

Choosing professional whitening also means you’ll experience a luxury service. At Beauty Box, we create a relaxing environment where you can unwind while we take care of your smile. Our expert team makes sure you leave feeling confident and beautiful, with no worries about side effects.

Final thoughts

In conclusion, if you’re wondering, Should I brush my teeth before using whitening strips? The answer is clear. Brushing before using whitening strips helps create a clean surface, allowing the strips to work more effectively. Just remember to wait about 30 minutes after using the strips before brushing again to protect your enamel.

At Beauty Box, we understand the importance of maintaining a healthy, beautiful smile. If you’re looking for a professional whitening service that delivers quick, long-lasting results, our team of licensed estheticians is here to help. We offer personalized treatments using top-quality products that minimize sensitivity and maximize results. So, are you ready to take your smile to the next level? Beauty Box is here to help you achieve the brighter, healthier smile you deserve. Why not book an appointment today and experience the difference for yourself? Your journey to a confident, radiant smile starts now!

How Long Do Spray Tans Last? A Complete Guide To A Lasting Glow

How long do spray tans last

If you’re considering a spray tan or already love the bronzed look, one of the first questions that comes to mind is, How long do spray tans last?While the answer can vary based on several factors, the average spray tan lasts from a minimum of 4 to a maximum of 10 days. With proper preparation and care, you can extend that glowing, tanned look even longer. In just 30 to 60 minutes, a professional spray tan gives you a smooth, even finish, customized to achieve the perfect shade you’re looking for.

Spray tans are the go-to solution for achieving a radiant, suntanned glow without exposing your skin to harmful UV rays. Whether you’re prepping for a big event, or vacation, or simply want to elevate your everyday look, understanding the factors that affect spray tan longevity can help you make the most of it. Here’s everything you need to know about making your spray tan last, keeping it flawless, and why Beauty Box is your go-to for achieving the perfect whether you prefer the convenience of a mobile spray tan at home or the indulgence of a basic spray tan in our luxurious studio.

What Is a Spray Tan and How Does It Work?

Many girls have a question about spray tans and how long it last. Let’s first dig into what spray tan is. A spray tan is a professional tanning method where a fine mist of tanning solution is applied to your skin to create a natural, sun-kissed glow. The active ingredient, DHA (dihydroxyacetone), interacts with the outer layer of your skin to temporarily darken its appearance. Unlike traditional tanning methods that rely on UV rays, spray tans are a safe and customizable option that lets you achieve your desired shade without damaging your skin. Perfect for special occasions or simply enhancing your everyday look, spray tans have become a go-to beauty treatment for those seeking a healthy, radiant glow. The process is quick, convenient, and offers instant results, making it an ideal choice for anyone short on time or wary of the sun’s harmful effects.

Science behind spray Tan: How Does It Work?

Spray tans work through the magic of DHA (dihydroxyacetone), a colorless sugar that interacts with amino acids in the outer layer of your skin. This reaction produces a natural-looking tan that begins developing within 2–4 hours of application and fully develops over the next 24 hours.

The process is safe and effective, with DHA earning FDA approval for external cosmetic use since the 1970s. Because the reaction only affects dead skin cells on the surface of the skin, the tan fades naturally as your skin exfoliates. This means the color is temporary and non-invasive, making spray tans a fantastic alternative to traditional tanning methods. The depth of your tan depends on the concentration of DHA in the tanning solution, which typically ranges from 5% for a light glow to 15% for a deep bronze.

The Benefits of Spray Tans Over Traditional Tanning

Spray tans have gained immense popularity not just for their convenience but also for the numerous advantages they offer over traditional tanning methods. First and foremost, they eliminate the risks associated with UV exposure, such as premature aging, sunburns, and an increased risk of skin cancer. Unlike tanning beds or sunbathing, which can cause long-term damage to your skin, spray tans offer a safer alternative with immediate results.

Another major advantage is the speed and convenience. A professional spray tan session takes from 30 minutes to 60 minutes, and you walk out with a perfectly even, streak-free tan that can be customized to your desired shade. Whether you prefer a subtle, summery glow or a deep, bronzed look, spray tans can be tailored to your exact preference.

Additionally, spray tans are perfect for busy individuals who want to look their best without dedicating hours to sunbathing or waiting for self-tanners to develop. The results are instant and ideal for those last-minute plans or events.

Who Should Get a Spray Tan?

Spray tans are a versatile beauty treatment, ideal for anyone who wants to enhance their appearance effortlessly. They are particularly popular for special events like weddings, proms, and photoshoots, where a flawless, glowing complexion is essential. They’re also a favorite for vacations, ensuring you arrive at your destination with a bronzed glow from the start. But spray tans aren’t limited to special occasions; they’re perfect for achieving everyday confidence with a natural, healthy-looking tan that doesn’t rely on sun exposure.

How Long Do Spray Tans Last on Average?

The longevity of a spray tan typically ranges between 5 to 10 days, depending on several factors, including your skin type, pre- and post-care routine, and the quality of the tanning solution. Dry skin tends to shed cells faster, which can cause the tan to fade more quickly, while oily skin might sometimes affect the evenness of application. However, with proper preparation and aftercare, most clients can enjoy their tan for a full week or more.

During the first three days, your tan will appear its most vibrant, showcasing a rich, even color that enhances your natural features. By days 4–7, gradual fading begins, particularly in areas that experience more friction, such as hands, feet, and elbows. By the eighth to tenth day, you’ll notice significant fading as the outer layer of your skin exfoliates naturally.

The quality of the tanning solution also plays a key role. High-quality products, like those used at Beauty Box, are designed to last longer and fade more evenly, ensuring that your tan looks natural and beautiful throughout its duration.

How Spray Tans Fade Naturally Over Time

The fading process of a spray tan is directly tied to your skin’s natural exfoliation cycle, which typically lasts around 28–30 days. As dead skin cells are shed, the tan gradually diminishes. However, external factors such as frequent showers, sweating, or swimming in chlorinated water can accelerate the fading process. Maintaining your skin’s moisture levels is crucial for prolonging the life of your tan. Well-hydrated skin retains the tanning solution more effectively, ensuring that the color fades evenly and lasts longer.

Real-World Data on Spray Tan Longevity

A 2021 survey revealed that 80% of spray tan users noticed a significant fade by Day 7. However, 25% of users who followed meticulous aftercare routines reported their tans lasting up to 10 days or longer. This underscores the importance of both preparation and maintenance in achieving a long-lasting spray tan.

Factors That Impact Spray Tan Longevity

Your skin type plays a crucial role in determining how long your spray tan lasts. From the condition of your skin to your daily habits, understanding these variables can help you maximize your tan’s longevity. By tailoring your preparation and aftercare to suit your unique needs, you can significantly extend the life of your tan and maintain that flawless finish for days longer. Let’s take a closer look at how your skin type and other key factors can impact the durability of your spray tan.

Dry skin: 

Dry skin exfoliates more quickly, leading to faster fading. Moisturizing regularly can help counteract this and keep the tan vibrant. 

Oily skin: 

It can sometimes even prevent application, but using a prep spray before tanning can resolve this issue. 

Combination skin: 

Often requires special attention to drier areas like elbows and knees, ensuring a smooth and even finish.

Pre tanning preparation: 

Proper preparation is essential for a lasting tan. Exfoliating 24 hours before your appointment removes dead skin cells and creates a smooth base for the tanning solution. Hydration in the days leading up to your session is also key, though you should avoid lotions, perfumes, and deodorants on the day of your appointment as they can block the solution from adhering evenly.

Post tanning routine: 

Once tan is applied, gentle post-care practices will prolong its lifespan. Daily moisturizing with tan-friendly, oil-free products helps maintain the glow, while minimizing water exposure and avoiding hot showers to prevent premature fading. When drying off after a shower, pat your skin gently instead of rubbing to avoid removing the tan.

Swimming in chlorinated pools, for instance, can reduce the tan’s longevity by up to 30%, while excessive sweating or wearing tight clothing can cause streaks or uneven fading. To get the most out of your tan, opt for loose clothing and minimize friction-prone activities during its duration.

Conclusion

A spray tan is more than a beauty boost-it’s a healthier, time-saving way to achieve the perfect glow. With the right preparation, care, and quality products, your spray tan can last up to 10 days, leaving you radiant and confident for any occasion. Ready to experience a flawless tan? Trust Beauty Box to provide the ultimate spray tanning experience tailored to your needs.

FAQs

Question 1: How long does a spray tan last if you shower every day?

Answer: If you shower daily, your spray tan may last between 5 to 7 days, which is slightly less than the typical lifespan of 7 to 10 days. Frequent showers accelerate the fading process as water exposure and the use of soaps contribute to the natural exfoliation of your skin. However, you can still extend your tan’s life with proper care. Use lukewarm water instead of hot water, as heat can dry out your skin and cause the tan to fade faster. Opt for sulfate-free body washes that are gentle on your tan, and avoid harsh scrubbing or loofahs. After showering, pat your skin dry with a soft towel rather than rubbing, and always moisturize immediately with an oil-free, tan-friendly lotion to keep your skin hydrated and your tan looking fresh. These small adjustments can make a big difference, even with daily showers.

Question 2: Do spray tans look natural?

Answer: Spray tans can look incredibly natural when applied correctly and with the right products. Modern tanning solutions are specifically designed to avoid the orange tones associated with older methods, providing a realistic, sun-kissed glow that enhances your natural beauty. A professional spray tan technician will customize the shade based on your skin tone and preferences, ensuring a result that complements your complexion. Additionally, proper preparation, such as exfoliating your skin before your appointment, helps the tan develop evenly and smoothly. When done professionally, a spray tan can mimic the look of a natural tan while giving your skin a healthy radiance.

Question 3: Is a spray tan safe during pregnancy?

Answer: Yes, most spray tans are considered safe during pregnancy, as DHA only reacts with the outer layer of the skin. However, it’s always best to consult with your healthcare provider and ensure the tanning solution used is free from harsh chemicals.

Question 4: Can I work out after a spray tan?

Answer: It’s recommended to wait at least 8 to 12 hours after getting a spray tan before working out. This time allows the DHA in the tanning solution to fully develop and bond with the outer layer of your skin. Sweating too soon after your spray tan can lead to streaking, uneven patches, or premature fading as the solution may not have set properly. Once the development period has passed, you can resume working out, but it’s important to take precautions to preserve your tan. Wear loose, breathable clothing to minimize friction, and blot sweat with a towel rather than wiping it away to avoid disrupting the tan. After your workout, rinse off gently in lukewarm water and moisturize your skin to maintain its hydration and the evenness of your tan. With these steps, you can stay active without compromising your glow.

join the beauty box club

Get exclusive offers and news delivered right to your inbox!

Subscription Form